53
��
Despite its numerous options, operation of the
multi
MAUS
PRO
is simple and intuitive. A concept which had already
been successfully introduced for the Lokmaus models of the first and second generation. The following shows you
how to operate the
multi
MAUS
PRO
based on practical examples. If problems occur during operation or program-
ming, “
Tips, Information, and Shortcuts
” can be found starting on page 86.
2.1 Start
After starting up the
multi
MAUS
PRO
,
the display screen shows the word “
MULTIMAUS
” in animated lettering
.
The
multi
MAUS
PRO
then switches to drive mode and displays the first locomotive.
2.1.1 First-time use
When connecting the
multi
MAUS
PRO
for the first time, there is only one locomo-
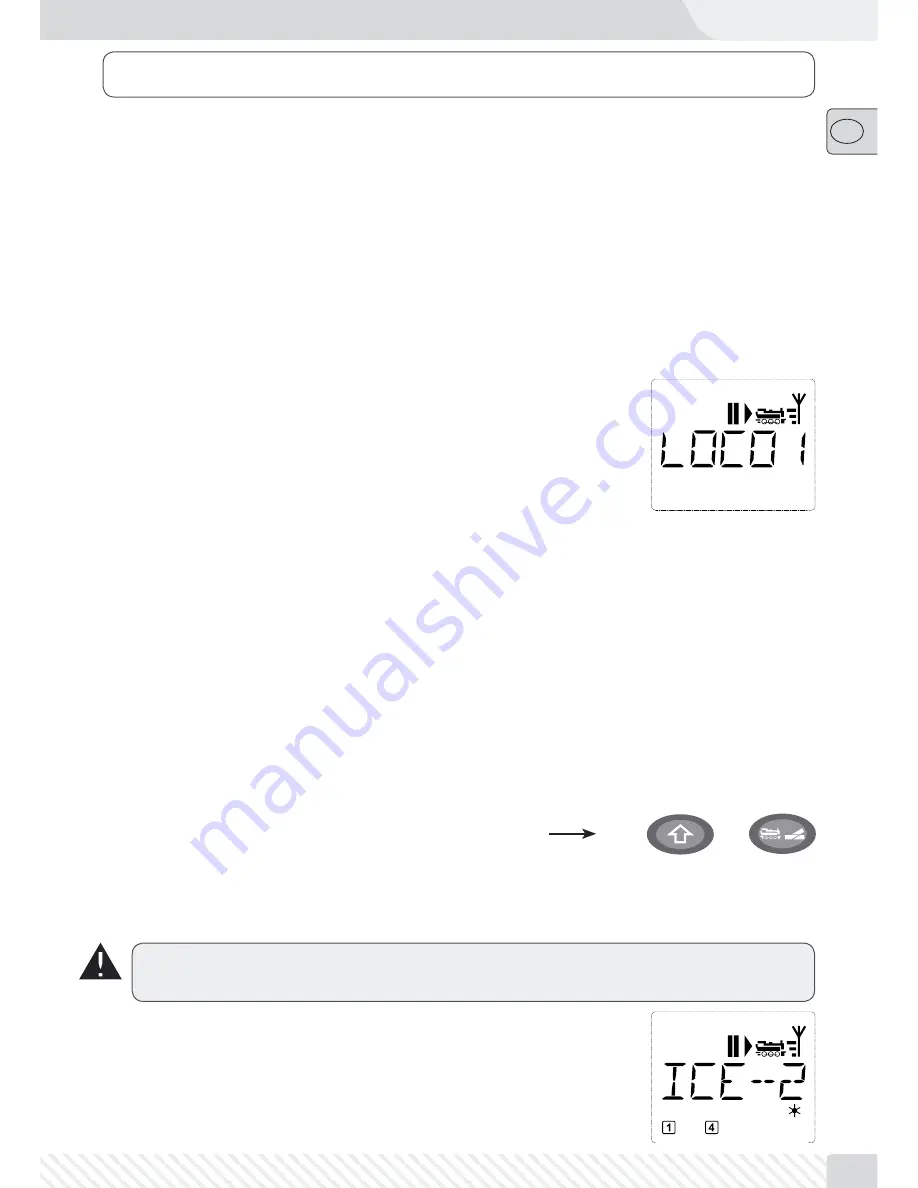
tive (address 3) in the library (“library mode” factory setting). The display screen
shows the locomotive symbol, the standstill symbol “
II
” (i.e. the locomotive is
stopped) together with the right arrow and the lettering “LOCO 1” so that you
can drive the locomotive immediately.
If you have purchased the
multi
MAUS
PRO
with a starter set, the locomotive from
the set is already fully programmed. You can also drive this locomotive immedi-
ately (chapter 2.3).
2.1.2 An already used
multi
MAUS
PRO
If you have already used the
multi
MAUS
PRO
, the locomotive last controlled is displayed – regardless if you
used the library or the address mode.
While scrolling with the “arrow keys” you see all settings of the traction operations, i.e. drive direction, name
or address of the locomotive, selected functions.
2.2 Selecting a Locomotive
The
multi
MAUS
PRO
offers two ways of selecting a locomotive:
– With the library mode set at the factory: see the following Chapter 2.2.1.
– With the address mode, i.e. using the locomotive address directly: see Chapter 2.2.2.
Switching between library and locomotive address mode
+
2.2.1
Library mode
Locomotive library mode
is a database which gives you the option of saving 64 locomotives with a name (5
characters), locomotive address and the required speed steps.
The decoder locomotive address therefore always has to be changed using “CV1” (see 2.8 “Quick-pro-
gramming” on page 64). You will be required to make the changes in the library as well.
Screen display
(in this case an “ICE”-train of the second series):
– Locomotive name (in this case “ICE-2”) and loco symbol,
– Direction of travel (in this case: the locomotive was or is stopped, the arrow
shows the last direction of travel),
– Light (in this case: the locomotive lighting is switched on),
– F1 and F4 (in this case: the activated locomotive functions).
Part 2 • Operation – Driving and Switching


