4
1. Retract your saw’s blade entirely below the table surface
.
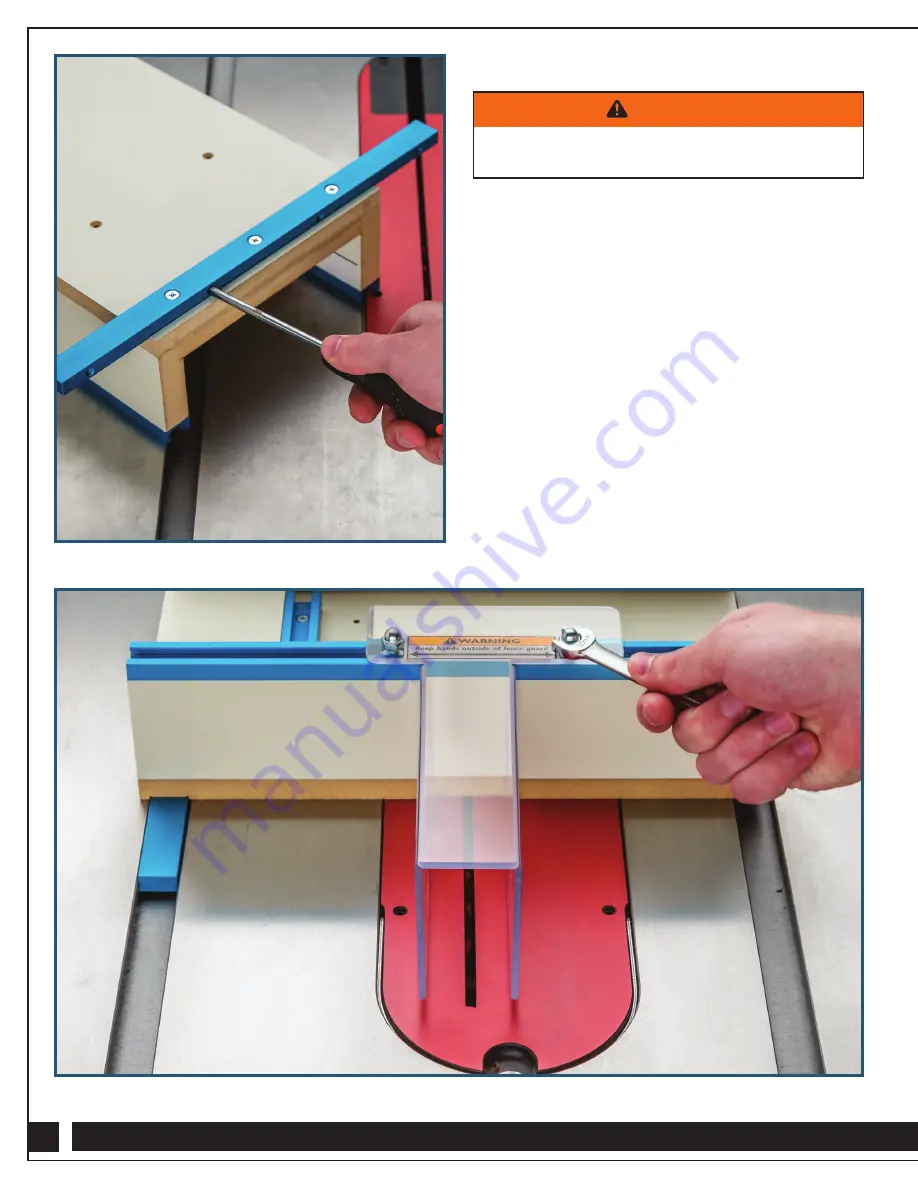
2. Set the Sled Body (1) on the saw table, with the miter bar
in the saw’s miter slot, and slide it forward. If the sled shifts
at all from side to side, turn it over and use a small slotted
screwdriver to adjust the nylon set screws in the miter bar to
eliminate excessive play.
Fig. 1.
3. With the table saw turned off, position the Sled Body (1) at
the front of the saw table.
4. Install the 1/4"-20 x 1/2" Hex Bolts (8) and 1/4"-20 Cap
Nuts (7) on the plastic Blade Guard (6) with bolt heads facing
down, but don’t tighten them.
5. Slide the heads of the 1/4"-20 x 1/2" Hex Bolts (8) on the
Blade Guard (6) into the T-track atop the back fence of the
Sled Body (1) and position the Blade Guard so that the rear
channel is roughly centered over the blade path. (Use the
slot in the saw’s throat plate as a guide.) Tighten the 1/4"-20
Cap Nuts (8) to lock the Blade Guard in position.
Fig. 2.
Fig. 2
Fig. 1
> Remove table saw blade guard and riving knife prior
to use of sled and reinstall both after completing sled use.
WARNING
Assembly and Setup Instructions


