I) Attaching to the Power Unit
Note:
When you ordered your BrushHound product, details about your Power Unit were provided to custom match your
Attachment to your Power Unit. While BrushHound products can be attached to a variety of different backhoes and exca-
vators, your Attachment is specifically configured for your Power Unit and can not necessarily be placed on another Power
Unit as is. Specifically, the mount and hydraulic motor were selected to mate to your Power Unit’s arm and optimize per-
formance based on your hydraulic system, respectively. Your Attachment should only be connected to Power Units that
share the same specifications as the information on the Power Unit you provided. To connect your Attachment to another
Power Unit, contact your nearest BrushHound Dealer.
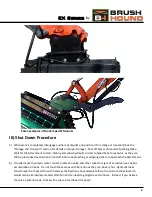
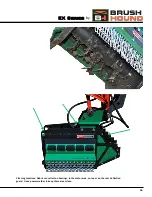
The person that is attaching your BrushHound product should be familiar with the attachment and removal of reg-
ular buckets from a backhoe or excavator and be able to do so safely. Attachment should be performed on flat ground
away from obstructions. During attachment, keep hands out of pinch points and away from the blades to avoid injury:
1) Ensure that the appropriate mount for the Power Unit is attached to the BrushHound product using the 4 provided 1”
bolts (See the “Optional Mounts” section for details on switching mounts).
2) Lower the Power Unit’s arm into position and attach the mount in the same way you would attach the bucket.
3) Connect Attachment’s hydraulic lines to your Power Unit’s auxiliary hydraulic circuit. If your Power Unit does not have
an auxiliary circuit, fully retract the thumb and use your thumb’s hydraulic circuit (See the “Hydraulic Plumbing” sec-
tion for details on the appropriate connection of hoses to the Power Unit). Ensure that all fittings are connected tight-
ly and that quick couplers have fully engaged.
4)
Make sure that your Power Unit is set to “Hydraulic Breaker Mode” (one way flow). If your Power Unit does not have
a hydraulic breaker mode or one way flow, you may need to install a case drain line.
II) Starting Procedure
The Operator should be properly trained on the use of your BrushHound Attachment and wearing the appropriate
safety gear. Do not start the Power Unit until the Attachment has been checked for proper assembly and installation. This
includes the appropriate connection of the mount and hydraulic connections as well as the proper functioning of all safety
devices on both the Power Unit and the Attachment. Clear the work area of all bystanders and children:
1) Check that the attachment is in the down position and that the blades are not in contact with ground. Start engine
and set throttle to idle. Never engage the auxiliary hydraulic flow with the motor above idle speed.
2) With the motor at low RPM engage the auxiliary hydraulic flow.
3) Slowly bring the throttle up to maximum flow. If the Attachment produces excessive noise or vibration, disengage the
auxiliary hydraulics and shut down the Power Unit immediately. Determine the cause of the problem and correct it
before continuing with its operation.
4) Attachment is ready for operation.
2) Basic Operation
5
www.rockhound.com
Содержание BrushHound 30EX
Страница 2: ......
Страница 4: ......
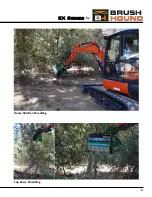
Страница 13: ...8 House Rotation Shredding EX Series by Top Down Shredding...
Страница 23: ...18 EX Series by Serial Number Plate...
Страница 24: ...EX Series Brush Shredder Parts Catalog 19 www rockhound com...


