background image

UK

 ELECTRICAL CONNECTION

ELECTRICAL  REQUIREMENTS

Any permanent electrical installation must comply

with the latest I.E.E. Regulations and local Electricity

Board regulations. For your own safety this should be

undertaken by a qualified electrician  e.g. your local

Electricity Board, or a contractor who is on the roll of

the National Inspection Council for Electrical

Installation Contracting (NICEIC).

ELECTRICAL  CONNECTION

Before connecting to the mains supply ensure that

the mains voltage corresponds to the voltage on the

rating plate inside the cooker hood.
This appliance is fitted with a 2 core mains cable and

must be permanently connected to the electricity supply

via a double-pole switch having 3mm minimum contact

gap on each pole. A Switched Fuse Connection Unit

to BS.1363 Part 4, fitted with a 3 Amp fuse, is a

recommended mains supply connection accessory to

ensure  compliance  with  the  Safety  Requirements

applicable to fixed wiring instructions.

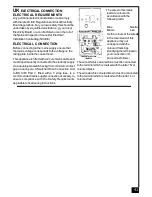
The wires in this mains

lead are coloured in

accordance with the

following code:

Blue

Neutral

Brown

Live

As the colours of the wires

in the mains lead of this

appliance may not

correspond with the

coloured markings

identifying the terminals in

your connection unit,

proceed as follows:-

The wire which is coloured blue must be connected

to the terminal which is marked with the letter ‘N’ or

coloured black.
The wire which is coloured brown must be connected

to the terminal which is marked with the letter ‘L’ or

coloured red.

41

Содержание ARROW MURALE 900

Страница 1: ...ION ET D UTILISATION INSTRUCTIONS FOR INSTALLATION AND DIRECTIONS FOR USE MONTAGE UND GEBRAUCHSANWEISUNG LIBRETTO DI ISTRUZIONI INSTRUCCIONES DE INSTALACION E UTILIZACION MONTAGE EN GEBRUIKSHANDLEIDIN...

Страница 2: ...TALACION DEL APARATO FUNCIONAMIENTO CONSEJOS DE UTILIZACION MANTENIMIENTO GARANTIA Y ASSISTENCIA TECNICA NOTA GB CONTENTS ELECTRICAL WIRING INSTALLATION ADVICE FITTING THE APPLIANCE OPERATION USEFUL H...

Страница 3: ...e inf rieure 0 65 m du plan de travail risque d in ammation des ltres La fum e doit monter naturellement vers la zone de captation Respecter le diam tre de sortie de l appareil la hotte ne doit en auc...

Страница 4: ...lles d une montre les vis de r glage Vr jusqu en n de course Fig 3b Accrocher le corps Rep 5 sur les deux vis 1 pr c demment install es Fig 3a Mettre la hotte de niveau en tournant les vis de r glage...

Страница 5: ...touches vitesse et vitesse en gardant la touche enfonc e jusqu l obtention de la vitesse d sir e Le niveau de vitesse est visualis par les leds 2 3 4 qui s allument au fur et mesure de l accroissemen...

Страница 6: ...arr t apr s 15 minutes Indication de saturation des ltres m talliques Apr s 200 heures de fonctionnement 1 bref clignotement de la Led 1 indique qu il faut nettoyer les ltres m talliques voir paragrap...

Страница 7: ...abrasifs et une ponge l g rement humide N utilisez jamais d ponges ou de chiffons tremp s N introduisez aucun objet ni les mains dans l ouverture servant l vacuation de l air Conduit d vacuation V ri...

Страница 8: ...t est couvert par la Directive Europ enne 2002 96 EC Votre produit est con u et fabriqu avec des mat riaux et des composants de haute qualit qui peuvent tre recycl s et utilis s de nouveau Veuillez vo...

Страница 9: ...lanced ue type If other types of ue or appliances are tted ensure that there is an adequate supply of fresh air to the room Ensure the kitchen is tted with an airbrick which should have a cross sectio...

Страница 10: ...od At the point marked draw a horizontal line parallel to the cooking appliances Drill two holes 1 in the wall using an 8 mm drill bit and insert the rawl plugs and screws into the holes 1 4 2 x 44 4...

Страница 11: ...he electrical connection has been made test the lights and the fan motor d Insert the charcoal lter into the base of the motor housing and secure the lter with two metal secur ing straps item A as ill...

Страница 12: ...ood as follows The lights and the fan motor should be switched OFF to set the timer Push the LED button until the LED lights will ash One ash of the LED lights 2 3 and 4 function is switched OFF Two a...

Страница 13: ...as illustrated Fig 7 These batteries should give a long life and constant discharge throughout their life These batteries must be disposed of properly and could explode if damaged or exposed to heat...

Страница 14: ...a dishwasher Allow to dry before replacing Active Charcoal Filter The charcoal lter cannot be cleaned The lter should be replaced at least every three months or more frequently if the hood is used for...

Страница 15: ...pliance complies with European regulations on low voltages Directive 2006 95 CE on electrical safety and with the following European regulations Directive 2004 108 CE on electromagnetic compat ibility...

Страница 16: ...ichtige Ableitung der Kochschwaden Luftzug kann Turbulenzen verursachen Der Aussendurchmesser am Gebl seabgang des Ger tes ist f r die Wahl des Abluft Rohrsystems zu ber cksichtigen Die Dunstesse darf...

Страница 17: ...hrauben in den Bohrungen 1 anbringen Schrauben 4 2 x 44 4 Beim Anziehen der Schrauben einen Freiraum von 5 6 mm belassen um ein Einh ngen des Haubenk rpers zu erm glichen Geringf gige nderun gen k nne...

Страница 18: ...erschmutzte Luft wird gereinigt und dann wieder in den Raum zur ckgef hrt Motor und Beleuchtung m ssen abgeschaltet sein Auf den Bedienknopf bis zum Blinken aller 5 LEDs dr cken Zwei Blinken aller 5 L...

Страница 19: ...n Abschaltautomatik f r Gebl se Nachlauf Diese Funktion erm glicht nach Beendigung des eigentlichen Kochvorganges das zeitlich begrenzte Absaugen Nachlaufzeit der letzten Kochschwaden um danach automa...

Страница 20: ...oder in der Hitze liegen Nicht ins Feuer werfen Um die Umwelt zu sch tzen bitte diese Batterien in einen geeigneten Contai ner abladen 5 NUTZUNG Um ein optimales Absaugen der Dunstschwaden zu erziele...

Страница 21: ...tes die Sie auf dem Typenschild nden das sich im Geh use hinter den Fett ltern be ndet an F r die Anwendung der vertraglichen Garantie wird nur die Rechnung des Ger tes verbindlich anerkannt Von der...

Страница 22: ...cappa non deve in alcun caso essere collegata ad un condotto di ventilazione meccanica controllata V M C Qualora l aria viziata fosse scaricata in un condotto d evacuazione veri care che quest ultimo...

Страница 23: ...ere la valvola di non ritorno Rif 8 sull uscita dell apparecchio Rif 6 e raccordare il tubo essibile Fig 5 all evacuazione esterna ed all uscita dell apparecchio Fissare l assieme tramite collari o na...

Страница 24: ...velocit visualizzabile tramite i Leds 2 3 4 i quali si accendono progressivamente con l aumentare della velocit Led 2 livello minimo Leds 2 e 3 livello intermedio Leds 2 3 e 4 livello alto La portata...

Страница 25: ...attivare questa funzione luci e motore devono essere spenti Premere il tasto per 10 secondi 1 lampeggio dei Leds 1 2 3 4 e 5 funzione disattivata 2 lampeggi dei Leds 1 2 3 4 e 5 funzione attivata Il...

Страница 26: ...avo fosse danneggiato dovr essere sostituito esclusivamente da un centro di riparazione consigliato dal fabbricante poich la riparazione prevede l utilizzo di attrezzature apposite Staccare la spina d...

Страница 27: ...r a 0 65 m del plano de cocci n entonces existir a riesgo de incendio del ltro Los humos deben salir libremente por la zona de aspiraci n atenci n a la corriente de aire la cual puede provocar turbule...

Страница 28: ...de regulaci n de la campana Ver colocaci n del cuerpo de la campana La campana puede tener una excursi n maxima de 16mm 4 Colocaci n del cuerpo de la campana Antes de iniciar a colocar la campana hay...

Страница 29: ...o de los 5 LEDS indicar la memorizaci n de la puesta en marcha del modo evacuaci n exterior B FUNCIONES DE BASE Alumbrado Su puesta en marcha se efect a apretando el bot n 1 luz El LED 1 mostrar si el...

Страница 30: ...nci n de la parada retardada La campana puede entonces colocarse en la posici n de la velocidad deseada El parpadeo de los LEDS 2 3 4 dependiendo de la velocidad inicial prevista indicar que la funci...

Страница 31: ...a facilitar al m ximo las operaciones de mantenimiento sin nimo de buen funcionamiento y rendimiento de la campana en el tiempo Limpieza de los ltros met licos Es indispensable proceder a una LIMPIEZA...

Страница 32: ...elaci n con baja tensi n 2006 95 CE de la securidad electrica y a las normas europeas 2004 108 CE en relati n con la compatibilad electroma gnetica y C E E 93 68 en relaci n con la marcaci n CE Cuando...

Страница 33: ...turbulentie kan veroorzaken Het is van groot belang dat de afvoerdiameter in acht wordt genomen Een apparaat met motor mag nooit worden aangesloten op een centraal ventilatiesysteem De kookdampen moge...

Страница 34: ...roeven van de afzuigkap zie Montage van het huis van de afzuigkap De afzuigkap mag een maximale afwijking van 16 mm hebben 4 Montage van het huis van de afzuigkap Voordat u met de installatie begint m...

Страница 35: ...uitgeschakeld OFF totdat de 5 ledjes twee keer knipperen om te bevestigen dat de wasemschouw gebruiksklaar is voor recirculatie Omzetten naar afzuiging de wasemschouw is geschikt voor luchtafvoer naar...

Страница 36: ...al lters Na ongeveer 200 uren gebruik zal er een Led 1 kort oplichten om aan te geven Dat de metaal lters dienen gereinigd te worden zie onderhoud Om deze functie terug te resetten laat U het licht br...

Страница 37: ...afwasmachine Deze maatregel voorkomt het gevaar van brand Behuizing Gebruik geen natte doeken om de behuizing te reinigen Het gebruik van een milde zeep in combinatie met een vochtige doek wordt aang...

Страница 38: ...product conform is de Europese Richtlijn 2002 96 EC Uw apparaat werd ontworpen met en vervaardigd uit onderdelen en materialen van superieure kwaliteit die gerecycleerd en opnieuw gebruikt kunnen wor...

Страница 39: ......

Страница 40: ...38 OPTION OPTIONAL OPTIONAL OPZIONALE OPCIONAL OPTIE ACCESSOIRES ACCESSORI ACCESSORIES ACCESORIA ZUBEH RE ACCESSOIRES HI PIN G9 40 W 230 V 2 LR03 AAA 1 5V 1...

Страница 41: ...Composants Components Bauelemente Componenti Componentes Onderdelen 39 2 R 7a 7b 12a 8...

Страница 42: ...W VERT JAUNE GR N GELB GREY GRIS GRAU LIGHT BLUE BLEU CLAIR HELL BLAU PINK ROSE ROSA PURPLE MAUVE MALVER FARBIG WHITE BLANC WEISS YELLOW JAUNE GELB 10 F 400 V Green Yellow G N U R E U E T S E H C S I...

Страница 43: ...nnectedtotheelectricitysupply viaadouble poleswitchhaving3mmminimumcontact gap on each pole A Switched Fuse Connection Unit to BS 1363 Part 4 fitted with a 3 Amp fuse is a recommendedmains supply conn...

Страница 44: ...42 0 3 0 5 5 4 5 2 0 5 2 550 285 320 5 9 3 0 2 7 0 8 0 1 150 5 7 0 1 285 320 395 790 1140 mm 898 63 550 63 45 898...

Страница 45: ...232 m m 0 5 6 i n i m H 6 1 1 1 7a 7b 1 6 2 3 5 2 1 2 1 232 m m 0 5 6 i n i m H 6 1 1 1 7a 7b 1 6 2 3 5 2 1 2 1 43 232 m m 0 5 6 i n i m H 6 1 1 1 7a 7b 1 6 2 3 5 2 1 2 1 7 2 3 7 7 9 0 4 258 5 116 116...

Страница 46: ...44 3 3a 3b Vr Vr 12a...

Страница 47: ...45 6 7b 7a 4 5 Douille G9 G9 socket HI PIN G9 40 W 230 V 8...

Страница 48: ...46 7 8 A 7b 7a 2 1 2 1 2 1 7 7 9 0 4 258 5 116 116 R D...

Страница 49: ...tique de la hotte Rating plate of the cookerhood Typenschild im Inneren der Dunstesse Etichetta all interno della cappa Etiqueta de la campana Typeplaatje van de afzuigkap Num ro de s rie Serial numbe...

Страница 50: ......

Страница 51: ......

Страница 52: ...oute de Caen Sainte C cile B P 56 50800 VILLEDIEU LES PO LES France T l 02 33 91 26 50 Fax 02 33 51 54 79 e mail com France roblin fr For outside France Tel 33 0 2 33 91 26 57 Fax 33 0 2 33 51 54 79 e...

Отзывы: