


RIX
Industries
MAN
‐
2V3B
‐
4.1V
‐
P1
Page
20
c.
Clean and inspect the cylinder bore for wear or damage (see ch. 5). Wear must be
within the tolerance specified at end of this chapter. Repair or replace as necessary.
d.
Remove and discard the used rings and backup o-rings. Clean the ring grooves and
install new o-rings. Carefully spread each new compression ring and install in the
groove. Be certain the ends of the ring fit completely into the groove. Install rings
with gap 180
˚
from the ring above.
e.
Lay the cylinder flat on a clean workbench, or if possible, set cylinder upside down
such that the 3rd stage part of the rod can protrude thru top of cylinder during
installation.
f.
Compress the top ring by hand and work the piston into the bore, rotating (in one
direction only) to assist in the installation. Repeat for the remaining rings. Slide
piston back and forth in the bore a few times, then remove piston assembly and check
to ensure all rings are fully seated in the ring grooves and have not pulled out and
over the side of the piston. If necessary the last 1/4” (6 mm) of the piston ring can be
cut off.
g.
Reinstall the 2nd stage head per valve assembly instructions, Section 7.4.2
h. Reinstall cylinder assembly onto compressor.
i.
Adjust piston rod height per 7.8.
j.
Rotate the flywheel by hand several times to be certain that the parts are free.
Piston
ring
break
‐
in:
None required.
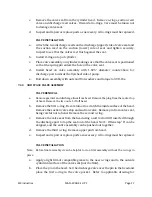
7.6.3
REPLACE
PISTON
RING
‐
FLOATING
PISTON
‐
3RD
STAGE
Note:
See drawing in the back of this manual for details of the floating piston assembly.
a.
Remove the cylinder head per Section 7.3. Note orientation of suction/discharge
ports.
b.
Rotate crankshaft by hand until piston is at top of cylinder, then remove piston.
Note
: Rider ring on piston rod cannot be changed unless the cylinder is removed.
c.
Remove cylinder. Inspect condition of cylinder and piston and replace if necessary.
Wear must be within the tolerance specified at end of chapter.
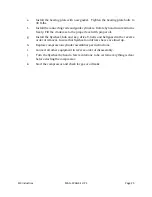
d.
Replace rider ring on end of piston rod.
e.
Replace piston rings and o-ring expanders, and piston if necessary.
f.
Install piston in sleeve tool and insert piston back into cylinder with stubbed end up
toward head.
g.
Reinstall the cylinder and head in accordance with instructions.
h.
Rotate the flywheel by hand several times to be certain that the parts are free.
Piston
ring
break
‐
in:
None required.
Содержание 2V3B-4.1V-P1A
Страница 46: ...RIX Industries MAN 2V3B 4 1V P1 Page 37 FIGURE 1 GENERAL COMPRESSOR DETAIL 1 4 ...
Страница 47: ...RIX Industries MAN 2V3B 4 1V P1 Page 38 FIGURE 2 GENERAL COMPRESSOR DETAIL 2 4 ...
Страница 48: ...RIX Industries MAN 2V3B 4 1V P1 Page 39 FIGURE 3 GENERAL COMPRESSOR DETAIL 3 4 ...
Страница 49: ...RIX Industries MAN 2V3B 4 1V P1 Page 40 FIGURE 4 COMPRESSION VALVE DETAIL ...
Страница 50: ...RIX Industries MAN 2V3B 4 1V P1 Page 41 FIGURE 5 GENERAL COMPRESSOR DETAIL 4 4 ...
Страница 51: ...RIX Industries MAN 2V3B 4 1V P1 Page 42 FIGURE 6 FIRST STAGE COMPRESSION STAGE DETAIL ...
Страница 52: ...RIX Industries MAN 2V3B 4 1V P1 Page 43 FIGURE 7 SECOND AND THIRD STAGE COMPRESSION STAGE DETAIL ...
Страница 53: ...RIX Industries MAN 2V3B 4 1V P1 Page 44 FIGURE 8 SUCTION AND FIRST STAGE PLUMBING DETAIL ...
Страница 54: ...RIX Industries MAN 2V3B 4 1V P1 Page 45 FIGURE 9 SECOND AND THIRD STAGE PLUMBING DETAIL ...
Страница 55: ...RIX Industries MAN 2V3B 4 1V P1 Page 46 FIGURE 10 FINAL DISCHARGE PLUMBING DETAIL ...
Страница 56: ...RIX Industries MAN 2V3B 4 1V P1 Page 47 FIGURE 11 CRANKCASE ASSEMBLY DETAIL ...
Страница 57: ...RIX Industries MAN 2V3B 4 1V P1 Page 48 FIGURE 12 CONNECTING ROD DETAIL ...
Страница 58: ...RIX Industries MAN 2V3B 4 1V P1 Page 49 FIGURE 13 CONTROL BOX ASSEMBLY DETAIL 1 3 ...
Страница 59: ...RIX Industries MAN 2V3B 4 1V P1 Page 50 FIGURE 14 CONTROL BOX ASSEMBLY DETAIL 2 3 ...
Страница 60: ...RIX Industries MAN 2V3B 4 1V P1 Page 51 FIGURE 15 CONTROL BOX ASSEMBLY DETAIL 3 3 ...
Страница 61: ...RIX Industries MAN 2V3B 4 1V P1 Page 52 FIGURE 16 WIRING SCHEMATIC ...
Страница 62: ...RIX Industries MAN 2V3B 4 1V P1 Page 53 FIGURE 17 ELECTRICAL SCHEMATIC ...
Страница 65: ...RIX Industries MAN 2V3B 4 1V P1 Page 55 FIGURE 18 FLOW SCHEMATIC ...
Страница 70: ...RIX P N 76 713 X76 713 DWG A8042 CUI SP CTI PROPIN ...
Страница 71: ...RIX P N 76 713 X76 713 DWG A8042 CUI SP CTI PROPIN ...
Страница 77: ......
Страница 78: ......
Страница 79: ......
Страница 80: ......
Страница 81: ... ǣ ...
Страница 82: ... Ǥ ǣ ...