3-4 Riverstone Networks RS 3000 Switch Router Getting Started Guide
Installing the Hardware
Hardware Installation
6.
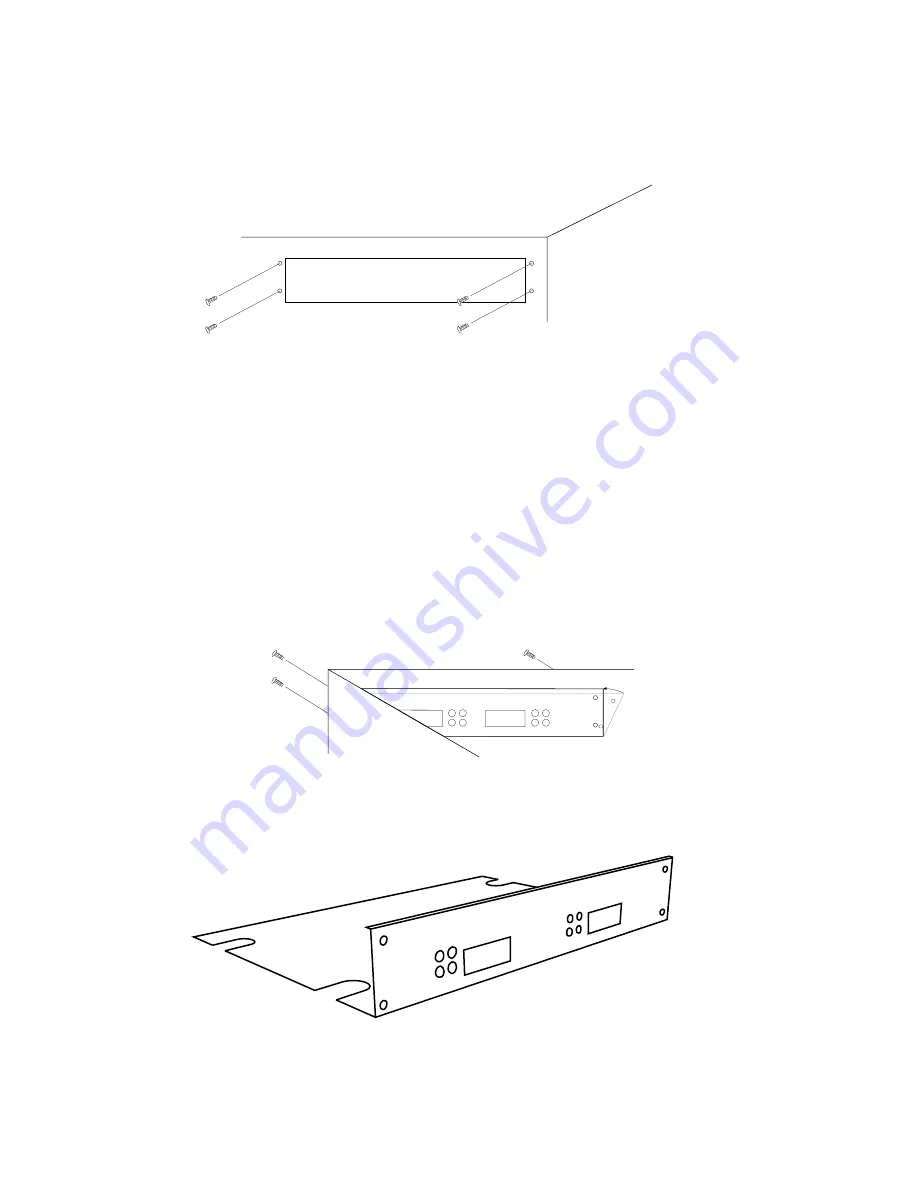
Use the #2 Phillips-head screwdriver to remove the four mounting screws that secure the cover plate
to the expansion slot (see
). Be careful not to damage or remove any EMI gaskets around
the edges of the expansion slot opening.
Figure 3-2 Removing the cover plate (view from outside chassis)
7.
Install the line card’s face plate:
Standard Face Plate
– From the inside of the chassis, line up the four holes in the line card’s face plate with
the corresponding holes around the expansion slot. Use the screws provided and the #2 Phillips-head
screwdriver to affix the line card’s face plate to the chassis.
Extended Face Plate
– From the inside of the chassis, place the face plate on top of the motherboard. Align
the extended face plate so that the four holes around the front of the face plate align with the four holes around
the expansion slot, and the four notches of the extended part are directly over the four stand-offs on the
motherboard (see
). You may need to gently push the extended face plate down while lining up the
first of the face plate screws. Use the screws provided and the #2 Phillips-head screwdriver to affix the line
card’s face plate to the chassis.
Figure 3-3 Installing “standard” line card face plate (view from inside chassis)
Figure 3-4 “Extended” EMI face plate
Содержание RS 3000
Страница 1: ...36 004 07 Rev 0A RS 3000 Switch Router Getting Started Guide Release 8 0 ...
Страница 16: ...xvi Riverstone Networks RS 3000 Switch Router Getting Started Guide Figure 3 16 10 100BASE TX RJ 45 port 3 15 ...
Страница 20: ...1 2 Riverstone Networks RS 3000 Switch Router Getting Started Guide Related Documentation About This Guide ...


