background image

4

5

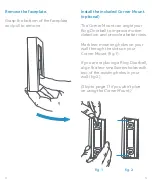
Remove the faceplate.

Grasp the bottom of the faceplate 

and pull to remove.

Install the included Corner Mount. 

(optional)

The Corner Mount can angle your 

Ring Doorbell to improve motion 

detection and provide a better view.

Mark two mounting holes on your 

wall through the slots on your 

Corner Mount (fig 1).

If you are replacing a Ring Doorbell, 

align the two small screw holes with 

two of the existing holes in your 

wall (fig 2).

(Skip to page 11 if you don’t plan  

on using the Corner Mount.)

fig. 1

fig. 2

Содержание Doorbell Pro 2

Страница 1: ...User Guide Doorbell Pro 2 ...

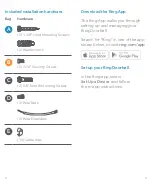
Страница 2: ...app stores below or visit ring com app Set up your Ring Doorbell In the Ring app select Set Up a Device and follow the in app instructions Included installation hardware Bag Hardware A 2 1 3 8 Long Mounting Screws 2 Wall Anchors B 2 3 16 Security Screws C 2 5 8 Short Mounting Screws D 2 Wire Nuts 2 Wire Extenders E 10 Cable clips ...

Страница 3: ...le your Ring Doorbell to improve motion detection and provide a better view Mark two mounting holes on your wall through the slots on your Corner Mount fig 1 If you are replacing a Ring Doorbell align the two small screw holes with two of the existing holes in your wall fig 2 Skip to page11 if you don t plan on using the Corner Mount fig 1 fig 2 ...

Страница 4: ...ire through the center of the Corner Mount Using the long mounting screws secure the Corner Mount to the wall through the slots fig 3 If you re re using existing holes secure it with the adjacent screw holes fig 4 fig 3 fig 4 3 16 Security screw 1 3 8 Long mounting screw 5 8 Short mounting screw DO NOT USE any screw other than the included long mounting screws when securing your Ring Doorbell If y...

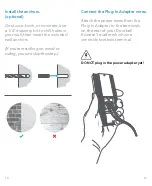
Страница 5: ...u ran the wire through your wall be sure to feed any excess wiring into the wall first Once you re done skip ahead to page 15 Connect the Plug In Adapter wires Attach the power wires from the Plug In Adapter to the terminals on the rear of your Doorbell It doesn t matter which wire connects to which terminal DO NOT plug in the power adapter yet ...

Страница 6: ...rbell as a template mark the location of the two mounting holes on your wall 3 16 Security screw 1 3 8 Long mounting screw 5 8 Short mounting screw DO NOT USE any screw other than the included short mounting screws when securing your Ring Doorbell ...

Страница 7: ...n insert the included wall anchors If you re installing on wood or siding you can skip this step Connect the Plug In Adapter wires Attach the power wires from the Plug In Adapter to the terminals on the rear of your Doorbell It doesn t matter which wire connects to which terminal DO NOT plug in the power adapter yet ...

Страница 8: ...cable clips Screw in your Ring Doorbell Mount your Ring Doorbell with the two included long mounting screws If you ran the wire through your wall be sure to feed any excess wiring into the wall first 3 16 Security screw 1 3 8 Long mounting screw 5 8 Short mounting screw DO NOT USE any screw other than the included long mounting screws when securing your Ring Doorbell If you are running the wire up...

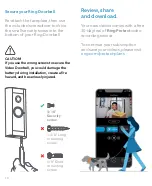
Страница 9: ...nto the bottom of your Ring Doorbell Review share and download Your new device comes with a free 30 day trial of Ring Protect video recording service To continue your subscription and save your videos please visit ring com protect plans CAUTION If you use the wrong screws to secure the Video Doorbell you could damage the battery during installation create a fire hazard and be seriously injured ...

Страница 10: ...USD month or 100 USD year How do I sign up Simply log into your Ring account at ring com protect plans and follow the on screen instructions 5 CAD per month or 50 CAD per year 15 CAD per month or 150 CAD per year For information on our warranty theft protection and Ring Protect Plans see ring com legal 2020 Ring LLC or its affiliates Ring and all related marks are trademarks of Ring LLC or its aff...

Страница 11: ...XX XXXXXX XX ...
Отзывы: