Rimage Prism CDPR11 Скачать руководство пользователя страница 7

Introduction 


Introduction 

This manual provides the information needed to set up, install, and operate the Prism

Plus

 printer 

and to identify the parts.  

Operating system requirements 

The Rimage Prism

Plus

 is compatible only with Windows 2000, Windows XP, and Windows 2003 

Server. It requires one USB port. 

Media requirements 

You must use discs that are coated with a surface designed for thermal printing. Silver lacquer 
discs without an additional thermal protective layer are not designed for thermal printing. The heat 
of the thermal printing process may damage the dye layer in a CD-R. 

The media in Rimage Media Kits™ is designed for optimum use in the Prism

Plus

. For information 

about Rimage Media Kits

 – convenient packages of discs and ribbons, all guaranteed by 

Rimage – contact Rimage at 800-445-8288. 
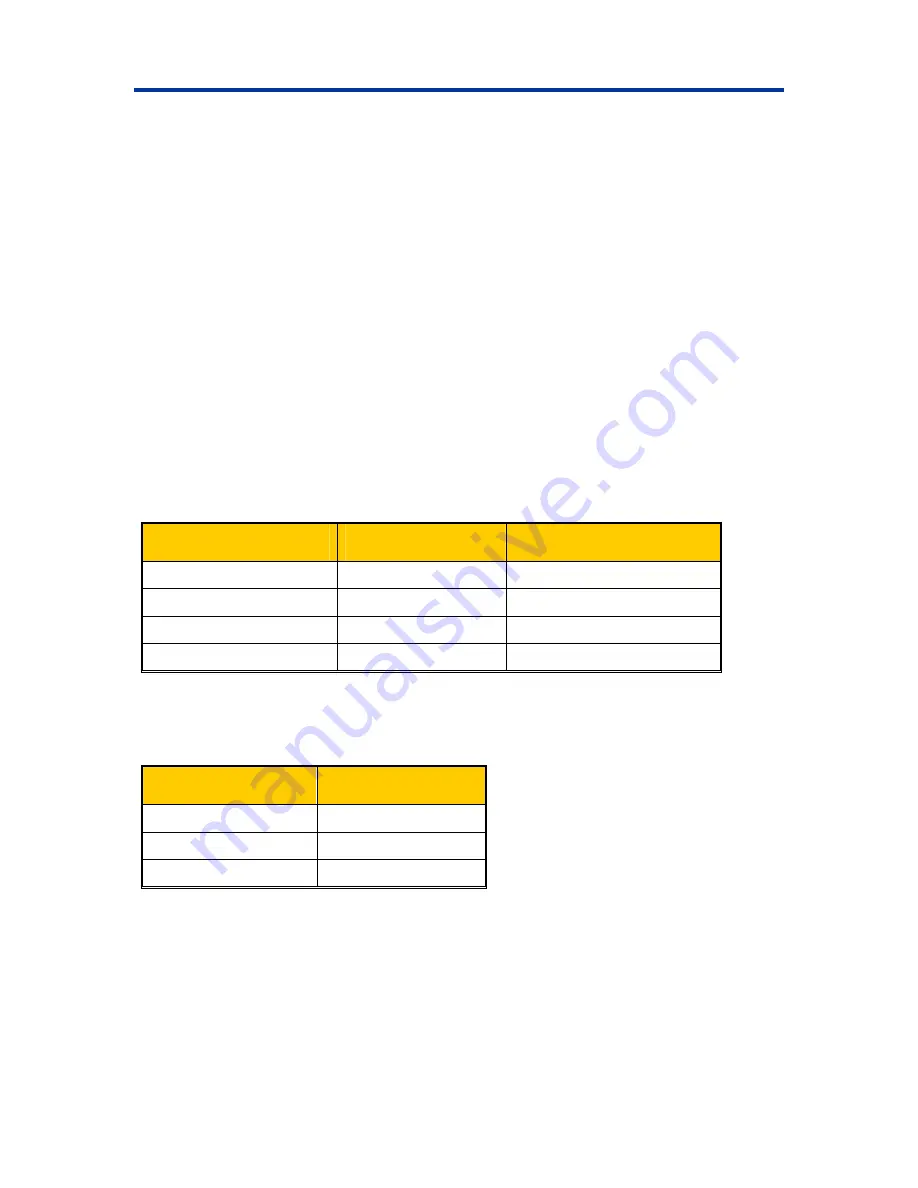
Ribbon requirements 

The Prism

Plus

 requires ribbons designed specifically for use with the printer. The table below lists 

the type of ribbon to use with your printer. 

Ribbon Color 

Part Number 

Number of Discs Printed 

Black 201737-006 

2100 

Red 202082-002 

2100 

Midnight Blue 

203217-001 

2100 

Multicolor 202506-001 

500 

Store the ribbons at -5

°

C (23

°

F) to 40

°

C (104

°

F) and at 30-80% relative humidity, non-

condensing. Avoid direct sunlight. 

Label design requirements 

Properties 

Image Size 

Resolution 300x300 

DPI 

Width 

5.12” (1536 pixels) 

Height 

4.52” (1356 pixels) 


110635_G  

Содержание Prism CDPR11

Страница 1: ...Rimage PrismPlus TM User Guide...

Страница 2: ......

Страница 3: ...Cs violates national and international legislation and can result in severe penalties Rimage Corporation reserves the right to make improvements to the equipment and software described in this documen...

Страница 4: ...r product If you cannot find a solution on our website email Rimage Services at support rimage com Rimage Europe GmbH Hans B ckler Stra e 7 63128 Dietzenbach Germany Tel 49 0 6074 8521 0 FAX 49 0 6074...

Страница 5: ...on the printer 8 Loading the discs 9 Selecting the printing preferences 9 Navigating to printing properties 9 Setting ribbon type media type and print strobe 10 Setting color options 10 Setting the pr...

Страница 6: ...Rimage PrismPlus ii...

Страница 7: ...CD R The media in Rimage Media Kits is designed for optimum use in the PrismPlus For information about Rimage Media Kits convenient packages of discs and ribbons all guaranteed by Rimage contact Rima...

Страница 8: ...smPlus Front view Ribbon Guides Clamping Pins Drawer and Centering Pin Supply Roller Take up Roller Control panel There are four LEDs and an Operator Button on the operator panel located on the front...

Страница 9: ...sc is removed from the pad The Disc Not Present LED flashes a fault code when an error occurs After the error is resolved press the Operator button to turn off the LED The Disc Not Present LED flashes...

Страница 10: ...Rimage PrismPlus 4 110635_G Rear view...

Страница 11: ...nter Connecting the cables 1 Connect the parallel cable to the parallel cable connection at the back of the printer 2 Connect the other end of the parallel cable to a parallel port on the back of the...

Страница 12: ...og box opens select Continue Anyway 1 Navigate to the print area settings In Windows 2000 navigate Start Settings Printers The Printers dialog box opens In Windows XP navigate Start Printers and Faxes...

Страница 13: ...No f Select Next The Add Printer Wizard displays the printer settings you have specified g Select Finish 5 When the Windows Logo testing dialog box opens select Continue Anyway 6 Set the ribbon type a...

Страница 14: ...ge PrismPlus 8 110635_G Powering on the printer 1 To power on the printer press the power switch on the rear of the printer The printer initializes 2 To power off the printer press the power switch ag...

Страница 15: ...nd plate vary between the standalone and the automated models The automated models have a hole through the center of the plate the standalone model does not All models have a centering pin 3 To close...

Страница 16: ...To Enable Color Sub Strobes select Enabled Setting color options Printing in monocolor 1 Install a monocolor ribbon in the printer 2 Navigate to printing properties 3 Select the Device Settings tab 4...

Страница 17: ...tem select No If you are making multiple copies on a standalone printer select Yes n the tray 10 olor intensity color balance or pattern settings select 11 To save the changes select OK 1 s XP navigat...

Страница 18: ...crease the left margin to move the label toward the right 4 Select OK to save the changes to the label 5 Print another label to verify the proper print position Printing discs with serialized labels W...

Страница 19: ...mPlus b Remove the top cover c Remove the ribbon Refer to Changing the print ribbon on page 15 d While pressing the Operator button power on the PrismPlus e When the Disc Not Present LED flashes relea...

Страница 20: ...lus d Power on the PrismPlus Cleaning the printhead alternate method If a cleaning pad is not available use the following cleaning procedure 1 Prepare the PrismPlus a Power on the PrismPlus b To open...

Страница 21: ...e to clean the printhead Refer to Cleaning the printhead on page 13 1 Access the ribbon area a Power on the PrismPlus b Remove the of the printer top cover c To remove the take up roller pull up on it...

Страница 22: ...ke up roller on top of the ribbon leader as shown The gear must be on the correct side c Pull the ribbon leader up over the cardboard core and attach the adhesive strip to the cardboard core so that t...

Страница 23: ...arking should not be past the point shown in the picture on page 16 If the marking is on the roller pull the take up roller out and roll back the ribbon To take up the slack roll the supply roller bac...

Страница 24: ...Ribbon 3 color CYM panel ribbon Ribbon Capacity Monochrome black 2100 discs Monochrome red 2100 discs Monochrome blue 2100 discs 3 color panel 500 discs Physical Properties 6 0 H x 8 5 W x 14 0 D 15 2...

Страница 25: ...it is moving Caution Indicates that failure to observ Safety precautions Warning Do not disassemble or use tools on the printer All service procedures should be performed by an authorized field techn...

Страница 26: ...raged to try to correct the interference by one or more of the following measures Reorient or relocate the receiving antenna Increase the separation between the equipment and receiver Connect the equi...

Страница 27: ...glected or that were modified in any respect without the written consent of Rimage Equipment or parts that have been damaged due to shipping or accidents or damaged by lightning storms water or power...

Отзывы: