Page 17
34
Y
65
Y
66
33
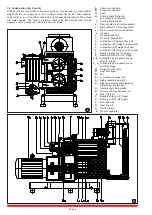
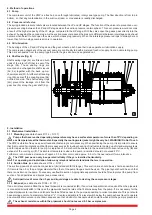
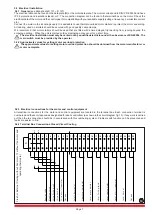
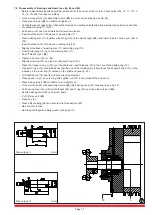
8.3 Changing Bearings, Shaft Seals and Seals in Gearbox Connection housing (fig. 33).
• Removal and re-assembly of water jacket
and compressor stage (see page 12).
• Removal and re-assembly of gearbox (see
page 17).
• Remove the circlip (87) on the drive shaft
(72) and on the gear shaft (74).
• Remove the coupling (86).
• Remove shaft key (7).
• Remove the allen screws in the bearing
cover (81).
• Loosen and remove the bearing cover (81)
with two allen screws (M8) together with the
seal (83) and shaft sealing (82).
• Remove the spacer ring (79).
• Press the drive shaft (72) with bearing (26) and
gear shaft (74) with bearing (26) out of the intermedi-
ate housing in the drive direction, using a sleeve on the
outer bearing ring.
• Pull off and change ball bearings (26).
• The assembly is in the reverse order.
• Please note the following:
- Before pressing on bearing (26) their inner ring should be warmed to 100°C.
- When fitting the bearing cover (81) with the shaft seals (82) an assembly sleeve type II (W
2
)
should be used.
9. Other repairs
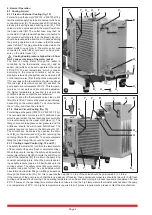
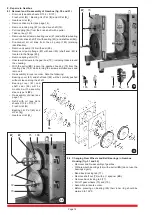
9.1 Cleaning the Suction and Exhaust Ports in Connection Housing (fig. 34)
• Switch off pump and bleed to atmospheric pressure.
• Remove the pipe work.
• Remove the separator (Z).
• Remove the flange (103) from the suction channel (Y
65
) (note seals (104)).
• Remove the hemispherical mesh (118) and clean (solvent).
• Both port areas (Y
65
and Y
66
) can be cleaned through the openings in
the intermediate housing (89). (Please take care, that no dirt enters
the pump).
• Assembly is in the reverse order.
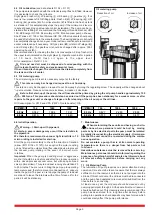
9.2 Changing the Pressure Relief Valve (fig. 34)
• Remove allen screws in the valve (400).
• Carefully remove the valve (400) straight from the
intermediate housing.
• Check all parts and the valve seat in the connection
housing (89). If necessary, regrind the valve seat.
• Before re-assembly check that the valve (404) slides
easily in the valve sleeve (401).
• Assembly is in the reverse order.
10 Instructions for storing fresh oil lubricated rotary vane vacuum pumps
Introduction
Start-up of all pumps delivered by Rietschle should be made within 3 months. If this is not possible, please observe the
following details, the guarantee given by Rietschle may be invalidated if not followed.
a. Storing of pumps
The store room for the pumps must be dry and free of all corrosive materials. The ambient temperature should be constant
and above 10°C.
b. Condition of Stored Pumps
The suction and discharge ports of the pumps should be sealed with blank flanges. All lubricating and sealing oil reservoirs
should be filled, in accordance with the instruction manual.
c. Maintenance during Storage
The pumps should be operated once a month for about 2 hours to prevent any kind of corrosion within the pump. Please
pay attention to the fact, that the blank flange from the discharge side is to be removed before operation and installed again
afterwards. The blank flange of the suction side should not be removed, since end vacuum should be reached.
d. Setting Pumps into Operation
A technical service made by Rietschle will be necessary for all pumps stored longer than 3 months. You will be responsible
for the costs of the inspection and test run. Further, all costs occurring from improper storage or handling will be charged.
/ PM6
9.99

