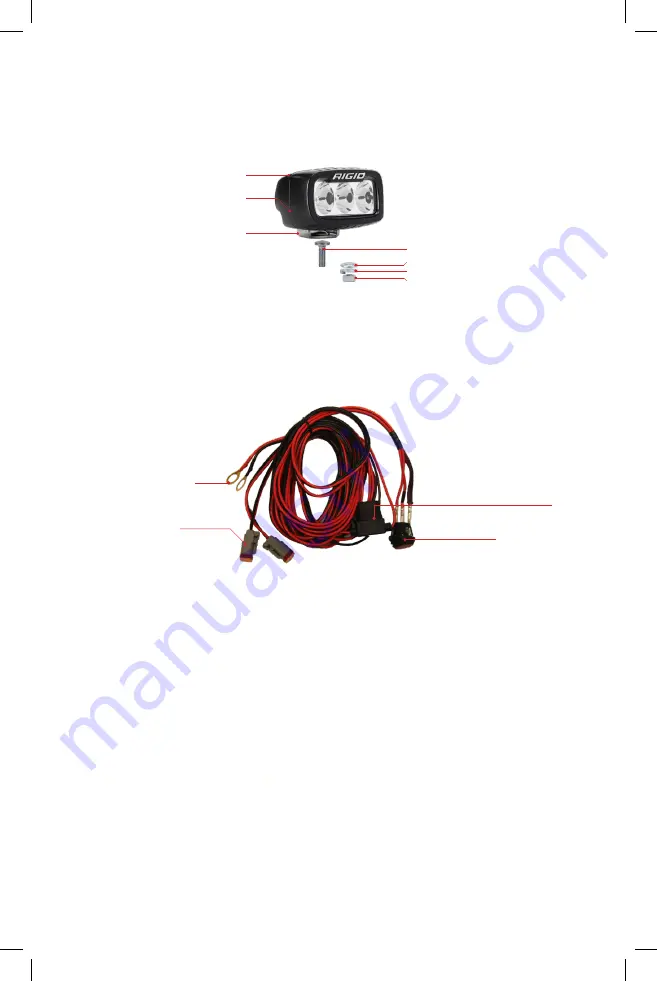
F - 5/16” Flat Washer
E - 5/16-18 Carriage Bolt
D - Mounting Bracket
C - M6 Nyloc Nut (1)
B - M6 Allen Socket Head (1)
A - LED Light (Housing)
G - 5/16” Split Washer
H - 5/16-18 Nut
SR-M SERIES PRO
Assemble your LED light kit by attaching the mount (D) to the housing (A) using the provided bolt(s)
(B) and nylon lock nut(s) (C). Tighten until snug. Use the remaining bolt, washers, and nut (E, F, G, H) to
mount the completed light assembly. A 5/16” hole is required.
(See Figure Below)
WIRING INSTRUCTIONS
Battery Eyelets
Switch
Deutsch Connector
Fuse
1. When routing wire harness through any metal surface be sure it is free of any sharp
edges and protected using wire sheathing or a grommet.
2. Route the harness through vehicle, connect the SR-M lamps by directly plugging into the
Deutsch connector’s that are pre-terminated onto the harness.
3. Route the switch lead of the harness to the desired switch location and follow the wiring
diagram to ensure proper connections at the switch.
4. Connect the positive and negative battery terminals once all connections have been
made with the RED harness lead connected to the positive battery terminal and the BLACK
wire to the negative battery terminal.
5. Test to verify functionality, be sure to properly aim your new SR-M lighting before final
torque on all mounting hardware.
6. If connecting to an existing switch be aware of the current rating of your selected switch,
if switch rating is less than the amperage required to power your lighting then a relay must
be added in line to prevent failure of the switch.
7. If connecting to existing wiring, make sure to use appropriate fusing and wire gauge. Be
sure to use heat shrink tubing on all connections to ensure a weather tight seal.
IMPORTANT
Always disconnect the vehicle battery terminals before servicing the electrical system


