8
• Be sure you can quickly remove your foot from
the foot switch.
• Stand facing the directional switch.
• Be sure you have convenient access to directional
switch, tools and chucks.
• Do not reach across the machine or workpiece.
5. Flip the directional switch to FOR (Forward).
6. Grasp the pipe cutter’s feedscrew handle with both
hands.
7. Depress and hold down the foot switch with the left foot.
8. Tighten the feedscrew handle slowly and continu-
ously until the pipe is cut. Do not force the cutter
into the workpiece.
9. Release the foot switch and remove your foot from
the housing.
10. Swing pipe cutter back to the UP position.
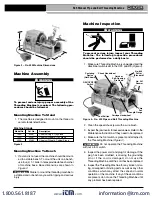
Reaming Pipe with No. 341 Reamer
1. Move reamer arm into DOWN position.
2. Extend reamer by pressing latch and sliding knob
toward pipe until latch engages bar.
3. Check the directional switch to insure it is in the
FOR (Forward) position. Depress and hold the foot
switch down with left foot.
4. Position reamer into pipe and complete reaming by
exerting pressure on handwheel.
(Figure 6)
5. Retract reamer bar and return reamer to UP position.
6. Release foot switch and remove your foot from the
housing.
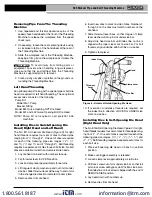
Figure 6 – Reaming with 341 Reamer
Threading Pipe or Rod with
Quick-Opening, Self-Opening or
Semi-Automatic Die Head
1. Install die set. Refer to die installation procedure.
2. Swing cutter and reamer to UP position.
3. Swing die head to DOWN position with throwout
lever set to CLOSE position.
4. Check directional switch to insure it is in the FOR
(Forward) position. Depress and hold the foot switch
down with left foot.
NOTE! Current 535 Machines have an automatic oiling
system that brings oil to the work through the die
head. Machines made prior to June 1, 1996
have an oil spout which must be swung to the
down position to flood dies with oil.
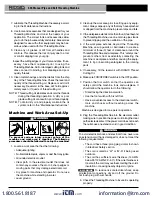
5. Turn carriage handwheel to bring dies against end of
pipe. Slight pressure on handwheel will start dies.
(Figure 7)
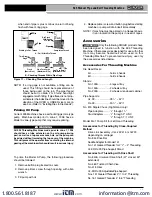
Figure 7 – Threading with 535 Manual Threading Machine
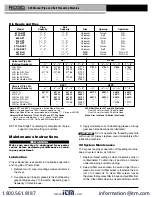
6. Quick-Opening 811A Die Head
(Figure 8) – When
thread is completed, rotate throwout lever to OPEN
position, retracting dies.
Self-Opening 815A Die Head
(Figure 9) – When die
head trigger contacts end of pipe, throwout lever is
automatically opened.
Semi-Automatic Die Head
(Figure 10) – When the
end of the pipe being threaded is flush with the end of
the number 1 die, tap the handle for the dies to re -
lease the pipe.
7. Turn carriage handwheel to back die head off pipe.
8. Release the foot switch and remove your foot from
the housing.
9. Swing die head back to UP position.
535 Manual Pipe and Bolt Threading Machine
www.
.com
1.800.561.8187


