background image

12

.1   

<Supplies and accessories>

12

 Supplies and accessories

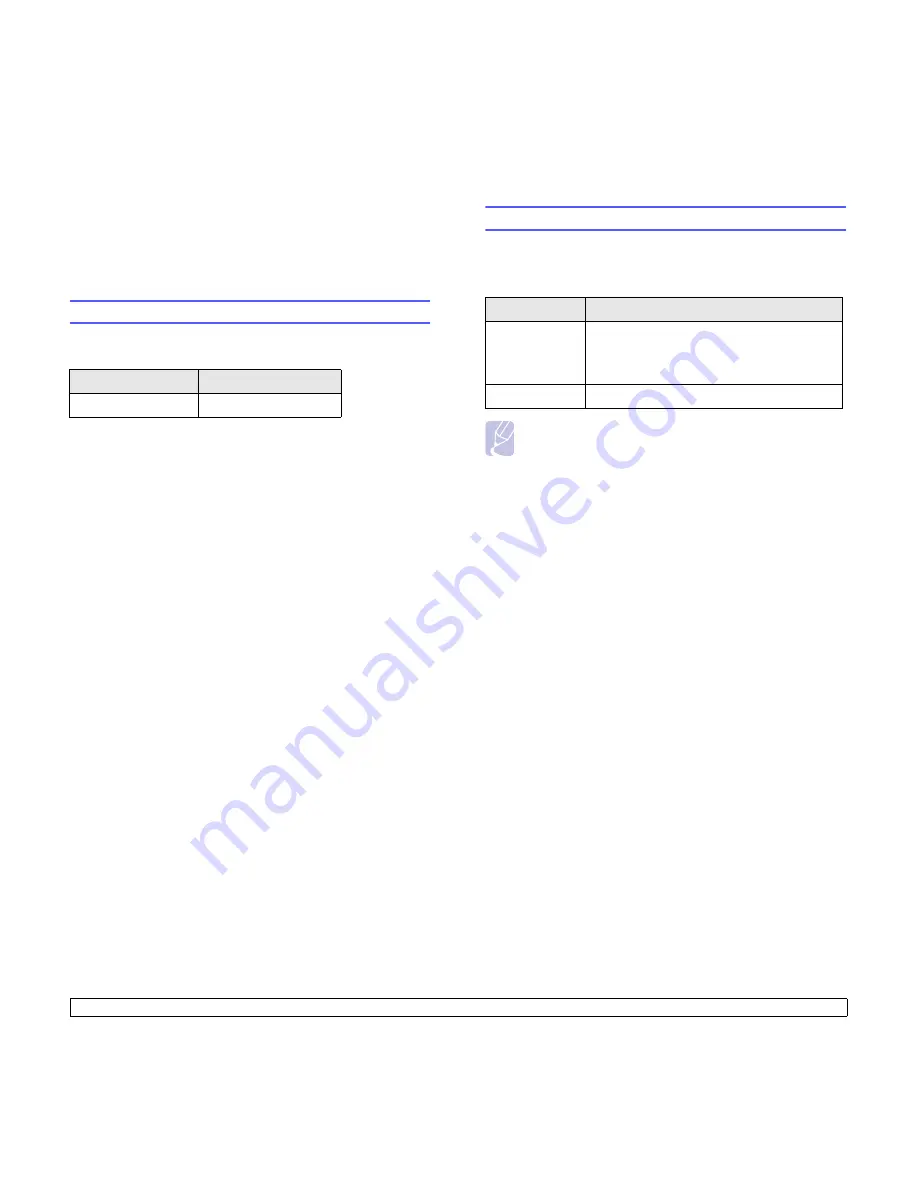
This chapter provides information on purchasing toner cartridges and 
accessories available for your machine.

Toner cartridges

When the toner runs out, you can order the following types of toner 
cartridges for your machine:

Type

Yield

a

a. Declared yield value in accordance with ISO/IEC 19752.

Standard yield 

Approx. 8,000 pages

Accessories

You can purchase and install accessories to enhance your machine’s 
performance and capacity.

The following accessories are available for your machine:

Note

Your machine comes with 

64

 MB of on-board memory and a 

32 MB DIMM. To expand the memory of your machine, you 
must remove the existing DIMM and purchase a larger one.

Accessory

Description

Optional tray

If you are experiencing frequent paper supply 
problems, you can attach an additional 250 
sheet tray. You can print documents on various 
sizes and types of print materials.

Memory DIMM

Extends your machine’s memory capacity.

Содержание Laser MFP

Страница 1: ...ual carefully before you use this machine and keep it handy for future reference For safe and correct use please be sure to read the Safety Information in this manual before using the machine Laser MFP User s Guide ...

Страница 2: ...ion PCL and PCL 6 are trademarks of Hewlett Packard company Microsoft Windows Windows 98 Windows Me Windows 2000 Windows NT 4 0 Windows XP and Windows 2003 are registered trademarks of Microsoft Corporation PostScript 3 is a trademark of Adobe System Inc UFST and MicroType are registered trademarks of Monotype Imaging Inc TrueType LaserWriter and Macintosh are trademarks of Apple Computer Inc All ...

Страница 3: ...ver features 3 2 System requirements 3 2 4 Network setup Introduction 4 1 Supported operating systems 4 1 Configuring TCP IP 4 1 Configuring EtherTalk 4 2 Setting Ethernet speed 4 2 Restoring the network configuration 4 2 Printing a network configuration page 4 2 5 Loading originals and print media Loading originals 5 1 Selecting print media 5 2 Loading paper 5 5 Setting the paper size and type 5 ...

Страница 4: ...4 Receiving manually using an extension telephone 9 4 Receiving automatically in Ans Fax mode 9 4 Receiving faxes using DRPD mode 9 4 Receiving in secure receiving mode 9 5 Receiving faxes in memory 9 5 Printing received faxes on both sides of paper 9 6 Sending a fax to multiple destinations 9 6 Sending a delayed fax 9 7 Sending a priority fax 9 7 Forwarding faxes 9 8 10 Fax setup Changing the fax...

Страница 5: ... Clearing document jams 14 1 Clearing paper jams 14 2 Understanding display messages 14 7 Toner cartridge related messages 14 10 Solving other problems 14 11 15 Installing accessories Precautions when installing accessories 15 1 Installing a memory DIMM 15 1 16 Specifications General specifications 16 1 Printer specifications 16 1 Scanner and copier specifications 16 2 Facsimile specifications 16 ...

Страница 6: ...wall outlet before you move the machine While moving the machine you should take care that the power cord will not be damaged under the machine Before moving the machine be sure to disconnect all external connections especially the power cord from the wall outlet Damaged power cords are a fire and electric shock hazard When you disconnect the power plug from the wall outlet always pull the plug no...

Страница 7: ... make removing the stain impossible Do not look into the lamp it can damage your eyes When loading paper take care not to trap or injure your fingers During operation rollers for transporting the paper and originals revolve A safety device is being installed so that the machine can be operated safely But take care not to touch the rollers during operation An injury might occur Fire and breakdown c...

Страница 8: ...cates that the product must not be treated as municipal waste It must be disposed of separately via the appropriate return and collection systems available By following these instructions you ensure that this product is treated correctly and help to reduce potential impacts on the environment and human health which could otherwise result from inappropriate handling Recycling of products helps to c...

Страница 9: ...one company 2 This equipment uses the RJ11C USOC jack 3 A plug and jack used to connect this equipment to the premises wiring and telephone network must comply with the applicable FCC Part 68 rules and requirements adopted by the ACTA A compliant telephone cord and modular plug is provided with this product It is designed to be connected to a compatible modular jack that is also compliant See inst...

Страница 10: ...ger Equivalence Number is an indication of the maximum number of devices allowed to be connected to a telephone interface The termination on an interface may consist of any combination of devices subject only to the requirement that the sum of the RENs of all the devices does not exceed five ...

Страница 11: ...he sheet of paper and can then be taped together to form a poster See the Software section Save time and money You can print multiple pages on one single sheet of paper to save paper You can use preprinted forms and letterhead with plain paper See the Software section This machine automatically conserves electricity by substantially reducing power consumption when not in use 250 250 Expand your ma...

Страница 12: ...y 4 scanner lid 13 output support 5 document output tray 14 USB memory port 6 control panel 15 multi purpose tray extension 7 output tray 16 multi purpose tray paper width guides 8 front cover 17 scanner glass 9 paper level indicator 18 toner cartridge Rear view 1 control board cover 7 extension telephone socket EXT 2 network port 8 duplex unit 3 USB port 9 power receptacle 4 parallel port 10 powe...

Страница 13: ...umber 17 Reduce Enlarge Makes a copy smaller or larger than the original 6 Fax Activates Fax mode 18 USB Print Allows you to directly print files stored on a USB Memory device when it is inserted into the USB memory port on the front of your machine 7 Copy Activates Copy mode 19 Duplex Allows you to print documents on both sides of the paper 8 Scan Email Activates Scan mode 20 Toner Save Allows yo...

Страница 14: ... selected Continue at the NonGenuine Toner prompt See page 14 10 The lifespan of the toner cartridge is reached and you selected Continue at the Toner Exhausted prompt See page 14 10 The toner cartridge is low Order a new toner cartridge You can temporarily improve print quality by redistributing the toner See page 13 4 Finding more information You can find information for setting up and using you...

Страница 15: ... should be well ventilated and away from direct sunlight or sources of heat cold and humidity Do not set the machine close to the edge of your desk or table Clearance space Front 482 6 mm enough space so that the paper tray can be removed Back 100 mm enough space for ventilation Right 100 mm enough space for ventilation Left 100 mm enough space for ventilation ...

Страница 16: ... to Answer Stamp Rcv Name Rcv Start Code Auto Reduction Discard Size Junk Fax Setup DRPD Mode Change Default Resolution Darkness Auto Report Copy Feature Copy Collation 2 Up 4 Up ID Copy Poster Copy Clone Copy Erase Bkgd Copy Setup Change Default Copies Reduce Enlarge Darkness Original Type Scan Feature USB Memory Scan Size Original Type Resolution Scan Color Scan Format E mail Scan Size Original ...

Страница 17: ... to correct and enter a new number 5 To select AM or PM for 12 hour format press the or button or any number button When the cursor is not under the AM or PM indicator pressing the or button immediately moves the cursor to the indicator You can change the clock mode to 24 hour format e g 01 00 PM as 13 00 For details see the next section 6 Press OK to save the time and date When you enter a wrong ...

Страница 18: ...want 3 Press On Hook Dial to save the change and return to Standby mode Note You can adjust the speaker volume only when the telephone line is connected Entering characters using the number keypad As you perform various tasks you may need to enter names and numbers For example when you set up your machine you enter your name or your company s name and the fax number When you store fax numbers or e...

Страница 19: ...pears and press OK 4 Press the Scroll buttons until On appears and press OK 5 Press the Scroll buttons until the time setting you want appears and press OK 6 Press Stop Clear to return to Standby mode Scan Power Save mode Scan Power Save mode allows you to save power by turning off the scan lamp The scan lamp under the scanner glass automatically turns off when it is not in actual use to reduce po...

Страница 20: ...onitor This program allows you to monitor the machine s status and alerts you when an error occurs during printing SmarThru1 This is the accompanying Windows based software for your multifunctional machine Printer Settings Utility You can create and edit Phone Book entries from your computer and set up print and scan system data options ScanClair This program allows you to scan a document on your ...

Страница 21: ...e is not supported in NT 4 0 O X X System requirements Before you begin ensure that your system meets the following requirements Windows Note For Windows NT 4 0 2000 XP 2003 users who have an administrator right can install the software Macintosh Item Requirements Recommended Operating system Windows 98 Me NT 4 0 2000 XP 2003 CPU Windows 98 Me NT 4 0 2000 Pentium II 400 MHz or higher Pentium III 9...

Страница 22: ...ettings SetIP A utility program allowing you to select a network interface and manually configure the addresses for use with the TCP IP protocol For further details refer to the user s guide on the Printer Scanner Drivers and Utilities Type 104 CD that came with your machine Via the control panel You can set up the following basic network parameters through the machine s control panel Configure TC...

Страница 23: ...dby mode Configuring EtherTalk EtherTalk is AppleTalk used in an Ethernet network This protocol is widely used in Macintosh network environments To use EtherTalk take the following steps 1 Press Menu until Network appears on the bottom line of the display and press OK 2 Press the Scroll buttons until EtherTalk appears and press OK 3 Press the Scroll buttons until On appears and press OK 4 Press St...

Страница 24: ...d In the ADF Using the ADF you can load up to 50 sheets of paper 75 g m2 for one job When you use the ADF Do not load paper smaller than 142 x 148 mm or larger than 216 x 356 mm Do not attempt to load the following types of paper carbon paper or carbon backed paper coated paper onion skin or thin paper wrinkled or creased paper curled or rolled paper torn paper Remove all staples and paper clips b...

Страница 25: ... affect the machine s performance and the output quality When you choose print materials consider the following The type size and weight of the print media for your machine is described in following tables Desired outcome The print media you choose should be appropriate for your project Brightness Some print media are whiter than others and produce sharper more vibrant images Surface smoothness Th...

Страница 26: ...Envelope Envelope B5 176 x 250 mm 6 93 x 9 84 inches 75 to 90 g m2 20 lb to 24 lb bond 5 sheets of 75 g m2 20 lb bond in the multi purpose tray Envelope Monarch 98 4 x 190 5 mm 3 88 x 7 5 inches Envelope COM 10 105 x 241 mm 4 12 x 9 5 inches Envelope DL 110 x 220 mm 4 33 x 8 66 inches Envelope C5 162 x 229 mm 6 38 x 9 02 inches Envelope C6 114 x 162 mm 4 49 x 6 38 inches Transparency Letter A4 Ref...

Страница 27: ...hem as they print out Mode Size Source Copy mode Letter A4 Legal Folio Executive ISO B5 JIS B5 A5 A6 tray 1 optional tray 2 multi purpose tray Single side printing All sizes supported by the machine tray 1 optional tray 2 multi purpose tray Duplex printing Letter A4 Legal Folio tray 1 optional tray 2 multi purpose tray1 1 75 to 90 g m2 20 to 24 lb bond only Fax mode Letter A4 Legal tray 1 optional...

Страница 28: ...s Do not run a sheet of labels through the machine more than once The adhesive backing is designed for only a single pass through the machine Do not use labels that are separating from the backing sheet or are wrinkled bubbled or otherwise damaged Card stock or custom sized materials Do not print on media smaller than 98 mm wide or 148 mm long In the software application set margins at least 6 4 m...

Страница 29: ...ce one sheet at a time in the multi purpose tray You can load previously printed paper The printed side should be facing up with an uncurled edge at the front If you experience problems with paper feed turn the paper around Note that print quality is not guaranteed 1 2 3 4 1 paper length guide 2 support guide 3 guide lock 4 paper width guides 1 Press and hold the guide lock and slide the paper len...

Страница 30: ...will result in a paper jam or skew 5 After loading paper set the paper type and size for the multi purpose tray See page 5 8 for copying and faxing or the Software section for PC printing 6 After printing fold the multi purpose tray extension and close the multi purpose tray Notes Depending on the media type you are using keep the following loading guidelines Envelopes Flap side down and with the ...

Страница 31: ...our PC 1 Press Menu until System Setup appears on the bottom line of the display and press OK 2 Press the Scroll buttons until Paper Setup appears and press OK 3 Press OK when Paper Size appears 4 Press the Scroll buttons until the paper tray you want appears and press OK 5 Press the Scroll buttons until the paper size you are using appears and press OK 6 Press Back to return to the upper level 7 ...

Страница 32: ...nting from the multi purpose tray to the rear cover provides a straight paper path Using the rear cover might improve the output quality with special print media To use the rear cover open it by pulling down Note The fuser area inside the rear cover of your machine becomes very hot when in use Take care when you access this area ...

Страница 33: ...ter copying 2 or 4 up copying See page 6 2 5 Press Start to begin copying Note You can cancel the copy job during an operation Press Stop Clear and the copying will stop Changing the settings for each copy Your machine provides default settings for copying so that you can quickly and easily make a copy However if you want to change the options for each copy use the copy function buttons on the con...

Страница 34: ... press OK 6 Repeat steps 4 through 5 as needed 7 Press Stop Clear to return to Standby mode Note While you are setting copy options pressing Stop Clear cancels the changed settings and restores the defaults Using special copy features You can use the following copy features Collation 2 up or 4 up copying You can set the machine to sort the copy job For example if you make 2 copies of a 3 page orig...

Страница 35: ...ss Start 6 Open the scanner lid and turn the original over Note If you press Stop Clear or if no buttons are pressed for approximately 30 seconds the machine cancels the copy job and returns to Standby mode 7 Press Start to begin copying Note If the original is larger than the printable area some portions may not be printed Poster copying Your machine can print an image onto 9 sheets of paper 3x3 ...

Страница 36: ...ll buttons until Clone Copy appears and press OK 5 Press the Scroll buttons to select Yes 6 Press OK or Start to begin copying Note You cannot adjust the copy size using the Reduce Enlarge button while making a clone copy Copying on both sides of paper By using the Duplex button on your machine you can set the machine to print copies on both sides of paper 1 Press Duplex 2 Press the Scroll buttons...

Страница 37: ...nt spooler such as the printer group in Windows delete the job as follows 1 Click the Windows Start menu 2 For Windows 98 NT 4 0 2000 Me select Settings and then Printers For Windows XP 2003 select Printers and Faxes 3 Double click the Printer Driver Type 104 PCL 6 icon 4 From the Document menu select Cancel Printing Windows 98 Me or Cancel Windows NT 4 0 2000 XP 2003 Note You can also access this...

Страница 38: ...o an FTP file server You can scan an image and upload it to an FTP server See page 8 4 To a computer networked via SMB NetBEUI a protocol You can scan an image and send it to a shared folder on an SMB server See page 8 5 a A network protocol provided by Microsoft Corporation for Windows network systems Scanning to an application using a local connection 1 Make sure that your machine and computer a...

Страница 39: ...of up to 8 characters The first character must be a letter The PIN must be 4 digits Note You can change the scanner properties of your machine and the scan settings from the ScanClair window Click Properties and set the options in each tab Registering authorized users To use an FTP server or SMB server or to send an email you need to register authorized users using Web Image Monitor Type 104 You c...

Страница 40: ... the login name and password 13 Enter the domain name of the SMB server 14 Enter the location the scanned image will be stored This is the location you have entered in the step 6 15 Click Apply Scanning to a network client Network client allows you to remotely scan an original from your network connected machine to your computer in JPEG TIFF or PDF file format Scanning 1 Make sure that your machin...

Страница 41: ... additional addresses press OK when Yes appears and repeat step 5 To continue to the next step press the Scroll buttons to select No and press OK 7 If the display asks if you want to send the email to your account press the Scroll buttons to select Yes or No and press OK Note This prompt does not appear if you have activated the Send To Self option in the email account setup 8 Enter an email subje...

Страница 42: ...e of the display and press OK 3 Press the Scroll buttons until the scan type you want appears and press OK 4 Press the Scroll buttons until the scan setting option you want appears and press OK 5 Press the Scroll buttons until the desired status appears and press OK 6 Repeat steps 4 and 5 to set other setting options 7 When you have finished press Stop Clear to return to Standby mode Changing the ...

Страница 43: ...ress Book for an entry There are two ways to search for an address in memory You can either scan from A to Z sequentially or search by entering the first letters of the name associated with the address Searching sequentially through memory 1 If necessary press Scan Email 2 Press Address Book until Search Send appears on the bottom line of the display and press OK 3 Press the Scroll buttons until t...

Страница 44: ...y name will be printed at the top of each page sent from your machine 1 Press Menu until System Setup appears on the bottom line of the display and press OK 2 Press OK when Machine Setup appears 3 Press OK when Machine ID appears 4 Enter your name or the company name using the number keypad You can enter alphanumeric characters using the number keypad and include special symbols by pressing the 0 ...

Страница 45: ...see page 5 1 Ready to Fax appears on the top line of the display 3 Adjust the resolution and the darkness to suit your fax needs 4 Enter the receiving fax machine s number You can use speed buttons speed dial numbers or group dial numbers For details about storing and searching for a number see page 10 3 5 Press Start 6 If an original is placed on the scanner glass select Yes to add another page L...

Страница 46: ... select the paper tray you will use for the fax reception 1 Press Menu until System Setup appears on the bottom line of the display and press OK 2 Press the Scroll buttons until Paper Setup appears and press OK 3 Press the Scroll buttons until Paper Source appears and press OK 4 Press the Scroll buttons until Fax Tray appears and press OK 5 Press the Scroll buttons until the paper tray you want ap...

Страница 47: ...ould normally If your machine detects a fax tone on the line it automatically starts to receive the fax Receiving faxes using DRPD mode Distinctive Ring is a telephone company service which enables an user to use a single telephone line to answer several different telephone numbers The particular number someone uses to call you is identified by different ringing patterns which consist of various c...

Страница 48: ...password to confirm it and press OK 7 Press Stop Clear to return to Standby mode When a fax is received in secure receiving mode your machine stores it in memory and shows Secure Receive to let you know that there is a fax received Notes DRPD must be set up again if you re assign your fax number or connect the machine to another telephone line After DRPD has been set up call your fax number again ...

Страница 49: ...ent resolution and darkness to suit your fax needs See page 9 1 4 Press Menu until Fax Feature appears on the bottom line of the display and press OK 5 Press the Scroll buttons until Multi Send appears and press OK 6 Enter the number of the first receiving fax machine and press OK You can use speed buttons speed dial numbers or group dial numbers For details see page 10 3 7 Enter the second fax nu...

Страница 50: ...er Page prompt The machine returns to Standby mode The display reminds you that you are in Standby mode and that a delayed fax is set Adding pages to a delayed fax You can add pages to the delayed transmissions previously reserved in your machine s memory 1 Load the originals to be added and adjust document settings 2 Press Menu until Fax Feature appears on the bottom line of the display and press...

Страница 51: ...OK 8 Enter the email address to which faxes are to be sent and press OK 9 Press Stop Clear to return to Standby mode Subsequent sent faxes will be forwarded to the specified email address Forwarding received faxes to another fax machine You can set your machine to forward incoming faxes to another fax number during a specified time period When a fax arrives at your machine it is stored in memory T...

Страница 52: ...equipped fax machine Sending a fax using ECM may take more time Receiving options Sent Report You can set your machine to print a confirmation report showing whether a transmission was successful how many pages were sent and more The available options are On Off and On Error which prints only when a transmission is not successful Image TCRb You can prevent the actual faxed material from being incl...

Страница 53: ...ode enables a user to use a single telephone line to answer several different telephone numbers In this menu you can set the machine to recognize which ring patterns to answer For details about this feature see page 9 4 a Distinctive Ring Pattern Detection Option Description 2 Press Menu until Fax Setup appears on the bottom line of the display and press OK 3 Press the Scroll buttons until Change ...

Страница 54: ...ou are prompted to enter a fax number while sending a fax To retrieve a number from speed buttons 1 to 15 press the corresponding speed button and press OK To retrieve a number from speed buttons 16 to 30 press Shift and then the corresponding speed button and press OK Speed dial numbers You can store up to 240 frequently used fax numbers in speed dial numbers Registering a speed dial number 1 Pre...

Страница 55: ... step 4 7 When you have finished press the Scroll buttons to select No at the Another No prompt and press OK 8 Press Stop Clear to return to Standby mode Using group dial numbers To use a group dial entry you need to search for and select it from memory When you are prompted to enter a fax number while sending a fax press Address Book See below Searching Phone Book for an entry There are two ways ...

Страница 56: ...oll buttons until the name you want appears and press OK 5 Press OK 6 Press OK when Yes appears to confirm the deletion 7 Press Stop Clear to return to Standby mode Printing Phone Book You can check your Phone Book settings by printing a list 1 Press Address Book until Print appears on the bottom line of the display 2 Press OK A list showing your speed button settings and speed dial and group dial...

Страница 57: ... devices Your machine supports USB memory devices with capacity of up to 512 MB You must use only an authorized USB memory device with an A plug type connector Use only a metal shielded USB memory device Note There are two USB plug types Insert a USB memory device into the USB memory port on the front of your machine Scanning to a USB memory device You can scan a document and save the scanned imag...

Страница 58: ...u can print TIFF BMP JPEG PDF and PRN files Direct Print option supported file types PRN PCL 6 compatible PRN files can be created by selecting the Print to file check box when you print a document The document will be saved as a PRN file rather than printed on paper Only PRN files created in this fashion can be printed directly from USB memory See the Software section to learn how to create a PRN...

Страница 59: ...a 1 Insert the USB memory device on which the backup data is stored in to the USB memory port 2 Press Menu until System Setup appears on the bottom line of the display and press OK 3 Press OK when Machine Setup appears 4 Press the Scroll buttons until Import Setting appears and press OK 5 Press the Scroll buttons until the data type you want appears and press OK 6 Press the Scroll buttons until th...

Страница 60: ... the Scroll buttons until Format appears and press OK 6 Press OK when Yes appears to confirm your selection 7 Press Stop Clear to return to Standby mode Viewing the USB memory status You can check the amount of memory space available for scanning and saving documents 1 Insert the USB memory device into the USB memory port on your machine 2 Press Scan Email 3 Press OK when Scan to USB appears on th...

Страница 61: ...ccessories You can purchase and install accessories to enhance your machine s performance and capacity The following accessories are available for your machine Note Your machine comes with 64 MB of on board memory and a 32 MB DIMM To expand the memory of your machine you must remove the existing DIMM and purchase a larger one Accessory Description Optional tray If you are experiencing frequent pap...

Страница 62: ...ecently received Schedule Jobs This list shows the documents currently stored for delayed faxes along with the starting time and type of each operation JunkFax Report This list shows the fax numbers specified as junk fax numbers To add or delete numbers to or from this list access the Junk Fax Setup menu Printing a report 1 Press Menu until System Setup appears on the bottom line of the display an...

Страница 63: ...axes and emails Fax Rcv Report Clears all records of received faxes NetScan Report Clears the information on network scan sessions in memory Cleaning your machine To maintain print and scan quality follow the cleaning procedures below each time the toner cartridge is replaced or if print and scan quality problems occur Note Cleaning the cabinet of the machine with cleaning materials containing lar...

Страница 64: ... you clean the scan unit at the start of each day and during the day as needed 1 Slightly dampen a soft lint free cloth or paper towel with water 2 Open the scanner lid 3 Wipe the surface of the scanner glass and ADF glass until it is clean and dry 4 Wipe the underside of the scanner lid and white sheet until it is clean and dry 5 Close the scanner lid Maintaining the toner cartridge Toner cartrid...

Страница 65: ...pears on the display The Status LED blinks red If this happens you can temporarily reestablish print quality by redistributing the remaining toner in the cartridge In some cases white streaks or light printing will still occur even after you have redistributed the toner 1 Open the front cover 2 Pull the toner cartridge out 3 Thoroughly roll the cartridge 5 or 6 times to distribute the toner evenly...

Страница 66: ...cartridge into the opening in the machine Tabs on the sides of the cartridge and corresponding grooves within the machine will guide the cartridge into the correct position until it locks into place completely 6 Close the front cover Make sure that the cover is securely closed Cleaning the drum If there are streaks or spots on your print the OPC drum of the toner cartridge may require cleaning 1 B...

Страница 67: ...Toner Empty Replace Toner message appears you can configure not to see this message again not to disturb you 1 Press Menu until System Setup appears on the bottom line of the display and press OK 2 Press the Scroll buttons until Maintenance appears and press OK 3 Press the Scroll buttons until CLR Empty Msg appears and press OK 4 Select On and press OK 5 Now the Toner Empty Replace Toner message d...

Страница 68: ...the ADF Document Jam appears on the display Caution To avoid tearing the document pull out the jammed document gently and slowly 1 Remove any remaining pages from the ADF 2 Open the ADF cover 1 ADF cover 1 3 Pull the jammed paper gently out of the ADF Note If you do not see the paper in this area refer to Roller misfeed See page 14 2 4 Close the ADF cover Then load the removed pages if any back in...

Страница 69: ...onal tray 2 or multi purpose tray below and page 14 3 Paper Jam 1 Open Close Door In the fuser area or around the toner cartridge page 14 3 Paper Jam 2 Check Inside In the paper exit area page 14 4 Duplex Jam 0 Check Inside In the duplex unit page 14 5 Duplex Jam 1 Check Inside Between the duplex unit and fuser area page 14 6 1 scanner lid 1 In the tray 1 1 Open and close the front cover The jamme...

Страница 70: ...raight up and out 5 Insert the trays back into the machine Printing automatically resumes In the multi purpose tray 1 If the paper is not feeding properly pull the paper out of the machine 2 Open and close the front cover to resume printing In the fuser area or around the toner cartridge Warning The fuser area is hot Take care not to burn your fingers when removing paper from the machine 1 Open th...

Страница 71: ...e 2 Gently pull the paper out of the output tray If you do not see the jammed paper or if there is any resistance when you pull stop and go to the next step 3 Open the rear cover 4 If you see the jammed paper push the pressure lever on each side up and remove the paper Skip to step 9 If you still do not see the paper go to the next step 5 Release the white strip the rear cover stopper and fully op...

Страница 72: ...pull push the pressure lever on each side up to loose the paper and then remove it 9 Return the lever door stopper and guide to their original position 10 Close the rear cover Printing automatically resumes In the duplex unit area If the duplex unit is not inserted correctly paper jam may occur Make sure that the duplex unit is inserted correctly Duplex Jam 0 1 Pull the duplex unit out of the mach...

Страница 73: ...rectly Do not overload the tray Ensure that the paper level is below the paper capacity mark on the inside wall of the tray Do not remove paper from the tray while your machine is printing Flex fan and straighten paper before loading Do not use creased damp or highly curled paper Do not mix paper types in a tray Use only recommended print media See page 5 8 Ensure that the recommended print side o...

Страница 74: ... memory space Document Jam The loaded original has jammed in the ADF Clear the jam See page 14 1 Door Open The front cover or rear cover is not securely latched Close the cover until it locks into place Duplex Jam 0 Check Inside Paper has jammed during duplex printing Clear the jam See page 14 5 Duplex Jam 1 Open Close Door Paper has jammed during duplex printing Clear the jam See page 14 6 Enter ...

Страница 75: ...ulti purpose tray See page 5 7 Network Error There is a problem with the network Contact your network administrator Message Meaning Suggested solutions No Answer The receiving fax machine has not answered after several redial attempts Try again Make sure that the receiving machine is operational Not Assigned The speed button or speed dial number you tried to use has no number or email address assi...

Страница 76: ...end Error AUTH There is a problem in SMTP authentication Configure the authentication setting Send Error DNS There is a problem in DNS Configure the DNS setting Send Error POP3 There is a problem in POP3 Configure the POP3 setting Send Error SMTP There is a problem in SMTP Change to the available server Send Error Wrong Config There is a problem on the network interface card Configure your network...

Страница 77: ...ou selected Continue at the NonGenuine Toner prompt Install the genuine toner cartridge Toner Empty Replace Toner The toner in the cartridge has run out Install a new genuine toner cartridge You can keep printing but the quality cannot be guaranteed and the product support is no longer provided You can configure not to see the Toner Empty Replace Toner message See page 13 6 Replace Toner The toner...

Страница 78: ... If an original does not feed into the machine the ADF rubber pad may require to be replaced Contact your service representative Transparencies stick together in the paper exit Use only transparencies specifically designed for laser printers Remove each transparency as it exits from the machine Envelopes skew or fail to feed correctly Ensure that the paper guides are against both sides of the enve...

Страница 79: ...nect Try a print job that you have already printed successfully If possible attach the cable and the machine to another computer and try a print job that you know works Finally try a new printer cable The wrong printer driver was selected Check the application s printer selection menu to ensure that your machine is selected The software application is malfunctioning Try printing a job from another...

Страница 80: ...Try a different brand of paper See page 5 8 The paper lot is bad The manufacturing processes can cause some areas to reject toner Try a different kind or brand of paper If these steps do not correct the problem contact a service representative Vertical lines If black vertical streaks appear on the page The drum inside the toner cartridge has probably been scratched Remove the toner cartridge and i...

Страница 81: ...e and humidity can cause paper curl See page 5 8 Turn over the stack of paper in the tray Also try rotating the paper 180 in the tray Try printing to the rear cover Condition Suggested solutions Wrinkles or creases Ensure that the paper is loaded properly Check the paper type and quality See page 5 8 Turn over the stack of paper in the tray Also try rotating the paper 180 in the tray Try printing ...

Страница 82: ... copies Smears lines marks or spots appears on copies If defects are on the original press Darkness to lighten the background of your copies If no defects are on the original clean the scan unit See page 13 3 Copy image is skewed Ensure that the original is face down on the scanner glass or face up in the ADF Check that the copy paper is loaded correctly Blank copies print out Ensure that the orig...

Страница 83: ...text Communication speed slows in scan mode because of the large amount of memory required to analyze and reproduce the scanned image Set your computer to the ECP printer mode through BIOS setting It will help to increase the speed For details about how to set BIOS refer to your computer user s guide Message appears on your computer screen Device can t be set to the H W mode you want Port is being...

Страница 84: ...ADF rubber pad may need to be replaced Contact your service representative Faxes are not received automatically The receiving mode should be set to Fax Make sure that there is paper in the tray Check to see if the display shows any error message If it does clear the problem The machine does not send Make sure that the original is loaded in the ADF or on the scanner glass Sending should show up on ...

Страница 85: ...stScript driver referring to the Software section Print a configuration page and verify that the PS version is available for printing If the problem persists contact a service representative Common Macintosh problems Limit Check Error message appears The print job was too complex You might need to reduce the complexity of the page or install more memory A PostScript error page prints The print job...

Страница 86: ...ity from your body by touching something metal such as the metal back plate on any device plugged into a grounded power source If you walk round before finishing installation discharge any static electricity once again Installing a memory DIMM Your machine has a dual in line memory module DIMM slot Use this DIMM slot to install additional memory Your machine has 96 MB of memory It can be expanded ...

Страница 87: ... the PostScript printer driver is installed on your computer For details about installing the PS printer driver see the Software section 2 Click the Windows Start menu 3 For Windows 98 Me NT 4 0 2000 select Settings and then Printers For Windows XP select Printers and Faxes 4 Select the Printer Driver Type 104 PS printer 5 Click the right mouse button on the machine icon and select Properties 6 Fo...

Страница 88: ...H Display 16 characters x 2 lines Toner cartridge yieldb 8 000 pages for starter 4 000 pages Memory 96 MB max 320 MB External dimension W x D x H 466 x 435 4 x 458 mm 18 3 x 17 1 x 18 in Printer specifications Weight including consumables 18 9 Kg 41 6 lb Package weight Paper 2 8 Kg 6 17 lb Plastic 0 7 Kg 1 54 lb Duty cycle Monthly print Up to 25 000 pages a Sound Pressure Level ISO 7779 b Average ...

Страница 89: ...laten up to 600 x 300 photo using ADF Print up to 600 x 600 text text photo photo Zoom rate Scanner glass 25 to 400 ADF 25 to 100 Multiple copies 1 to 99 pages Grayscale 256 levels Facsimile specifications Item Description Compatibility ITU T Group 3 Applicable line Public Switched Telephone Network PSTN or behind PABX Data coding MH MR MMR JBIG JPEG Color fax transmission JPEG Modem speed 33 6 Kb...

Страница 90: ... Pattern Detection 9 4 drum clean 13 5 E Erasing background special copy 6 4 error messages 14 7 F fax header set 9 1 Fax mode receiving mode 9 4 fax number set 9 1 faxing default settings change 10 2 delayed faxes 9 7 fax setup 10 1 forwarding faxes 9 8 Multiple Send faxes 9 6 original settings 9 1 priority faxes 9 7 receiving faxes 9 3 sending faxes 9 2 forwarding faxes 9 8 G Group dial numbers ...

Страница 91: ... Ans Fax mode 9 4 in DRPD mode 9 4 in Fax mode 9 4 in Secure Receiving mode 9 5 in Tel mode 9 4 in the memory 9 6 receiving modes 9 3 redialing automatically 9 3 manually 9 3 replacing toner cartridge 13 5 replacing toner cartridge 13 6 reports print 13 1 ringer 2 3 S scan power save mode 2 4 ScanClair Type 104 program adding scanners 8 2 problems 14 17 scanner glass cleaning 13 3 loading document...

Страница 92: ......

Страница 93: ...Software section ...

Страница 94: ...inting to a file PRN 13 Printer Settings 13 Layout Tab 14 Paper Tab 14 Graphics Tab 15 Extras Tab 16 About Tab 17 Printer Tab 17 Using a Favorite Setting 17 Using Help 17 Chapter 3 ADVANCED PRINTING Printing Multiple Pages on One Sheet of Paper N Up Printing 18 Printing Posters 19 Printing Booklets 19 Printing on Both Sides of Paper 20 Printing a Reduced or Enlarged Document 20 Fitting Your Docume...

Страница 95: ...Setting Up a Client Computer 24 Chapter 6 USING UTILITY APPLICATIONS Using Printer Settings Utility 25 Using Onscreen Help File 25 Opening the Troubleshooting Guide 25 Changing the Status Monitor Program Settings 25 Chapter 7 SCANNING Scanning Using SmarThru 26 Uninstalling SmarThru 26 Using SmarThru 27 Using Onscreen Help File 28 Scanning Process with TWAIN enabled Software 28 Scanning Using the ...

Страница 96: ...nter 30 For a Network connected Macintosh 30 For a USB connected Macintosh 30 Printing 31 Printing a Document 31 Changing Printer Settings 31 Printing Multiple Pages on One Sheet of Paper 32 Duplex Printing 33 Scanning 33 ...

Страница 97: ...rk skip this step and go to Installing Software for Network Printing on page 7 You can install the printer software using the typical or custom method NOTE If the New Hardware Wizard window appears during the installation procedure click in the upper right corner of the box to close the window or click Cancel Typical Installation This is recommended for most users All components necessary for prin...

Страница 98: ...orrectly click Yes If not click No to reprint it 7 Click Finish NOTE After setup is complete if your printer driver doesn t work properly reinstall the printer driver See Reinstalling Printer Software on page 10 Custom Installation You can choose individual components to install 1 Make sure that the printer is connected to your computer and powered on 2 Insert the supplied CD ROM into your CD ROM ...

Страница 99: ...inted at the end of the installation The installation window that appears in this User s Guide may differ depending on the printer and interface in use 6 Select the components to be installed and click Next NOTE You can change the desired installation folder by clicking Browse 7 After the installation is finished a window asking you to print a test page appears If you choose to print a test page s...

Страница 100: ...un Type X Setup exe replacing X with the letter which represents your drive and click OK 3 Click Next If necessary select a language from the drop down list View User s Guide Allows you to view the User s Guide If your computer doesn t have Adobe Acrobat click on this option and it will automatically install Adobe Acrobat Reader for you 4 Select Typical installation for a network printer Click Nex...

Страница 101: ... exe replacing X with the letter which represents your drive and click OK 3 Click Next If necessary select a language from the drop down list View User s Guide Allows you to view the User s Guide If your computer doesn t have Adobe Acrobat click on this option and it will automatically install Adobe Acrobat Reader for you 4 Select Custom installation Click Next 5 The list of printers available on ...

Страница 102: ...to be installed After selecting the components the following window appears You can also change the printer name set the printer to be shared on the network set the printer as the default printer and change the port name of each printer Click Next To install this software on a server select the Setting up this printer on a server checkbox 7 After the installation is finished a window appears askin...

Страница 103: ...se button You will see a component list so that you can reinstall any item individually NOTE If your printer is not already connected to the computer the following window will appear After connecting the printer click Next If you don t want to connect the printer at this time click Next and No on the following screen Then the installation will start and a test page will not be printed at the end o...

Страница 104: ...e 3 Select Remove and click Next You will see a component list so that you can remove any item individually 4 Select the components you want to remove and then click Next 5 When your computer asks you to confirm your selection click Yes The selected driver and all of its components are removed from your computer 6 After the software is removed click Finish ...

Страница 105: ...r printing from various Windows applications The exact steps for printing a document may vary depending on the application program you are using Refer to the User s Guide of your software application for the exact printing procedure 1 Open the document you want to print 2 Select Print from the File menu The Print window is displayed It may look slightly different depending on your application The ...

Страница 106: ...iffer depending on the printer in use If you access printer properties through the Printers folder you can view additional Windows based tabs refer to your Windows User s Guide and the Printer tab see Printer Tab on page 17 NOTES Most Windows applications will override settings you specify in the printer driver Change all print settings available in the software application first and change any re...

Страница 107: ...12 for more information on accessing printer properties Click the Paper tab to access various paper properties Copies Copies allows you to choose the number of copies to be printed You can select 1 to 999 copies Size Size allows you to set the size of paper you loaded in the tray If the required size is not listed in the Size box click Custom When the Custom Paper Setting window appears set the pa...

Страница 108: ...ore information on accessing printer properties Click the Graphic tab to display the properties shown below Resolution The higher the setting the sharper the clarity of printed characters and graphics The higher setting also may increase the time it takes to print a document Image Mode The available options are Normal 1 2 3 and Text Enhance Printer Setting If you select this option this feature is...

Страница 109: ... select output options for your document See Printing a Document on page 12 for more information about accessing the printer properties Click the Extras tab to access the following feature Watermark You can create a background text image to be printed on each page of your document For details see Using Watermarks on page 21 Overlay Overlays are often used to take the place of preprinted forms and ...

Страница 110: ...ble on each properties tab allows you to save the current properties settings for future use To save a Favorites item 1 Change the settings as needed on each tab 2 Enter a name for the item in the Favorites input box 3 Click Save When you save Favorites all current driver settings are saved To use a saved setting select the item from the Favorites drop down list The printer is now set to print acc...

Страница 111: ... Printing Multiple Pages on One Sheet of Paper N Up Printing You can select the number of pages to print on a single sheet of paper To print more than one page per sheet the pages will be reduced in size and arranged in the order you specify You can print up to 16 pages on one sheet 1 To change the print settings from your software application access printer properties See Printing a Document on p...

Страница 112: ...easier to pasting the sheets together 4 Click the Paper tab select the paper source size and type 5 Click OK and print the document You can complete the poster by pasting the sheets together 0 15 inches 0 15 inches Printing Booklets This printer feature allows you to print your document on both sides of the paper and arranges the pages so that the paper can be folded in half after printing to prod...

Страница 113: ... 2 5 3 2 5 3 2 5 3 2 5 3 Printing a Reduced or Enlarged Document You can change the size of a page s content to appear larger or smaller on the printed page 1 To change the print settings from your software application access printer properties See Printing a Document on page 12 2 From the Paper tab select Reduce Enlarge in the Printing Type drop down list 3 Enter the scaling rate in the Percentag...

Страница 114: ... message displays in the preview window When the First Page Only box is checked the watermark prints on the first page only 4 Select watermark options You can select the font name style size or grayscale level from the Font Attributes section and set the angle of the watermark from the Message Angle section 5 Click Add to add a new watermark to the list 6 When you have finished editing click OK an...

Страница 115: ...ST Dear ABC Regards WORLD BEST Using a Page Overlay After an overlay has been created it is ready to be printed with your document To print an overlay with a document 1 Create or open the document you want to print 2 To change the print settings from your software application access printer properties See Printing a Document on page 12 3 Click the Extras tab 4 Select the desired overlay from the O...

Страница 116: ...ws applications will override settings you specify in the printer driver Change all print settings available in the software application first and change any remaining settings using the printer driver The settings you change remain in effect only while you are using the current program To make your changes permanent make them in the Printers folder The following procedure is for Windows XP For ot...

Страница 117: ...D ROM Setting Up a Host Computer 1 Start Windows 2 From the Start menu select Printers and Faxes 3 Double click your printer driver icon 4 From the Printer menu select Sharing 5 Check the Share this printer box 6 Fill in the Shared Name field and then click OK Setting Up a Client Computer 1 Right click the Windows Start button and select Explorer 2 Select My Network Places and then right click Sea...

Страница 118: ...hanges to the printer click the Apply button Using Onscreen Help File For more information about Printer Settings Utility click Opening the Troubleshooting Guide Double click the Status Monitor icon on the Windows task bar Or from the Start menu select Programs or All Programs Type 104 Troubleshooting Guide Double click this icon Changing the Status Monitor Program Settings Select the Status Monit...

Страница 119: ...ds upon various factors including computer speed available disk space memory the size of the image being scanned and bit depth settings Thus depending on your system and what you are scanning you may not be able to scan at certain resolutions especially using enhanced dpi Scanning Using SmarThru SmarThru is the accompanying software for your machine With SmarThru scanning is the proverbial piece o...

Страница 120: ...files you have saved on your computer This is available when your machine supports the fax feature Double click this icon Make sure that your printer is selected 4 Click Scan To The Scan To menu bar appears on the SmarThru 4 window Scan To lets you use the following services Application Scanning an image and placing it in an image editor application such as Paint or Adobe Photoshop E mail Scanning...

Страница 121: ... PhotoDeluxe or Photoshop 4 Open the TWAIN window and set the scan options 5 Scan and save your scanned image NOTE You need to follow the program s instructions for acquiring an image Please refer to the user s guide of the application Scanning Using the WIA Driver Your machine also supports the Windows Image Acquisition WIA driver for scanning images WIA is one of the standard components provided...

Страница 122: ... machine provides you with the PPD file to use the PS driver Apple LaserWriter driver for printing on a Macintosh computer Also it provides you with the Twain driver for scanning on a Macintosh computer Printer driver Installing the printer driver 1 Connect your machine to the computer using the USB cable or the Ethernet cable 2 Turn on your computer and the machine 3 Insert the PostScript driver ...

Страница 123: ...your printer will be different depending on which cable you use to connect the printer to your computer the network cable or the USB cable For a Network connected Macintosh 1 Follow the instructions on Installing Software for Macintosh on page 29 to install the PPD file on your computer 2 Open Print Center or Printer Setup Utility from the Utilities folder 3 Click Add on the Printer List 4 Select ...

Страница 124: ...e menu and click Print 5 Choose the number of copies you want and indicate which pages you want to print 6 Click Print when you finish setting the options Mac OS 10 3 Make sure that your printer is selected Changing Printer Settings You can use advanced printing features when using your printer From your Macintosh application select Print from the File menu The printer name which appears in the pr...

Страница 125: ...e of print material select the corresponding paper type Resolution Quality You can select the printing resolution The higher the setting the sharper the clarity of printed characters and graphics The higher setting also may increase the time it takes to print a document Mac OS 10 3 Printing Multiple Pages on One Sheet of Paper You can print more than one page on a single sheet of paper This featur...

Страница 126: ...and the first page of the next copy will be printed on the front and back of one sheet In case of Uncollated copy the same page will be printed on the front and back of one sheet Therefore if you need multiple copies of a document and you want those copies on both sides of the paper you must print them one at a time as separate print jobs Mac OS 10 3 Scanning If you want to scan documents using ot...

Страница 127: ...te 22 print 22 P Paper properties set 14 paper size set 14 paper source set Windows 14 paper type set Macintosh 32 poster print 19 PostScript driver installing 23 print document 12 fit to page 20 from Macintosh 31 from Windows 12 N up Macintosh 32 Windows 18 overlay 22 poster 21 PRN 13 scaling 20 watermark 21 printer properties set Macintosh 31 Windows 13 23 printer resolution set Macintosh 32 Win...

Страница 128: ...stall Windows 10 system requirements Macintosh 29 uninstall Windows 11 status monitor use 25 T toner save set 15 TWAIN scan 28 U uninstall software Windows 11 W watermark create 21 delete 21 edit 21 print 21 WIA scan 28 ...

Страница 129: ......

Страница 130: ...Laser MFP User s Guide G960 8650 ...

Страница 131: ...fully before you use this machine and keep it handy for future reference For safe and correct use please be sure to read the Safety Information in this manual before using the machine Laser MFP Network Printer User s Guide ...

Страница 132: ...lt of handling or operating the machine Copyright 2007 Microsoft Windows Windows 98 Windows NT Windows Me Windows 2000 Windows XP and Windows 2003 are registered trademarks of Microsoft Corporation Macintosh AppleTalk and EtherTalk are registered trademarks of Apple Computer Inc All other brand or product names are trademarks of their respective companies or organizations ...

Страница 133: ...s setup 2 1 3 TCP IP environment Management protocols 3 1 DHCP BOOTP 3 1 HTTP 3 1 SNMP 3 1 SLP 3 2 Dynamic DNS DDNS 3 2 WINS 3 2 Bonjour 3 3 UPnP 3 3 Printing protocols 3 4 Standard TCP IP port 3 4 LPR port 3 4 Printer Port 3 5 IPP port 3 5 Additional functions 3 6 4 EtherTalk environment EtherTalk printing 4 1 Configuring EtherTalk 4 1 Configuring the printer 4 1 TCP IP printing 4 2 Bonjour print...

Страница 134: ...the printer Operating system Network environment Printing protocol Action Windows 98 NT ME 2000 XP 2003 TCP IP LPD LPR IPP See Chapter 3 TCP IP environment Unix AT T system V Rel 4 2 BSD4 3 HP UX Rel 9 x Rel 10 x SCO 5 x SUNOS 5 5 Sparc or Solaris 2 5 TCP IP LPD LPR See Chapter 3 TCP IP environment Macintosh Macintosh 8 6 9 2 10 1 10 3 or higher TCP IP EtherTalk Bonjour See Chapter 4 EtherTalk env...

Страница 135: ...t TCP IP addresses for the print server You will need your printer card s MAC address IP address subnet mask and gateway address First check with your network administrator for the TCP IP addresses Note The MAC address is the hardware serial number of the network printer card You can check the address by printing the Network Printer Configuration Page For printing the page refer to your printer us...

Страница 136: ...rk printer card s MAC address hardware address IP address subnet mask default gateway and then click Apply 4 Click OK to confirm the settings 5 Click Exit to close the SetIP program Using Web Image Monitor Type 104 1 Run your web browser 2 Enter your print server s IP address in the URL field and click Go 3 Click Network Settings Æ TCP IP 4 Select Static from IP Address Assignment Method 5 Enter y...

Страница 137: ...tion layer protocol for distributed collaborative hypermedia information systems It is a generic stateless protocol which can be used for many tasks beyond its use for hypertext such as with name servers and distributed object management systems You are using HTTP when you connect your network printer via a web browser The Network Printer Card has a built in web server Web Image Monitor Type 104 Y...

Страница 138: ...r Agent Dynamic DNS DDNS DNS Domain Name System is used for registration of domain names and provides Host names to an IP address resolution service For printer devices DNS may be utilised for printer domain name registration so that print server clients may refer to the printer by its host name rather than by its IP address Even though a printer s IP address is changed all clients can operate thi...

Страница 139: ...evices in the home office and public spaces UPnP is more than just a simple extension of the plug and play peripheral model It is designed to support zero configuration invisible networking and automatic discovery for a wide breadth of device categories from a wide range of vendors This means a device can dynamically join a network obtain an IP address convey its capabilities and learn about the p...

Страница 140: ...e the printing service from LPD running on a network print server through the LPR port Most operating systems such as Microsoft Windows NT 2000 XP 2003 and support LPR port printing Configuring an LPR port You can enable or disable the LPR Printing port through Web Image Monitor Type 104 Select Network Settings Æ Raw TCP IP LPR IPP You can also change the port number of LPR LPD The default port nu...

Страница 141: ... click OK 7 When the port name displays in the Print to the following port list click OK or Close IPP port Internet Printing Protocol IPP allows printing across the Internet meaning that you can send a print job to your printer from a remote place if you are an Internet user no matter what operating system you use or where you are Configuring IPP in the print server The network administrator must ...

Страница 142: ...nique for all slots and should not include symbols The length of the user name and the password should each be less than 7 characters Additional functions The following are additional functions you can use through Web Image Monitor Type 104 Printer properties settings You can check and modify printer and document properties for an installed printer For properties that are not supported by the prin...

Страница 143: ...to change the action Apply Undo and to print to the network print server Note Ranges of addresses shouldn t contain null or 0 0 0 0 values Reset 1 Run your web browser and access Web Image Monitor Type 104 2 Click Network Settings Æ Reset You can reboot the network print server if your network settings are not applied correctly or the network card is disconnected from your network Ethernet speed Y...

Страница 144: ...s This name is automatically displayed on Chooser Printer Type shows the printer type Last Error Occurred shows the last error RTMP allows you to set the time in seconds after which the routing table entry maintained by the RTMP protocol times out ZIP current zone shows the AppleTalk Zone name If there is no configured zone asterisk should be displayed PAP wait time before transmitting a tickle pa...

Страница 145: ...ist as the default printer in boldface It also appears in the Printer pop up menu when you print a document Bonjour printer Usually used in Macintosh networks to search for network devices Bonjour consists of IPv4 Link Local Addressing Multicast DNS and DNS Service Discovery Known as zero configuration networking Bonjour uses industry standard IP protocols to allow devices to automatically find ea...

Страница 146: ... This product includes software developed by the OpenSSL Project for use in the OpenSSL Toolkit http www openssl org 5 The names OpenSSL Toolkit and OpenSSL Project must not be used to endorse or promote products derived from this software without prior written permission 6 For written permission please contact openssl core openssl org 7 Products derived from this software may not be called OpenSS...

Страница 147: ...Appendix 5 2 This product includes cryptographic software written by Eric Young eay cryptsoft com This product includes software written by Tim Hudson tjh cryptsoft com ...

Страница 148: ...Monitor Type 104 2 2 IP filtering 3 6 IPP port 3 5 L LEDs 1 1 LPR port 3 4 N Network administration software install 2 1 Network environments supported 1 1 Network Printer Card connect 1 1 P Printer Port 3 5 S SetIP 2 1 SLP 3 2 SNMP 3 1 Specifications 5 1 Standard TCP IP port 3 4 T TCP IP in Macintosh 4 2 management protocol BOOTP 3 1 DDNS 3 2 DHCP 3 1 HTTP 3 1 SLP 3 2 SNMP 3 1 UPnP 3 3 WINS 3 2 p...

Страница 149: ...G960 8651 ...

Страница 150: ......

Страница 151: ...lt of handling or operating the machine Copyright 2007 Microsoft Windows Windows 98 Windows NT Windows Me Windows 2000 Windows XP and Windows 2003 are registered trademarks of Microsoft Corporation Macintosh AppleTalk and EtherTalk are registered trademarks of Apple Computer Inc All other brand or product names are trademarks of their respective companies or organizations ...

Страница 152: ... Global Address Book During Scan To Email Input 4 3 LDAP Server Configuration LDAP Server Setup in EWS 5 IP Address or Host Name 6 LDAP Server 6 LDAP Server Port 6 Search Root Dir3ectory 6 Login Name 6 Login Password 6 Maximum Number of Search Results 7 Search Timeout 7 LDAP Referrals 7 Example of Search Root Directory and Login Name 8 ...

Страница 153: ...atabase to access e mail addresses LDAP Lightweight Directory Access Protocol is a popular protocol used by large accounts to access large quantities of data including corporate address books The local system will need to know where the LDAP server is located on the network and may need a login name and password if the LDAP server is not configured to allow NULL names and passwords The user can us...

Страница 154: ...Press ok if Search ID is displayed Input Search ID LDAP client will search email addresses from LDAP server Select email address among the search result Search Global Address Book During Scan To Email Input When prompted to enter a destination address while input scan to email information Press Address Book Input Search ID and select email address LDAP client will search email addresses from LDAP ...

Страница 155: ...5 3 LDAP Server Configuration LDAP Server Setup in EWS URI http Printer s IP Address The LDAP Directory feature is located on the Machine Settings tab as figure 1 Figure 1 LDAP Server Setup ...

Страница 156: ... are 0 0 0 1 255 255 255 254 0 0 0 0 255 255 255 255 are not allowed to set the IP address of the machine LDAP Server Port This provides the user to configure LDAP port number Input 1 65535 Default is 389 Search Directory Root This provides user to configure directory root with string format Input the top level of the LDAP directory tree which user want to search Login Name This provides user to c...

Страница 157: ...out This provides user to configure LDAP server timeout option 0 is to waiting for server timeout User timeout s range is from 0 5 100 Default is 30 LDAP Referrals This provide user to enable disable LDAP referral This is an option of usage of referral server If enabled and If LDAP server has no data to search LDAP server request same search data from referral server ...

Страница 158: ...ects contain attributes e g uid user ID ex test1 cn common name ex jimbob mail e mail address ex jimbob example com User should configure Optional Information as following Search Root Directory dc example dc test dc com Login name cn jimbob dc example dc test dc com dc example dc test dc com ou manager ou people ou local ou guest uid advance uid test1 uid basic uid test2 ...

Страница 159: ...G960 8651 ...

Отзывы: