background image

2-16


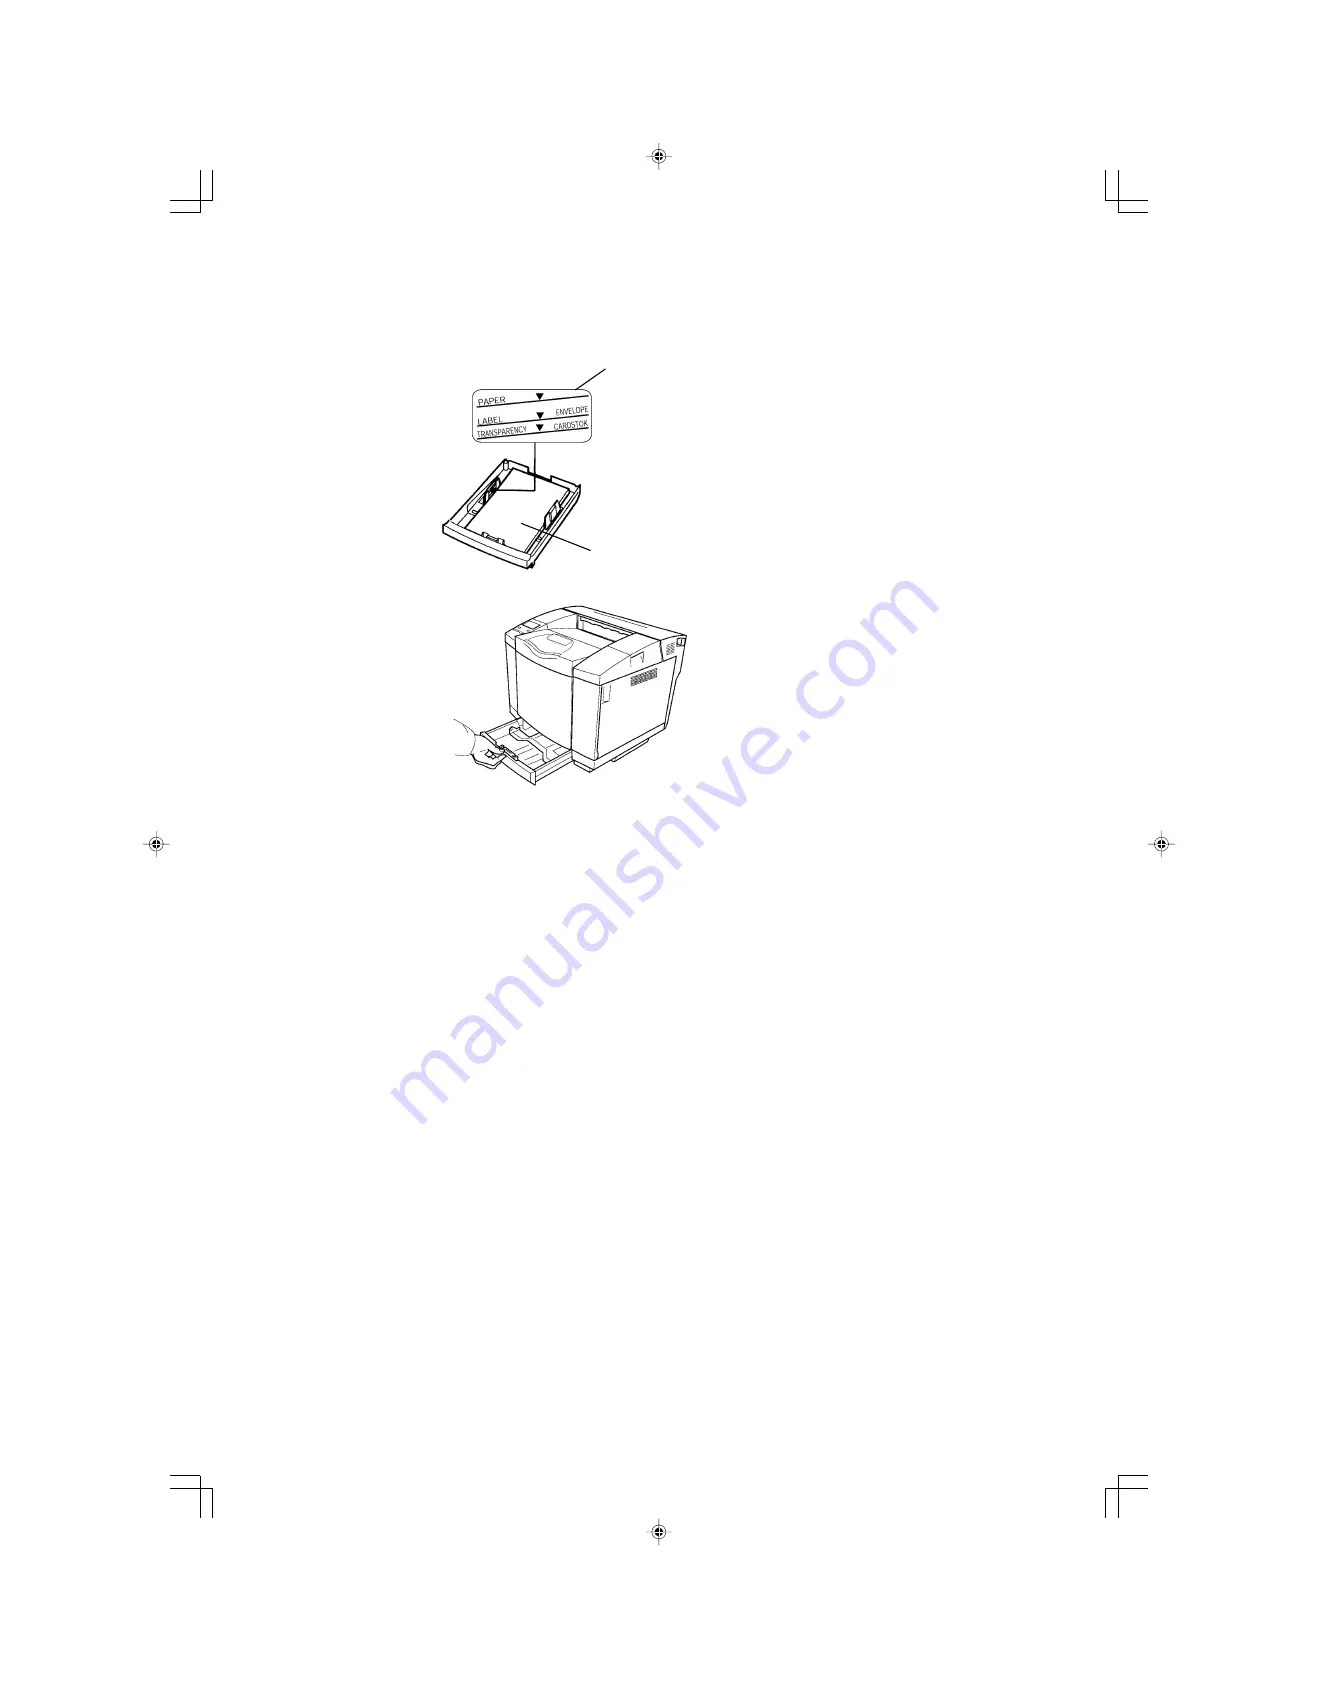
(d)  Supply paper (A4-size plain paper 

in this example) in the paper tray.  
Pay attention to the following: 

-  Check that the four corners 

of the paper are set firmly in 
the paper tray. 

-  Supply an appropriate 

amount of paper so that it 
does not exceed its height 
limit. 


(e)  Re-mount the paper tray into the 

printer.  


Height limit by 
media type 

Paper

Содержание Aficio CL800

Страница 1: ... 1 Plane Tree Crescent Feltham Middlesex TW13 7HG Phone 44 0 20 8261 4000 Germany RICOH DEUTSCHLAND GmbH Mergenthalerallee 38 40 65760 Eschborn Phone 49 0 6196 9060 France RICOH FRANCE S A 383 Avenue du Général de Gaulle BP 307 92143 Clamart Cedex Phone 33 0 821 01 74 26 Spain RICOH ESPAÑA S A Avda Litoral Mar 12 14 Blue Building Marina Village 08005 Barcelona Phone 34 0 93 295 7600 Italy RICOH IT...

Страница 2: ...ctions Please keep this manual in a handy place near the machine Power Source 220 240 V 50 60 Hz 6 A or more Please be sure to connect the power cable to a power source as above Operator Safety This printer is considered a class 1 3B laser device safe for office EDP use The printer contains 5 milliwat 770 795 nanometer wavelength AlGaAs Laser Diode Direct or indirect reflected eye con tact with th...

Страница 3: ...stallation 2 1 1 Checking Your Package 2 2 2 Procedure for Installation 2 4 3 Checking Where to Install the Printer 2 5 4 Checking the Power Source 2 7 5 Installing the Printer 2 8 6 Preparing the printer 2 9 7 Connecting the Power Cord 2 14 8 Ensuring the Printer Operation 2 15 9 Connecting the Printer to a PC 2 21 10 Installing the Printer Driver 2 22 ...

Страница 4: ...n this manual the following important symbols are used WARNING Indicates a potentially hazardous situation which if instructions are not followed could result in death or serious injury CAUTION Indicates a potentially hazardous situation which if instructions are not followed may result in minor or moderate injury or damage to property ...

Страница 5: ...epair Your equipment s cover has been damaged Do not incinerate spilled toner or used toner Toner dust might ignite when exposed to an open flame Disposal should take place at an authorized dealer or an appropriate collection site If you dispose of the used toner containers yourself dispose of them according to local regulations Dispose of the used toner cartridge in accordance with the local regu...

Страница 6: ...rinter and wait about 30 minutes After that install the new fusing unit Not waiting for the unit to cool down can result in a burn Do not pull out the fusing unit forcefully It may cause the unit to fall and result in an injury When touching the fusing unit do not touch any areas other than the handle as it may cause a burn When removing misfed paper do not touch the fusing unit because it could b...

Страница 7: ...tric shock When you pull out the plug from the socket grip the plug not the cord to avoid damaging the cord and causing a fire or an electric shock When moving the printer after use do not take out any of the Toners Photo Conductor Units nor the Waste Toner Bottle to prevent toner spill inside the machine When lifting the machine use the inset grips on both sides Otherwise the printer could break ...

Страница 8: ...rning Labels The printer has warning labels on the following positions Should the warning label be damaged or peeled off contact your dealer or service representative Printer body Toner cartridge Waste toner pack ...

Страница 9: ...very Time 45 seconds or less As an ENERGY STAR Partner we have determined that this machine model meets the ENERGY STAR Guidelines for energy efficiency The ENERGY STAR Guidelines intend to establish an international energy saving system for developing and introducing energy efficient office equipment to deal with environmental issues such as global warming When a product meets the ENERGY STAR Gui...

Страница 10: ...asurements were made in accordance with ISO7779 and reported in conformance with ISO 9296 Noise Emission Sound Power Level Mainframe only Stand by 54 dB A During Printing 66 dB A Sound Power Level Mainframe only Stand by 46 dB A During Printing 60 dB A ...

Страница 11: ...1 1 Chapter 1 Before Using the Printer 1 PC Connection 1 2 2 Names of Printer Components 1 3 ...

Страница 12: ...1 2 1 PC Connection You can connect the printer directly to a Windows PC using the USB interface supported in the standard configuration USB cable PC Printer ...

Страница 13: ... Control panel Top cover exit tray Stacks printed sheets coming out face down Paper trays Tray 1 standard and Tray 2 option Load print media Front cover Paper Feeder option Provides an additional paper tray Duplex Unit option Enables print on both sides of the sheets ...

Страница 14: ...nit 2 3 Rear View with Duplex Unit Back cover when opened Duplex cover when opened Paper reverse unit when opened Reverses the paper Power cord inlet Back cover USB interface connector Connects the USB interface cable Main power Switch ...

Страница 15: ...ridge Produces per color images developed by laser beams on its photosensitive belt Toner cartridges From top to bottom black K yellow Y magenta M and cyan C Waste toner pack Stores waste toner Fuser unit Thermally fuses toner powder ...

Страница 16: ...1 6 ...

Страница 17: ... 2 4 3 Checking Where to Install the Printer 2 5 4 Checking the Power Source 2 7 5 Installing the Printer 2 8 6 Preparing the printer 2 9 7 Connecting the Power Cord 2 14 8 Ensuring the Printer Operation 2 15 9 Connecting the Printer to a PC 2 21 10 Installing the Printer Driver 2 22 ...

Страница 18: ... Power cord Accessory kit Setup Guide This manual Option Setup Guide Two CD ROMs Printer driver Manuals Starter kit Belt cartridge The printer includes toner cartridges K Y M and C one each a waste toner pack and a fuser unit as consumables In this manual the Photo Conductor Unit Type 140 is called the Belt cartridge and the Waste Toner Bottle Type 140 is called the Waste toner pack ...

Страница 19: ...uctions Acrobat Reader and other items The printer includes toner cartridges K Y M and C one of each and a waste toner pack as consumables The toner cartridge included in the starter kit has the capacity to print no more than 1500 pages For details on when to replace consumables see Operating Instructions attached to the CD ROM ...

Страница 20: ...ter Check where to install the printer page 2 5 Check the power source page 2 7 Install the printer page 2 8 Preparing the printer page 2 9 Connect the power cord page 2 14 Ensure the printer operation page 2 15 Connect the printer to a PC page 2 21 Install the printer driver page 2 22 ...

Страница 21: ...re and humidity To load paper replace consumables and resolve paper jams etc leave a clearance as shown below A more than 25 cm More than 35 cm when the AD460 duplex unit is attached B more than 20 cm C more than 70 cm D more than 50 cm When moving from a cold to warm location or if the local temperature rises suddenly condensation may occur inside If this occurs leave the machine unused for at le...

Страница 22: ...xit and nearby parts may become hot during printing This is normal and no reason for concern This unit is designed and manufactured to have a life expectancy of 5 years based on a monthly printing volume of 2 000 sheets A4 with a 1 1 ratio of color printing and monochrome printing when the power is on for a total of 8 hours per day If the monthly number of printed pages exceeds 10 000 sheets or if...

Страница 23: ...t in event of an emergency it can be unplugged easily h h h h Only connect the printer to the power source described on this page h h h h Avoid multi wiring Power Consumption The printer consumes power of up to 1 300 W When determining the power source for the printer consider its electric power capacity as well Should the rated power capacity be exceeded the circuit breaker may be shut down affec...

Страница 24: ... printer will break or cause injury if dropped h h h h To prevent an injury this printer should be lifted by at least two people Installation procedure a Take out the printer from its packing box You will find four grips at the bottom of the printer Have two or more persons grasp these grips firmly to carry the printer b Install the printer in a suitable place Four grips ...

Страница 25: ...or reverse it Install the cyan C magenta M yellow Y and black K toner cartridges as shown below Installation procedure a Unlock the lever on the front cover and open the front cover b Remove the shipping support and four toner cartridges c Pull out the orange tape to remove the protective paper d Rock the toner cartridge three or four times in the direction of arrows to level out the toner inside ...

Страница 26: ...the protector because it is necessary for transporting the printer f For each setting softly force the toner cartridge along the guides in the printer Install the cyan C magenta M yellow Y and black K toner cartridges in that order g Close the front cover securely by pushing it until it locks Protector ...

Страница 27: ...t off Removal will prevent normal printing Installation procedure a Pull up the lever on the top cover and open the top cover until it stops Keep the top cover fully open during the replacement work b Remove the two shipping pins of a new belt cartridge c Remove the protective sheet for the belt cartridge Pay attention to the following Do not touch the photosensitive belt Do not wipe off any of th...

Страница 28: ...2 12 e Restore the lock levers f Close the top cover by pushing it until it locks While closing keep holding the top cover until you close it to the locked position ...

Страница 29: ... the back cover and open the back cover until it stops Keep the top cover fully open during the replacement work b Pull out the tension release piece orange colored provided at the left and right side of fuser unit c Close the back cover and push it until it locks While closing keep holding the back cover until you close it to the locked position Back cover Lever Fuser unit Tension release piece O...

Страница 30: ... to handle the plug with wet hands Doing this may result in receiving an electric shock Procedure for connecting the power cord a Before connecting the power cord check that the main power switch for the printer is placed in the OFF position b Insert the connector of the power cord into the printer socket c Insert the plug of the power cord into a grounded wall socket Main power switch Power conne...

Страница 31: ...standard A4 size paper for the test print after the printer installation 8 1 Supplying Paper Before turning on the printer supply paper in the paper tray as shown below For details of the printer driver setting for the paper see Operating Instructions attached to the CD ROM Procedure for supplying paper a Draw out the paper tray from the printer b Hold the stopper on the pair of side plates and ad...

Страница 32: ...r tray Pay attention to the following Check that the four corners of the paper are set firmly in the paper tray Supply an appropriate amount of paper so that it does not exceed its height limit e Re mount the paper tray into the printer Height limit by media type Paper ...

Страница 33: ...ached to the CD ROM Warming up Test xx Decomplessing Test xx Test finished Tray1 A4 Ready When you turn on the printer ensure that the LCD in the control panel displays the information shown left If a printer error is detected If a printer error is detected the ERROR lamp in the control panel turns on and the display provides an error message For details of error messages and actions to be taken s...

Страница 34: ...ecting the panel display language a Ensure that the control panel is displaying Ready Tray 1 A4 Ready b Press ONLINE key Tray 1 A4 Not Ready c Press MENU key and or key to select Config Menu Tray 1 A4 Config Menu d Press ENTER key and or key to select Display submenu Tray 1 A4 Display e Press ENTER key and the current setting appears with an asterisk Tray 1 A4 Display ENGLISH f Press or key to sel...

Страница 35: ... A4 Ready b Press ONLINE key Tray 1 A4 Not Ready c Press MENU key First Tray 1 A4 Test Menu d Press MENU key Second Tray 1 A4 TestPrint e Press MENU key Third Test print starts and the display blinks while printing When test print ends the printer enters offline mode Tray 1 A4 TestPrint f Press ONLINE key Tray 1 A4 Ready If you find an error in the printed test pattern see Operating Instructions a...

Страница 36: ...rding to the procedure below Procedure for turning off the printer a Check that the printer is not operating After printing data or after closing the cover wait for the operational noise to stop b Turn off the main power switch of the printer Main power switch ...

Страница 37: ...ndows PC 9 1 Setting the USB a Connect a USB cable to the USB interface connecter on the rear panel of the printer b Connect a USB cable to the Windows PC Next install the printer driver The driver installation procedure varies depending on your PC s OS Windows 98 Me See page 2 23 Windows 2000 XP Server 2003 See page 2 25 USB interface connector This connector is used for USB cable connection of t...

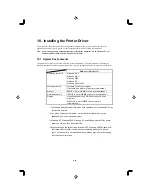
Страница 38: ... Server 2003 Microprocessor 3 Pentium 133 MHz or higher Pentium 200 MHz or higher is recommended Memory 64 MB or more 128 MB or more is recommended Hard disk space 4 100 MB or more 300 MB or more is recommended Display Video Graphics Array VGA 640 dots by 480 dots minimum 256 colors or more 65536 colors or more is recommended 1 In Windows 98 and Windows Me which were upgraded from Windows 95 it ma...

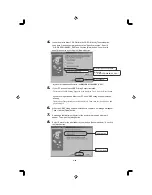
Страница 39: ...on of Operating System Here we show the operation in case of Windows 98 as follows Installation Steps Before installation Before starting to install the printer driver check to make sure the following Power to the printer main unit is off The PC is on The printer and the PC are properly connected through a USB cable 1 Turn on the power to the printer Windows 98 Me recognizes new hardware and start...

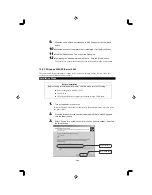
Страница 40: ...d Then click the Next button If you are using Windows Me or your PC has USB Printing Support installed already The location of the printer driver will be displayed Then click the Next button and go on to Step 12 6 When the USB Printing Support installation is complete a message will appear Then click the Finish button 7 A message that indicates the start of the printer driver search wizard will ap...

Страница 41: ... of Operating System Here we show the operation in case of Windows 2000 as follows Installation Steps Before installation Before starting to install the printer driver check to make sure the following Power to the printer main unit is off The PC is on The printer and the PC are properly connected through a USB cable 1 Turn on the power to the printer Windows 2000 XP Server 2003 recognizes new hard...

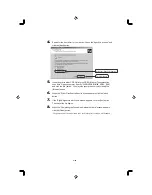
Страница 42: ...utton You may also specify the source by clicking the Browse button 6 When the Driver Files Search Results window appears click the Next button 7 If the Digital Signature Not Found window appears click the Yes button The copy of the file begins 8 When the Completing the Found New Hardware Wizard window appears click the Finish button The printer icon of the model name to be used in the printer win...

Страница 43: ...ctions Please keep this manual in a handy place near the machine Power Source 220 240 V 50 60 Hz 6 A or more Please be sure to connect the power cable to a power source as above Operator Safety This printer is considered a class 1 3B laser device safe for office EDP use The printer contains 5 milliwat 770 795 nanometer wavelength AlGaAs Laser Diode Direct or indirect reflected eye con tact with th...

Страница 44: ... 1 Plane Tree Crescent Feltham Middlesex TW13 7HG Phone 44 0 20 8261 4000 Germany RICOH DEUTSCHLAND GmbH Mergenthalerallee 38 40 65760 Eschborn Phone 49 0 6196 9060 France RICOH FRANCE S A 383 Avenue du Général de Gaulle BP 307 92143 Clamart Cedex Phone 33 0 821 01 74 26 Spain RICOH ESPAÑA S A Avda Litoral Mar 12 14 Blue Building Marina Village 08005 Barcelona Phone 34 0 93 295 7600 Italy RICOH IT...

Отзывы: