background image

2. Setting Up the Printer

Where to Put the Printer

The printer’s location should be carefully chosen because environmental conditions greatly affect its
performance.

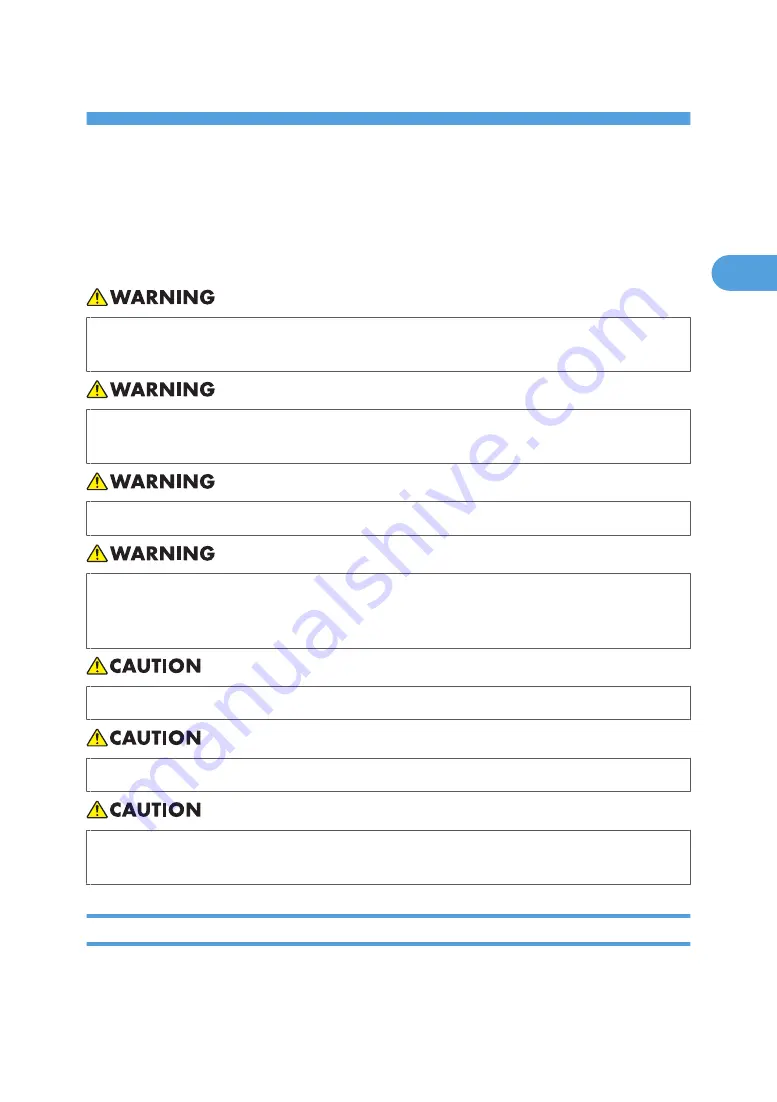
• Be sure to locate the machine as close as possible to a wall outlet. This will allow easy disconnection

of the power cord in the event of an emergency.

• Do not use any power sources other than those that match the specifications shown in this manual.

Doing so could result in fire or electric shock.

• Do not use multi-socket adaptors. Doing so could result in fire or electric shock.

• Do not use power cords that are damaged, broken, or modified. Also, do not use power cords

that have been trapped under heavy objects, pulled hard, or bent severely. Doing so could result
in fire or electric shock.

• Keep the machine away from humidity and dust. Otherwise a fire or an electric shock might occur.

• Do not place the machine on an unstable or tilted surface. If it topples over, an injury might occur.

• Make sure the room where you are using the machine is well ventilated and spacious. Good

ventilation is especially important when the machine is used heavily.

Optimum Environmental Conditions

Recommended temperature and humidity

23

2

Содержание Aficio AP600LU

Страница 1: ...orrect use of this machine please be sure to read the Safety Information in this manual before you use it 1 Getting Started 2 Setting Up the Printer 3 Installing the Printer Driver Operating Instructions Setup Guide ...

Страница 2: ...ers are therefore directed to return all chassis and laser subsystems to the factory or service depot when replacement of the optical subsystem is required Important Contents of this manual are subject to change without prior notice In no event will the company be liable for direct indirect special incidental or consequential damages as a result of handling or operating the machine Caution Use of ...

Страница 3: ...luded on the CD ROM 16 Viewing the Contents of the CD ROM 16 Guide to This Printer 17 Mainframe 17 Control Panel 20 2 Setting Up the Printer Where to Put the Printer 23 Optimum Environmental Conditions 23 Environments to Avoid 24 Power Connection 25 Space Required for Installing the Printer 25 Unpacking the Printer and Checking the Contents of the Box 26 Installing the Toner Cartridge 27 Installin...

Страница 4: ...Driver 39 Installing Windows 64 bit Compatible Drivers 40 Installing the Printer Driver Using USB 42 Windows 2000 USB 42 Windows XP Windows Server 2003 2003 R2 USB 43 Windows Vista Windows Server 2008 USB 44 Windows 7 Windows Server 2008 R2 USB 44 Troubleshooting USB 46 INDEX 47 2 ...

Страница 5: ...P are as follows Microsoft Windows XP Professional Microsoft Windows XP Home Edition Microsoft Windows XP Media Center Edition Microsoft Windows XP Tablet PC Edition Microsoft Windows XP Professional x 64 Edition The product names of Windows Vista are as follows Microsoft Windows Vista Ultimate Microsoft Windows Vista Business Microsoft Windows Vista Home Premium Microsoft Windows Vista Home Basic...

Страница 6: ...rosoft Windows Server HPC Server 2008 Microsoft Windows Server 2008 Standard without Hyper VTM Microsoft Windows Server 2008 Enterprise without Hyper VTM Microsoft Windows Server 2008 Datacenter without Hyper VTM The product names of Windows Server 2008 R2 are as follows Microsoft Windows Server 2008 R2 Foundation Microsoft Windows Server 2008 R2 Standard Microsoft Windows Server 2008 R2 Enterpris...

Страница 7: ...or electric shock Do not remove any covers or screws other than those explicitly mentioned in this manual Inside this machine are high voltage components that are an electric shock hazard and laser components that could cause blindness Contact your sales or service representative if any of the machine s internal components require maintenance adjustment or repair Do not attempt to disassemble or m...

Страница 8: ...gency Do not use any power sources other than those that match the specifications shown in this manual Doing so could result in fire or electric shock Do not use multi socket adaptors Doing so could result in fire or electric shock Do not use power cords that are damaged broken or modified Also do not use power cords that have been trapped under heavy objects pulled hard or bent severely Doing so ...

Страница 9: ...ys pull the plug not the cord Pulling the cord can damage the power cord Use of damaged power cords could result in fire or electric shock Store toner new or used toner containers and components that have been in contact with toner out of reach of children Do not place the machine on an unstable or tilted surface If it topples over an injury might occur Make sure the room where you are using the m...

Страница 10: ...e engineered to meet high standards of quality and functionality and we recommend that you use only the expendable supplies available at an authorized dealer Positions of Labels and Hallmarks for WARNING and CAUTION This machine has labels for WARNING and CAUTION at the positions shown below For safety please follow the instructions and handle the machine as indicated CDY001 1 2 8 ...

Страница 11: ... name Aficio AP600LU Machine Harmful toxic substances or elements Unit name Lead Pb Mercury Hg Cadmium Cd Chromium hexavalent Cr VI Polybromin ated biphenyl PBB Polybromin ated diphenyl ether PBDE 1 Structure Drive 2 Exterior 3 Operation 4 Read Write 5 Developme nt 6 Fusing 7 Paper feed 8 Electrical installations 9 Document feed 10 Bundled item Others 9 ...

Страница 12: ...andard Environmental protection expiration date for use China only Environmental protection expiration date Thismarkindicatesenvironmentalprotectionexpirationdateforusethat is applied to electronic information product sold in China As long as you follow the safety instructions and precautions for use of this product it will not cause environmental pollution nor cause serious harm to the human body...

Страница 13: ...ast operation has been completed To exit Energy Saver mode press any key on the control panel To change the setting of the Energy Saver mode see System Menu in the Printer Reference on the CD ROM Specifications Energy Saver mode Power Consumption With Options 10 5 W or less Printer Only 6 5 W Default Time 1 minute 11 ...

Страница 14: ...read and follow the instructions carefully Setup Guide this manual Provides information about setting up the printer This manual is provided as a printed manual Printer Reference Provides information about using the printer This manual is provided on the CD ROM Notes for Users Explains the additional information provided for the manual included with this printer There is a CD ROM that comes with t...

Страница 15: ...s not followed paper might be misfed originals might be damaged or data might be lost Be sure to read this This symbol indicates precautions for operation or actions to take after misoperation This symbol indicates a reference Indicates the names of keys on the machine s display or control panels 13 ...

Страница 16: ...14 ...

Страница 17: ... Edition Windows Vista Windows Vista Home Basic Windows Vista Home Premium Windows Vista Business Windows Vista Enterprise Windows Vista Ultimate Windows 7 Windows 7 Home Premium Windows 7 Professional Windows 7 Enterprise Windows 7 Ultimate Windows Server 2003 2003 R2 Windows Server 2003 Standard Edition Windows Server 2003 Enterprise Edition Windows Server 2003 Standard x64 Edition Windows Serve...

Страница 18: ...tents of the CD ROM Viewing the Contents of the CD ROM 1 Insert the CD ROM into the CD ROM drive Auto Run will start the installer 2 Select a language and then click OK 3 Click Browse This CD ROM Explorer starts and displays the contents of the CD ROM 1 Getting Started 16 1 ...

Страница 19: ...cies adhesive labels custom size paper envelopes as well as plain paper When printing on custom paper size printer driver settings are required Up to 100 sheets of plain paper 80 g m2 20 lb bond can be loaded See Paper and Other Media Supported by this Printer and Loading Paper in the Bypass Tray in the Printer Reference on the CD ROM 4 Output Tray Extension Pull out this extension when printing o...

Страница 20: ...ported by this Printer in the Printer Reference on the CD ROM Paper Tray is displayed Tray 1 on the panel display 13 Friction Pad This is required to feed in paper one sheet at a time Clean the friction pad when more than one sheet of paper is fed into the printer Also replace the friction pad when the message Replace Maintenance Kit appears 14 Paper Tray Cover Attach it when pulling out the tray ...

Страница 21: ...oller Feeds the paper If it becomes dirty clean it See Cleaning the Registration Roller in the Printer Reference on the CD ROM 5 Transfer Roller Cover Open this cover when replacing a transfer roller 6 Transfer Roller When Replace Maintenance Kit appears on the panel display replace this roller 7 Fusing Unit Lock Levers Lift these levers when replacing the fusing unit 8 Fusing Unit Fuses the image...

Страница 22: ...e of the error also appears on the panel display See Error Status Messages on the Control Panel in the Printer Reference on the CD ROM 4 Data In indicator Blinks while the printer is receiving data from a computer Is on if there is data to be printed 5 On Line key Press this key to switch the printer between online and offline 6 Job Reset key When the printer is online press this key to cancel any...

Страница 23: ...on the CD ROM 9 Escape key Press this key to return to the previous condition on the panel display 10 Enter key Press this key to execute menu items selected on the panel display Press this key to clear some errors See Troubleshooting in the Printer Reference on the CD ROM 11 keys Use these keys to increase or decrease values on the panel display when making settings Guide to This Printer 21 1 ...

Страница 24: ...1 Getting Started 22 1 ...

Страница 25: ...aptors Doing so could result in fire or electric shock Do not use power cords that are damaged broken or modified Also do not use power cords that have been trapped under heavy objects pulled hard or bent severely Doing so could result in fire or electric shock Keep the machine away from humidity and dust Otherwise a fire or an electric shock might occur Do not place the machine on an unstable or ...

Страница 26: ...e The machine must be level within 5 mm 0 2 both front to rear and left to right Environments to Avoid Do not use the printer in the following environments Locations exposed to direct sunlight or strong light Dusty areas Areas with corrosive gases Areas excessively cold hot or humid Locations near an air conditioner or humidifier Locations near other electronic equipment Locations where the printe...

Страница 27: ... more Space Required for Installing the Printer Leave enough space around the printer This space is necessary to operate the printer The recommended or minimum space requirement is as follows CDY008 A more than 10 cm 4 0 B more than 10 cm 4 0 C more than 100 cm 40 0 D more than 10 cm 4 0 Where to Put the Printer 25 2 ...

Страница 28: ... cable you use is appropriate for your computer Contents of the box Start Guide CD ROM Printer including a starter toner cartridge Additional Documentation Paper Tray Cover 2 Remove the plastic bag Lift the printer and move it to the place where you want to install it When lifting the machine use the inset grips on both sides Otherwise the machine could break or cause injury if dropped CDY009 3 Re...

Страница 29: ... swallowed dilute by drinking a large amount of water Consult a doctor if necessary Store toner new or used toner containers and components that have been in contact with toner out of reach of children Our products are engineered to meet the highest standards of quality and functionality When purchasing expendable supplies we recommend using only those provided by an authorized dealer Do not expos...

Страница 30: ...nserted between toner cartridge and the printer CDY011 3 While lifting the front side of the toner cartridge pull it out of the printer CDY012 Do not hold the toner cartridge upside down or stand it vertically Do not put the toner cartridge on an unstable or tilted surface 2 Setting Up the Printer 28 2 ...

Страница 31: ...l out the strips when the toner cartridge is slant or standing on its side the cartridge might cause trouble with the printer Be sure to pull the tape horizontally Pulling it upward or downward may cause the toner to scatter Be careful not to make your cloths dirty with toner After pulling the tape out of the cartridge toner scatters easily Do not shake the cartridge 5 Holding the grips of the ton...

Страница 32: ...ly pushing down CDY015 7 Close the front cover CDY016 Do not close the front cover with force If you cannot close the cover easily pull out the toner cartridge from the printer and insert it again After that close the front cover again 2 Setting Up the Printer 30 2 ...

Страница 33: ... PDF file on the CD ROM For more information about the paper sizes that can be set in the paper tray see Paper and Other Media Supported by this Printer in the Printer Reference provided as a PDF file on the CD ROM 1 Lift the paper tray slightly then pull it out until it stops CDY017 Do not touch the three white pins on the left front side of the printer 2 While lifting the front side of the tray ...

Страница 34: ...than A4 long edge feed or 81 2 x 11 long edge feed adjust the paper size dial to match the size and feed direction of the paper in the paper tray CDY020 When you load paper lager than A4 short edge feed or 81 2 x 11 short edge feed you should extend the tray For more information see Paper and Other Media Supported by this Printer in the Printer Reference provided as a PDF file on the CD ROM 2 Sett...

Страница 35: ...he paper size dial matches the size and feed direction of the paper in the tray Otherwise the printer might be damaged or a printing problem might occur Do not slide the paper tray in and out with force If you do the front and side paper guides will move out of the place Installing the Paper Tray 33 2 ...

Страница 36: ... disconnecting the power cord from the wall outlet always pull the plug not the cord Pulling the cord can damage the power cord Use of damaged power cords could result in fire or electric shock 1 Check that the power switch is turned off CDY022 2 Securely insert the power cord plug into the wall socket 2 Setting Up the Printer 34 2 ...

Страница 37: ...essary 1 Check that the power switch is turned on 2 Press the Menu key CDY023 Menu appears on the panel display 3 Press the or key until the following message appears on the panel display Menu Language 4 Press the Enter key 5 Press the or key until the language you want to select appears on the panel display 6 Press the Enter key 7 Press the On Line key The settings are applied and the ready messa...

Страница 38: ...pears on the panel display Menu List Test Print 4 Press the Enter key The following message appears on the panel display List Test Print Config P Er Log 5 Press the or key until the following message appears on the panel display List Test Print Config Page 6 Press the Enter key The test printing will start If you cannot complete the test printing correctly check if an error message appears on the ...

Страница 39: ... Do not use a parallel cable more than 2 5 meters 8 2 feet long 1 Turn off the power switch 2 Turn the computer off 3 Attach the interface cable to the interface connector of the printer Secure the cable with the metal fittings as shown in the illustration CDY024 4 Attach the other end of the interface cable to the interface connector of the computer Secure the cable Rating voltage of the parallel...

Страница 40: ...able to the USB interface connector of the printer Secure the cable CDY025 2 Attach the other end of the interface cable to the USB interface connector of the computer or the USB Hub Secure the cable 2 Setting Up the Printer 38 2 ...

Страница 41: ...ons of the same printer driver installed on your system at the same time When upgrading to a new version of the printer driver delete the old version and then install the new one 1 Quit all applications currently running 2 Insert the CD ROM into the CD ROM drive The installer starts Auto Run may not work with certain operating system settings If this happens launch Setup exe on the CD ROM root dir...

Страница 42: ... the printer is connected to your computer via USB see Installing the Printer Driver Using USB and install the printer driver using the procedure shown p 42 Installing the Printer Driver Using USB Windows XP Windows Server 2003 2003 R2 Use the following procedure to install the PCL driver under a 64 bit version of Windows XP or Windows Server 2003 2003 R2 1 On the Start menu click Printers and Fax...

Страница 43: ...ding on your operating system and the type of interface you are using for connection to the printer Windows 7 Windows Server 2008 R2 Use the following procedure to install the PCL driver under a 64 bit version of Windows 7 and Windows Server 2008 R2 1 On the Start menu click Devices and Printers 2 Click Add a printer 3 Follow the instructions that appear in the Add Printer window If the printer dr...

Страница 44: ...cept this manual 2 Check that the power of the printer is off 3 Connect the printer to your computer with a USB cable Connect the USB cable firmly 4 Turn on the power of the printer Found New Hardware Wizard starts and USB Printing Support is installed automatically 5 Click Next 6 In the Found New Hardware Wizard window click Search for a suitable driver for my device recommended and then click Ne...

Страница 45: ...ist or specific location Advanced and then click Next 7 Insert the CD ROM into the CD ROM drive If Auto Run starts click Cancel and then Exit 8 Select the Search removable media floppy CD ROM check box under Search for the best driver in these locations and then click Next 9 Specify the location where the source files of the printer driver is stored If the CD ROM drive is D the source files of the...

Страница 46: ... If the CD ROM drive is D the source files of the printer driver are stored in the following locations D DRIVERS PCL6 XP_VISTA MUI disk1 The PCL6 printer driver will be installed in the language of the operating system 8 Check the printer driver location and then click Next 9 Click Close If the installation is successful the icon of the printer connected to the USB001 port is added to the Printers...

Страница 47: ... If the CD ROM drive is D the source files of the printer driver are stored in the following locations Windows 7 D DRIVERS PCL6 XP_VISTA MUI disk1 Windows Server 2008 R2 D DRIVERS PCL6 x64 MUI DISK1 The PCL6 printer driver will be installed in the language of the operating system 16 Check the printer driver location and then click Next 17 Click Close If the installation is successful the icon of t...

Страница 48: ...ly connected to the USB ports and then turn on the power again Windows has already configured the USB settings Open Windows Device Manager and then under Universal Serial Bus controllers remove any conflicting devices Conflicting devices have a or icon by them Take care not to accidentally remove required devices For details see Windows Help 3 Installing the Printer Driver 46 3 ...

Страница 49: ...y 20 N Notes for Users 12 O On Line key 20 Optimum environmental conditions 23 Output Tray 17 Output Tray Extension 17 P Panel display 20 Paper Exit Cover 17 Paper Size Dial 17 Paper tray 31 Paper Tray 17 Paper Tray Cover 17 Parallel connection 37 Power connection 25 Power cord 34 Power Cord 17 Power indicator 20 Power Switch 17 Printer Reference 12 R Rear Cover 17 Registration Roller 17 S Safety ...

Страница 50: ...V Ventilator 17 48 EN CN G0918674 ...

Страница 51: ... 2010 Ricoh Co Ltd ...

Страница 52: ...Operating Instructions Setup Guide G091 8674 EN CN ...

Отзывы: