background image

162

C

h

a

n

gi

ng C

a

m

e

ra

 Se
tti

n

g

s

5

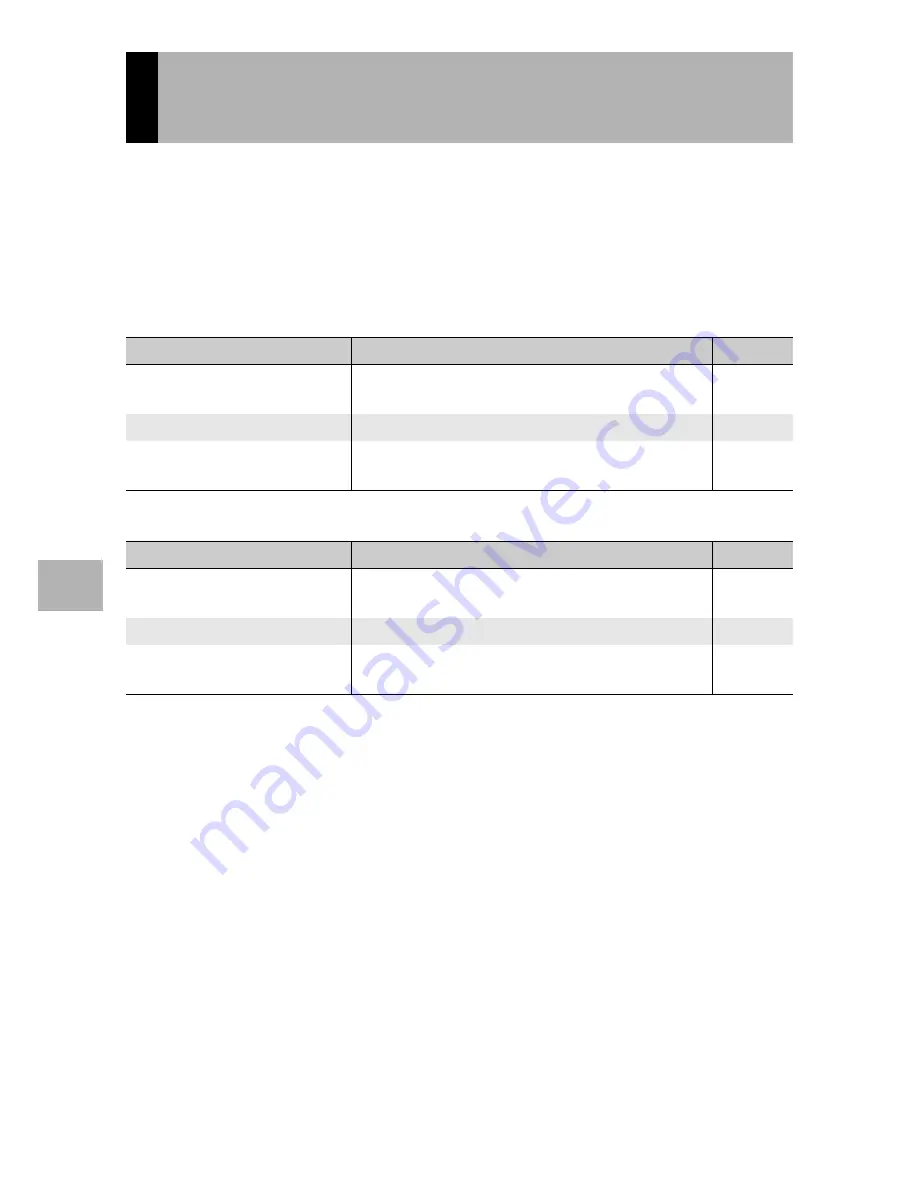
When a function is assigned to the Fn button, you can easily switch 
from one function to another simply by pressing the Fn button.
The following functions can be assigned to the Fn button. For 
information on how to use the Fn button, see the corresponding 
reference page.

When Mode Dial is Set to 

5

When Mode Dial is Set to SCENE

Assigning a Function to the Fn 

(Function) Button (Set Fn Button)

Available Setting

Description

Refer to

MoveTarget

*Default setting

Moves both the AE and AF, or one or the other 

targets.

P.73

AE Lock

Locks the exposure.

P.75

Step Zoom, AT-BKT, 

WB-BKT, CL-BKT, Min. Aper.

Switches between on and off for each function.

P.77

Available Setting

Description

Refer to

Macro Trgt

*Default setting

Moves the AF target without moving the camera 

to shoot close-ups.

P.74

AE Lock

Locks the exposure.

P.75

Step Zoom, AT-BKT, 

WB-BKT, CL-BKT, Min. Aper.

Switches between on and off for each function.

P.77

Содержание 173573 - R10 Digital Camera

Страница 1: ...and play back pictures Advanced Operations Read this section when you want to learn more about the different camera functions This section provides more detailed information about the functions used t...

Страница 2: ...rty of their respective owners Safety Precautions For the safe use of your camera be sure to read the safety precautions thoroughly Test Shooting Please be sure to do some test shooting to make sure i...

Страница 3: ...actions that must be performed The symbol alerts you to prohibited actions The symbol may be combined with other symbols to indicate that a specific action is prohibited Examples Do not touch Do not...

Страница 4: ...minutes and seek medical advice immediately INGESTION If any of the liquid crystal is ingested rinse the mouth out thoroughly with water Have the person drink a large amount of water and induce vomiti...

Страница 5: ...dapter in household electrical outlets Other adapters pose the risk of fire electric shock or injury To avoid the risk of fire electric shock or injury do not use the battery charger or AC adapter wit...

Страница 6: ...385 3786 Business hours 9 00 AM to 5 00 PM Camera User Guide This booklet This guide explains the usage and functions of the camera It also explains how to install the provided software on your comput...

Страница 7: ...ooting at 1 cm P 39 and close up flash shooting at 25 cm Telephoto or 20 cm Wide angle P 41 The camera is equipped with close up functions that allow you to take pictures at a distance of only 1 cm fo...

Страница 8: ...members or asking someone to take your picture while on vacation Face recognition mode enables optimal shooting of the subject s face P 45 The camera automatically focuses on the subject s face and ad...

Страница 9: ...oot an image with this function you can record the still image at the original size and a smaller subfile at the same time Skew correction mode helps straighten skewed images P 46 In skew correction m...

Страница 10: ...te and Time 32 Basic Shooting 33 Holding the Camera 33 Shooting with Auto Shooting Mode 35 Using the Zoom Function 37 Shooting Close Ups Macro Shooting 39 Using the Flash 41 Shooting with Easy Shootin...

Страница 11: ...Multi Shot Continuous S Cont M Cont 89 Viewing an S Cont or M Cont Still Image in Enlarged Display Mode 92 Setting the Picture Quality and Color Image Settings 93 Customizing the Picture Quality Cust...

Страница 12: ...y Display Flag Function Setting 123 Setting Canceling One File at a Time 123 Setting Canceling Multiple Files at One Time 124 Displaying an Image Set to Flag Function Setting Flag Function Display 125...

Страница 13: ...xed Focal Length Step Zoom 161 Assigning a Function to the Fn Function Button Set Fn Button 162 Changing the ISO Auto High Setting ISO Auto High 164 Changing the Size for Record Dual Size Sub File Siz...

Страница 14: ...tware 193 Downloading Images Using the DL 10 195 Downloading Images Without Using DL 10 196 Disconnecting the Camera from Your Computer 198 For Macintosh 199 Downloading Images to Your Computer 199 Di...

Страница 15: ...ra for the first time read this section Packing List 14 Names of Parts 17 How to Use the Mode Dial 19 Picture Display 20 Getting Ready 24 Basic Shooting 33 Playing Back Images 52 Deleting Files 56 Cha...

Страница 16: ...appearance of items included may differ RICOH R10 The serial number of the camera is provided on the bottom face of the camera Rechargeable Battery Battery Charger USB Cable Mini B cable Used to conne...

Страница 17: ...Traditional Simplified Korean Note Attaching the handstrap to the camera Thread the small end of the strap through the strap eyelet on the camera and loop the ends as shown Camera User Guide CD ROM GP...

Страница 18: ...wn in the figure For the latest information on optional accessories see the Ricoh website http www ricohpmmc com Optional Accessories Soft Case SC 80 Used to store your camera Neck Strap ST 2 A double...

Страница 19: ...to 1 Mode Dial P 19 35 43 44 45 117 2 Shutter Release Button P 33 3 POWER Button P 30 4 Microphone P 117 5 Lens Cover 6 Zoom lever z Telephoto Z Wide angle 8 Enlarged View 9 Thumbnail Display P 37 54...

Страница 20: ...Button P 66 11 MENU Button P 46 81 122 154 12 Fn Function Button P 71 13 t Self timer D Delete Button P 56 51 14 DISP Button P 60 62 15 Power DC input Cable Cover 16 Battery Card Cover P 28 17 Tripod...

Страница 21: ...ptimalaperture value and shutter speed depending on the subject P 35 EASY Easy Shooting Mode This allows you to shoot with easy operations and without having to make any complicated settings The setti...

Страница 22: ...ure Display 9999 9999 0 7 0 7 1280 1280 X4 0 X4 0 F3 3 F3 3 1 15 1 15 1cm 1cm _ _ 1 sec 1 sec Interval Interval 1 2 3 5 6 7 9 10 11 17 4 8 12 13 14 15 16 18 20 19 23 24 25 26 27 28 29 30 21 31 31 31 2...

Страница 23: ...1 4 Scene Modes Multi shot P 45 P 89 21 Zoom Bar P 37 22 Minimum Macro Distance P 176 5 Shooting Mode Types P 19 23 White Balance Mode Backlight Compensation P 111 76 6 Recording Destination P 25 7 Re...

Страница 24: ...ooting Recording 3 Flag Function Setting P 123 4 Mode Types 12 Date at Shooting P 181 5 Playback Data Source P 53 13 Battery Symbol P 23 6 Number of Playback Files 14 Recording Time or Lapsed Time 7 T...

Страница 25: ...symbol appears at the lower right of the picture display to indicate the battery level Recharge the battery before it is depleted Battery Symbol Description The battery is sufficiently charged The bat...

Страница 26: ...nds between shots changing the zoom setting from telephoto to wide angle or wide angle to telephoto for each shot 50 flash usage turning the power off after each 10 shots You can take approximately 27...

Страница 27: ...l memory when an SD memory card is loaded it records images to the SD memory card Caution If an SD memory card is loaded the camera does not record to the internal memory even if the card is full Take...

Страница 28: ...s and format the card It is recommended to move the write protection switch to LOCK when you have some important data recorded Note that you cannot shoot images on a locked card because no data can be...

Страница 29: ...is shown below Depending on the battery level the charging time differs Charging the Rechargeable Battery The rechargeable battery needs to be charged before use The battery is not charged at the tim...

Страница 30: ...t way and then push the card all the way in until it clicks The rechargeable battery may be inserted first Loading the Rechargeable Battery and SD Memory Card After recharging the rechargeable battery...

Страница 31: ...the battery card cover Release the hook that locks the rechargeable battery The battery is ejected Pull the battery out of the camera Be careful not to drop the battery when removing it from the came...

Страница 32: ...Press the POWER button Caution After the camera is turned on it may take longer for the camera to become ready for shooting when using the flash than when not using the flash Auto Power Off If the cam...

Страница 33: ...ge is set and the date time setting screen appears Note For how to set the display language and date time on the setup menu see Changing the Display Language Language N P 182 and Setting the Date and...

Страница 34: ...for more than one week the date and time settings will be lost These settings must be made again To retain the date and time settings load a battery with adequate remaining power for more than two ho...

Страница 35: ...htly press both elbows against your body 2 Put your finger on the shutter release button Caution When you are shooting be careful not to obstruct the lens or flash with your fingers hair or the strap...

Страница 36: ...cur in the following cases When shooting in a dark place without using the flash When using the zoom function When shooting using time exposure GP 100 When the J symbol appears on the picture display...

Страница 37: ...the center of the picture display The focal distance is measured at a maximum of nine points Green frames appear to indicate the positions that are in focus Shooting with Auto Shooting Mode Turn the m...

Страница 38: ...s green Subjects lacking contrast the sky a white wall the hood of a car etc Flat two dimensional objects with only horizontal lines and no significant protrusions Quickly moving objects Things in poo...

Страница 39: ...ning the zoom lever just slightly toward z operates the zoom at low speed Turn the zoom lever further to switch to high speed zooming 2 Compose your picture and half press the shutter release button 3...

Страница 40: ...er 4 8 for still images or 4 0 for movies To use digital zooming turn and hold the zoom lever toward z until the maximum magnification is reached on the zoom bar then momentarily release the zoom leve...

Страница 41: ...play the minimum shooting distance on the screen set Min Macro Distance to Show The minimum shooting distance and shooting range when using the zoom are shown below GP 176 Shooting Close Ups Macro Sho...

Страница 42: ...Zoom Macro in scene mode GP 45 The availability of macro shooting for each scene mode is shown below Scene Mode Macro Shooting Portrait Disabled Face Disabled Sports Disabled Landscape Disabled Night...

Страница 43: ...bol stops blinking and lights steadily and the camera is ready to shoot Using the Flash You can select the flash mode that best suits your shot At the time of purchase the camera is set to Auto Wide A...

Страница 44: ...increase the AE accuracy The flash mode setting for each scene mode is shown below Scene Mode Flash Mode Portrait Initial setting Flash Off Face Initial setting Flash Off Sports Initial setting Flash...

Страница 45: ...enu are different from other shooting modes The contents of the settings are the same as other modes Flash macro and self timer settings that are changed in another mode return to their default settin...

Страница 46: ...Reg My Settings 2 Press the shutter release button to shoot the picture Note You can change the camera settings even in my settings mode Changing the mode or turning the camera off returns the change...

Страница 47: ...pictures with abundant greenery or blue sky Nightscape Use when shooting night scenes In nightscape mode the flash fires when all of the following conditions are satisfied The flash is set to Auto Th...

Страница 48: ...tion screen appears Skew Correct Mode Use to straighten a rectangular object such as a message board or business card shot at an angle to make it look as if it were shot squarely For detailed operatio...

Страница 49: ...release button to shoot the picture Changing the shooting menu or setup menu setting in scene mode Press the MENU button in shooting mode and then press the ADJ OK button once or twice to select the M...

Страница 50: ...ra selects the optimal focus When a recognized face is focused the frame for that face is displayed in green If the camera cannot focus on a recognized face the frame for that face disappears The expo...

Страница 51: ...pressing the ADJ OK button To cancel skew correction press the ADJ OK button Even if you cancel skew correction the original image remains unchanged 6 Press the ADJ OK button The display indicates th...

Страница 52: ...oom lever toward z Telephoto or Z Wide angle The zoom level appears on the picture display 6 Compose your picture and half press the shutter release button 7 Full press the shutter release button Caut...

Страница 53: ...n and pictures are taken at the set shooting interval The focus position is set for the first shot When set to Custom press the MENU button to cancel the self timer during shooting Note The camera rem...

Страница 54: ...display the image 10 frames forward If there are less than 10 images the last image is displayed To switch the camera from playback mode to shooting mode press the 6 button again Viewing Your Images I...

Страница 55: ...is set to Hold the image remains displayed until the next time you half press the shutter release button When LCD Confirm is set to Hold the displayed image can also be enlarged or deleted GP 55 56 T...

Страница 56: ...n is divided into 20 frames and thumbnails are displayed Switching to Single Picture Display 1 Press the ADJ OK button to select a file 2 Turn the zoom lever toward 8 Enlarged View Grid View Thumbnail...

Страница 57: ...her than those above 16 In Enlarged View 8 on the Zoom Lever Enlarges the displayed still image 9 on the Zoom Lever Returns the enlarged still image to its original size ADJ OK Button If the image siz...

Страница 58: ...o Hold on the setup menu GP 168 the image displayed on the screen after being taken can be deleted 1 Press the 6 Playback button 2 Press the ADJ OK button to display the file you want to delete 3 Pres...

Страница 59: ...ss the ADJ OK button to select Yes and then press the ADJ OK button You can delete multiple files at a time by specifying the files individually by specifying a range of files to be deleted or by comb...

Страница 60: ...e upper left corner of the file 5 Repeat Step 4 to select all the files you want to delete If you selected a file by mistake you can deselect it by selecting the file and pressing the ADJ OK button 6...

Страница 61: ...selecting the starting point 6 Press the button to select the ending point of the range of files you want to delete and press the ADJ OK button The trash symbol is displayed in the upper left corner o...

Страница 62: ...rded with images Synchro Monitor Mode This turns the picture display off except when the camera is operated This is effective for saving power consumption In this mode pressing the shutter release but...

Страница 63: ...yback Mode White Saturation Highlights Display The white saturation areas of the image flash in black White saturation is the loss of tone that indicates the color shading in an image in which very br...

Страница 64: ...es of scenery or buildings This is also very useful for taking pictures with the horizon visible For information on how to set Level Setting see P 172 With Level Setting set to Display The level indic...

Страница 65: ...hen shooting images The accuracy of the level when using the camera as a level cannot be guaranteed When level The level indicator becomes green indicating that the scale is in the middle When tilted...

Страница 66: ...the left side without anything else this picture is underexposed with too many pixels only for shadow sections Refer to this histogram when correcting the exposure Note The histogram displayed on the...

Страница 67: ...re about the different camera functions 1 Various Shooting Functions 66 2 Shooting Playing Back Movies 117 3 Other Playback Functions 121 4 Direct Printing 147 5 Changing Camera Settings 153 6 Downloa...

Страница 68: ...g mode press the ADJ OK button Or press the ADJ OK button The ADJ mode screen appears If you pressed the ADJ OK button in Step 1 the screen appears with the first setting changed The fifth icon AE AF...

Страница 69: ...ont Mode Auto BKT Flash Comp Min Aper Note The functions that can be set with the ADJ OK button in scene mode easy shooting mode and movie mode differ from those in auto shooting mode The following se...

Страница 70: ...ress the ADJ OK button 4 Press the ADJ OK button The text density menu appears 5 Press the ADJ OK button to select the desired density setting You can also press the shutter release button to take the...

Страница 71: ...utton 7 Half press the shutter release button If AE AF is selected the Spot AE Spot AF position is displayed If AF is selected the Spot AF position is displayed If AE is selected the Spot AE position...

Страница 72: ...Shooting Functions 1 Note If you change the AE AF or AE AF setting after shifting the target the shifted target returns to the center You cannot use the AE AF target shift function if Focus is set to...

Страница 73: ...t to 5 When Mode Dial is Set to SCENE Using the Fn Function Button Available Setting Description Refer to MoveTarget Default setting Moves both the AE and AF or one or the other targets P 73 AE Lock L...

Страница 74: ...l not operate if it is pressed in movie mode Available Setting Portrait Face Sports Landscape Nightscape Night Port High Sens Zoom Macro Skew Correct Mode Text Mode Macro Trgt O O O O AE Lock O O O O...

Страница 75: ...a ready to shoot press the Fn Function button The target shift screen appears 4 Press the ADJ OK button to move the cross mark to the desired target position 5 Press the DISP button 6 Press the ADJ OK...

Страница 76: ...using a tripod to take pictures 1 Turn the mode dial to SCENE or EASY 2 Set Set Fn Button to Macro Trgt on the setup menu For the operating procedure see P 162 3 With the camera ready to shoot press...

Страница 77: ...e setup menu For the operating procedure see P 162 3 Check that the camera is ready to shoot 4 Put the subject of your photo in the center of the screen and press the Fn button The exposure is locked...

Страница 78: ...nd off for the backlight compensation function 1 Turn the mode dial to EASY 2 Set Set Fn Button to Back Comp on the setup menu For the operating procedure see P 162 3 With the camera ready to shoot pr...

Страница 79: ...BKT WB BKT CL BKT Min Aper 1 Turn the mode dial to 5 or SCENE 2 Set Set Fn Button to one of the above items on the setup menu For the operating procedure see P 162 3 With the camera ready to shoot pr...

Страница 80: ...89 Image Settings Auto Levels Hard Normal Soft Cust Set B W Sepia P 93 Flash Expo Comp 2 0 to 2 0 P 95 Auto Bracket Off On WB BKT CL BKT P 96 Time Exposure Off 1 Sec 2 Sec 4 Sec 8 Sec P 100 Record Du...

Страница 81: ...Size F3648 10M N3648 10M F3 2 9M F1 1 7M N3264 8M N2592 5M N2048 3M N1280 1M N640 VGA P 83 Setting Options Default Settings Refer to Movie Size 640 320 P 83 Frame Rate 30Frame S 15Frame S P 118 Focus...

Страница 82: ...uality Size O O O O O O O O O P 83 Density O P 68 Size O P 83 Focus O O O O O O O P 85 Exposure Metering O O P 88 Continuous Mode O P 89 Image Settings O O P 93 Flash Expo Comp O O O O O O O P 95 Auto...

Страница 83: ...m to display the next screen 3 Press the ADJ OK button The menu item settings are displayed 4 Press the ADJ OK button to select the setting 5 Press the ADJ OK button The setting is confirmed the shoot...

Страница 84: ...ss the ADJ OK button to select a tab on the left of the screen If the DISP button is pressed at this point the display returns to the screen shown in Step 1 Press the ADJ OK button to change screens P...

Страница 85: ...ovies GP 118 Choosing Picture Quality Mode Image Size Pic Quality Size Image Size Picture Quality Mode Pic Quality Size Remarks 3648 2736 F Fine N Normal F3648 10M N3648 10M For creating large prints...

Страница 86: ...low resulting in a large file but the picture quality is better than in Normal The number of images that can be stored in the internal memory or SD memory card depends on the Pic Quality Size setting...

Страница 87: ...ppears on the screen Changing the Focusing Mode Focus Symbol Mode Description None Multi AF Measures the distances from 9 AF areas and focuses to the nearest AF area This prevents the center of the pi...

Страница 88: ...bjects within the macro shooting range 1 Display the shooting menu For information on using the menu see P 81 2 Press the ADJ OK button to select Focus and press the button 3 Press the button to selec...

Страница 89: ...ward z Telephoto or Z Wide angle to adjust the focus Turning the zoom lever toward z adjusts the focus to farther objects Turning the zoom lever toward Z adjusts the focus to closer objects 8 Press th...

Страница 90: ...ting other than Multi a symbol appears on the screen Changing the Exposure Metering Modes Exposure Metering Symbol Mode Description None Multi The entire shooting range is divided into 256 partitions...

Страница 91: ...e shots at intervals of 1 7 5 seconds in about 2 seconds The 16 still images are grouped together as a set and are recorded as one image file 3648 2736 pixels M Memory reversal Cont The camera memoriz...

Страница 92: ...mpose your picture and then press and hold the shutter release button Pictures continue to be taken for as long as you hold down the shutter release button 6 Release your finger from the shutter relea...

Страница 93: ...lease button within 2 seconds from the time you first pressed it the shots from the time you pressed the shutter until you released it are recorded and the number of consecutive shots will be less tha...

Страница 94: ...played 2 Press the ADJ OK button to display an S Cont or M Cont still image 3 Turn the zoom lever toward 8 Enlarged View The first frame of the consecutive images is displayed in enlarged display mode...

Страница 95: ...et the picture quality by simply selecting Cust Set Setting the Picture Quality and Color Image Settings Type Description Auto Levels The camera automatically corrects image tone when images are recor...

Страница 96: ...ress the ADJ OK button to select Image Settings and press the button 3 Press the button to select Cust Set and press the button The Img Set screen appears If the values are already set you can set the...

Страница 97: ...n to select Flash Expo Comp and press the button The flash exposure compensation bar appears 3 Press the button to make the setting 4 Press the ADJ OK button The setting appears on the screen except w...

Страница 98: ...mpensation setting When shooting is completed three still images are displayed on the picture display They are from left to right at 0 5EV darker standard exposure compensation setting and 0 5EV brigh...

Страница 99: ...menu For information on using the menu see P 81 2 Press the ADJ OK button to select Auto Bracket and press the button 3 Press the button to select WB BKT 4 Press the ADJ OK button The symbol appears...

Страница 100: ...P 71 If Image Settings is set to B W the white balance bracket function can be set but it does not operate When CL BKT is selected and a still image is shot the color bracket function automatically re...

Страница 101: ...utton GP 71 Contrast Sharpness and Color Depth During Color Bracket Shooting During color bracket shooting the contrast sharpness and color depth values set in Image Settings apply as follows Black an...

Страница 102: ...s the button 3 Press the button to select the desired setting 4 Press the ADJ OK button The setting appears on the screen Note When using long time exposure the shutter speed may slow down and images...

Страница 103: ...ual Size and press the button 3 Press the button to select On 4 Press the ADJ OK button The symbol appears on the screen Caution If the original image size is 640 480 no subfile is created If the size...

Страница 104: ...on to select Pictures and Interval and press the button to make the settings 4 Press the ADJ OK button Note After setting Custom Self Timer with the camera ready to shoot press the t Self Timer button...

Страница 105: ...o select On 4 Press the ADJ OK button The symbol appears on the screen Caution You cannot use Fix Min Aperture in movie mode In scene mode you can only set Fix Min Aperture in Zoom Macro and Skew Corr...

Страница 106: ...button to select Interval and press the button 3 Press the button to set the hours To cancel interval shooting press the DISP button to return to the shooting menu 4 Press the button to move to the mi...

Страница 107: ...g scene mode interval shooting is not available Note Depending on the remaining battery level the battery may become depleted during movie shooting Use of a battery with adequate remaining power is re...

Страница 108: ...on The camera shake correction function is not available during multi shot shooting long time exposure and movie shooting If multi shot shooting or long time exposure is set while the camera shake cor...

Страница 109: ...DJ OK button The setting appears on the screen Note When time exposure is set to On priority is given to time exposure When scene mode is set to Nightscape or Night Port the maximum shutter speed for...

Страница 110: ...OK button to select Date Imprint and press the button 3 Press the button to select the desired setting 4 Press the ADJ OK button The symbol appears on the screen Note If the date and time have not be...

Страница 111: ...e exposure level higher When your subject is whitish The entire picture will turn out dark underexposed Set the exposure level higher When your subject is darkish The entire picture will turn out brig...

Страница 112: ...110 Various Shooting Functions 1 Note When shooting in particularly bright places you may not be able to correct the exposure level In that case the AE symbol appears on the screen...

Страница 113: ...Balance Symbol Mode Description AUTO Auto Adjusts the white balance automatically Outdoors Select this when shootingoutdoors sunny and whitebalance fails to adjust properly Cloudy Select this when sho...

Страница 114: ...Settings is set to B W or Sepia or scene mode is set to Text Mode Note The white balance may not be adjusted correctly for a subject that is mostly dark In this case add something white to the subjec...

Страница 115: ...nditions for your picture 5 Press the DISP button The white balance is set 6 Press the ADJ OK button The symbol appears on the screen The screen is displayed with the white balance set in Step 5 If th...

Страница 116: ...sensitivity is automatically set according to the shooting conditions but a higher upper limit than in Auto can be set When shooting a dark subject the shutter speed set in Auto Hi is faster than in...

Страница 117: ...is used When the image size is 3648 2736 the ISO setting is Auto and flash is not fired the ISO setting is between 80 and 200 Images shot with a higher sensitivity may appear grainy When the ISO sens...

Страница 118: ...s and press the button A confirmation message appears 3 Make sure that Yes is selected and then press the ADJ OK button The display indicates the camera is restoring the initial settings Once it is fi...

Страница 119: ...operation sounds may be recorded The maximum recording time per shooting depends on the size of your SD memory card GP 119 Even if you are within the maximum recording time recording may end dependin...

Страница 120: ...the remaining battery level the battery may become depleted during movie shooting Use of a battery with adequate remaining power is recommended Use of a high speed SD memory card with sufficient memor...

Страница 121: ...w The maximum recording time per shooting is 90 minutes or the equivalent of 4 GB Internal Memory 1 GB 2 GB 4 GB 8 GB 16 GB 640 480 15Frame S 1 min 22 s 23 min 42 s 48 min 13 s 99 min 8 s 193 min 30 s...

Страница 122: ...frames forward 3 Press the ADJ OK button Playback begins The elapsed playback indicator or the elapsed time is displayed on the screen Playing Back Movies Fast Forward Turn the zoom lever toward z dur...

Страница 123: ...button in the up down left or right direction Instructions to Press the ADJ OK button indicate that you should press directly down on the button Playback Menu Setting Options Refer to Flag Function S...

Страница 124: ...2 Press the ADJ OK button at the bottom item to display the next screen 4 Press the ADJ OK button The screen for the selected menu item appears Changing the display Press the ADJ OK button to select...

Страница 125: ...layback menu appears 4 Press the ADJ OK button to select Flag Function Setting and press the button The Flag Function Setting screen appears 5 Make sure that Set is selected to save a file or Cancel i...

Страница 126: ...lected a file by mistake select the file and press the ADJ OK button again 8 Press the DISP button Caution If the name of the file set to Flag Function Setting is changed using a computer the file is...

Страница 127: ...area are saved and the image is displayed as is the next time You can press the shutter release button or the 6 button to switch to shooting mode If no files are set to Flag Function Setting a messag...

Страница 128: ...mage with black borders added on the left and right sides You can also change the image size during shooting GP 83 1 Press the 6 Playback button 2 Press the ADJ OK button to display the file with the...

Страница 129: ...l image remains unchanged Caution You can only trim still images shot using this camera You cannot trim images shot in Movie S Cont or M Cont mode Subfiles with Sub File Size set to lower than N640 VG...

Страница 130: ...med 2 The aspect ratio of an F1 1 image is 1 1 but this changes to 4 3 when the image is trimmed Original image size Trimming level Trimmed image size 3648 2736 1 3264 2448 2 3 2592 1944 4 5 2048 1536...

Страница 131: ...ompensation and press the button 5 Press the ADJ OK button to select Auto and press the button The Level Compensation screen appears The original image appears at the upper left of the screen and the...

Страница 132: ...tical axis and the brightness on the horizontal axis ranging from shadows dark areas on the left through midtones to highlights bright areas on the right Each time you press the MENU button the select...

Страница 133: ...bright and dark areas You can then adjust the overall image brightness by moving the middle point left or right 8 Press the ADJ OK button Messages appear during the correction process and then the cor...

Страница 134: ...e lower left and the corrected image is shown on the right If you select a file that cannot use white balance compensation an error message appears and you are returned to the playback menu 5 Press th...

Страница 135: ...images shot in Movie S Cont or M Cont mode This function may not have any effect for images shot using Text Mode in scene mode or images shot when Image Settings is set to B W or Sepia You cannot use...

Страница 136: ...ror message appears The original image remains unchanged To select another correction area move the orange frame to the target area by pressing the ADJ OK button To cancel skew correction press the AD...

Страница 137: ...speed up the process The following table shows the approximate time required for skew correction When scene mode is set to Skew Correct Mode you can shoot an image and then immediately correct any ske...

Страница 138: ...ay the file you want to protect 3 Press the MENU button The playback menu appears 4 Press the ADJ OK button to select Protect and press the button 5 Make sure that 1 File is selected and then press th...

Страница 139: ...e ADJ OK button to select Protect and press the button 4 Press the ADJ OK button to select All Files 5 Make sure that Select is selected and then press the ADJ OK button All files are protected and th...

Страница 140: ...ight corner of the file 6 Press the button to select the next file you want to protect and then press the ADJ OK button 7 Repeat Step 6 to select all the files you want to protect If you selected a fi...

Страница 141: ...MENU button The playback menu appears 3 Press the ADJ OK button to select Slide Show and press the button The slide show starts and files are played back in order If you want to stop the slide show i...

Страница 142: ...ack screen Note If the capacity of the SD memory card to which you are copying is insufficient a message will be displayed indicating there is not enough capacity To copy only the number of shots that...

Страница 143: ...ecify the number of copies to print 1 Press the 6 Playback button 2 Press the ADJ OK button to display the still image for which you want to make the DPOF setting 3 Press the MENU button The playback...

Страница 144: ...OK button to select DPOF and press the button 4 Press the button to select All Files 5 Make sure that Select is selected and then press the ADJ OK button Once the DPOF setting is made the DPOF symbol...

Страница 145: ...er of copies 7 Press the button to select the next still image for which you want to make the DPOF setting 8 Press the button to set the number of copies to print Press the button to increase the numb...

Страница 146: ...memory card is initialized Setting or canceling files for Flag Function Setting Changing the magnification ratio or magnified area of files set to Flag Function Setting 1 Press the 6 Playback button...

Страница 147: ...to the Video In terminal on the television Connect the white plug of the AV cable to the audio input terminal white of the TV unit and the yellow plug to the video input terminal yellow 2 Make sure th...

Страница 148: ...mera with the AV cable Note You can connect the AV cable to the Video In terminal on your video recorder and record what you have shot to a video recorder Your camera is set to NTSC playback format us...

Страница 149: ...ction Note This camera uses PictBridge an industry standard for Direct Printing Your printer must be compatible with PictBridge to use the Direct Print function For support information see the documen...

Страница 150: ...omatically Turn on the printer if it is not already on Note To disconnect the camera from the printer check that the camera is turned off after printing is finished and disconnect the USB cable Cautio...

Страница 151: ...e action If a computer connection message appears even though the camera is connected to the printer reconnect the camera and press the ADJ OK button within 2 seconds 1 Check that the printer is ready...

Страница 152: ...Paper Size Sets the paper size Paper Type Sets the paper type Layout Sets the number of images printed on a sheet of paper The number of images that can be laid out on a sheet of paper varies dependin...

Страница 153: ...on cancels the operation When the images have been sent to the printer the display returns to the Direct Print playback mode screen and printing starts 1 Check that the printer is ready to print The C...

Страница 154: ...ton to select the setting and then press the ADJ OK button The display returns to the Direct Print menu 13 Repeat Steps 11 and 12 to change other settings as required 14 Press the ADJ OK button The se...

Страница 155: ...Settings MY1 MY2 P 159 Step Zoom On Off P 161 Set Fn Button Off MoveTarget Step Zoom AE Lock AT BKT CL BKT WB BKT Min Aper P 162 ISO Auto High AUTO 400 AUTO 800 AUTO1600 P 164 Sub File Size 1280 1M 64...

Страница 156: ...e or twice to select the MODE tab and then press the ADJ OK button twice The setup menu appears 3 Press the ADJ OK button to select the desired item If the DISP button is pressed at this point the dis...

Страница 157: ...ooting or playback screen Pressing the ADJ OK button in Step 6 confirms the setting and the display returns to the screen shown in Step 3 Note For some functions the setting selection method may diffe...

Страница 158: ...en appears to confirm formatting 3 Press the button to select Yes and then press the ADJ OK button Formatting starts When it is done the display returns to the setup menu If no SD memory card is loade...

Страница 159: ...lete copy the images to the SD memory card before formatting the internal memory GP 140 1 Display the setup menu For the operating procedure see P 154 2 Press the ADJ OK button to select Format Intern...

Страница 160: ...ess of the picture display changes as the slider is moved along the bar To cancel brightness adjustment press the DISP button to cancel the setting and return to the shooting menu 4 When you reach the...

Страница 161: ...as My Settings follow the steps below 1 Change the camera settings to the settings to be registered as My Settings 2 Display the setup menu For the operating procedure see P 154 3 Press the ADJ OK but...

Страница 162: ...ous Mode Image Settings Flash Expo Comp Auto Bracket CL BKT WB BKT Time Exposure Record Dual Size Custom Self Timer Fix Min Aperture Camera Shake Cor Slow Shutter Lmt Date Imprint Exposure Comp White...

Страница 163: ...Zoom and press the button 3 Press the button to select On 4 Press the ADJ OK button Note In Macro mode the step zoom focal lengths are roughly equivalent to 32 35 50 85 105 135 and 200 mm on a 35 mm...

Страница 164: ...ning a Function to the Fn Function Button Set Fn Button Available Setting Description Refer to MoveTarget Default setting Moves both the AE and AF or one or the other targets P 73 AE Lock Locks the ex...

Страница 165: ...lect Set Fn Button and press the button 3 Press the button to select the settings 4 Press the ADJ OK button Available Setting Portrait Face Sports Landscape Nightscape Night Port High Sens Zoom Macro...

Страница 166: ...ay the setup menu For the operating procedure see P 154 2 Press the ADJ OK button to select ISO Auto High and press the button 3 Press the button to select the desired setting 4 Press the ADJ OK butto...

Страница 167: ...uality Size for the original still image is set to N1280 1M and Sub File Size is set to 1280 1M 1 Display the setup menu For the operating procedure see P 154 2 Press the ADJ OK button to select Sub F...

Страница 168: ...Operation Sound Setting Operation Sounds Start sound Sound when the camera is turned on Shutter release sound Sound when the shutter release button is pressed Focus sound Sound when the shutter releas...

Страница 169: ...ton to select Vol Settings and press the button 3 Press the button to select the desired setting 4 Press the ADJ OK button Note The level sound is not emitted even when Level Setting is set to Disp Sn...

Страница 170: ...see P 154 2 Press the ADJ OK button to select LCD Confirm and press the button 3 Press the button to select the desired setting 4 Press the ADJ OK button Note When LCD Confirm is set to Hold the disp...

Страница 171: ...nabled when Pic Quality Size is set to a size other than 3648 2736 Zoom Magnification and Recorded Image Size Equivalent to that on a 35 mm camera 1 Display the setup menu For the operating procedure...

Страница 172: ...d z Each time you turn the zoom lever toward z the image is resized by one setting The size at which the image is recorded is displayed above the zoom bar Caution This function is not available when s...

Страница 173: ...ow 1 Display the setup menu For the operating procedure see P 154 2 Press the ADJ OK button to select ADJ Btn Set 1 ADJ Btn Set 2 ADJ Btn Set 3 or ADJ Btn Set 4 and then press the button 3 Press the b...

Страница 174: ...ton to select the desired setting 4 Press the ADJ OK button Note For information on how to use the level function during shooting see P 62 The level function is not available when recording movies or...

Страница 175: ...ifficult to measure the distance with auto focus when shooting in dark surroundings and the auto focus distance is measured 1 Display the setup menu For the operating procedure see P 154 2 Press the A...

Страница 176: ...t the desired setting 4 Press the ADJ OK button Note To continue using the camera after auto power off turned the camera off press the POWER button to turn the camera on again You can also press and h...

Страница 177: ...or press any button to return to the original picture display brightness The default setting is On 1 Display the setup menu For the operating procedure see P 154 2 Press the ADJ OK button to select L...

Страница 178: ...nce to Show 1 Display the setup menu For the operating procedure see P 154 2 Press the ADJ OK button to select Min Macro Distance and press the button 3 Press the button to select Show 4 Press the ADJ...

Страница 179: ...era held vertically Images shot with the camera held vertically will appear with the same vertical orientation Images shot with the camera held horizontally will automatically be rotated to a horizont...

Страница 180: ...ied playback When the image is going through skew correction the correction area is displayed in playback mode GP 134 When playing back a slide show or viewing camera images on a TV the camera is dete...

Страница 181: ...l No and press the button 3 Press the button to select the desired setting 4 Press the ADJ OK button Changing File Name Settings Sequential No Available Settings On Continue numbering File names are a...

Страница 182: ...o a computer using DL 10 GP 195 the file being transferred is renamed and saved The file is saved with the name RIMG jpg where indicates a number even if Sequential No is set to On Caution When the fi...

Страница 183: ...button to move to the next item 4 In Format choose the date and time format 5 Check the information on the screen and then press the ADJ OK button Once you have set the date and time the display retu...

Страница 184: ...ge selection screen appears 3 Press the button to select the desired setting 4 Press the ADJ OK button Once you have set the language the display returns to the setup menu 5 Press the MENU button or t...

Страница 185: ...AL format used in Europe and elsewhere then switch your camera to PAL format before connecting The default setting varies depending on where you purchased the camera 1 Display the setup menu For the o...

Страница 186: ...ed CD ROM GP 186 2 Download images without using DL 10 or other image download software GP 196 Caution You cannot download images from this camera to a computer running Windows 98 or 98 SE Note For de...

Страница 187: ...or other If used in conjunction with a hub or other USB devices the software may not work properly When dealing with movies and other large files a larger memory environment is recommended System Req...

Страница 188: ...rowse User s Manual Software Version Click this to display the Software User Guide PDF P 191 Browse CD ROM Content Click this to display the list of files contained on the CD ROM P 192 When Installing...

Страница 189: ...ng the software as before If you have already uninstalled the Caplio Software before the message appears DU 10 SR 10 or ST 10 will not be installed even if you install DC Software When Caplio Software...

Страница 190: ...xe The installer screen appears automatically 2 Click Installing the software Operating systems other than Windows Vista After a while the Choose Setup Language screen appears Windows Vista A screen a...

Страница 191: ...e next screen is displayed When installation of Irodio Photo Video Studio is completed a dialog box appears indicating that all software applications have been installed 7 Click Finish A dialog box in...

Страница 192: ...he Windows XP screen 1 Start your computer and insert the supplied CD ROM in the CD ROM drive Operating systems other than Windows Vista The installer screen appears automatically Windows Vista The Au...

Страница 193: ...Binding Before installing DeskTopBinder Lite uninstall these applications The data used in the previous application can be saved and inherited by DeskTopBinder Lite However when the previous applicat...

Страница 194: ...one double click Irodio Photo Video Studio exe in the Irodio Photo Video Studio folder Acrobat Reader is required to display the operation manual PDF file If the computer is running under Windows Acro...

Страница 195: ...Photo Video Studio and the DeskTopBinder Lite and then uninstall either one camera connection to the computer may fail In this case uninstall both DC Software and DC Software S and then install only t...

Страница 196: ...Vista 3 Double click the Add Remove Programs icon or the Add or Remove Programs icon in Windows XP 4 Select Irodio Photo Video Studio and then click Change Remove 5 Confirm file deletion and click OK...

Страница 197: ...e the Digital Camera folder The files will continue to be saved in the Caplio folder if you were previously using Caplio Software Set the correct date and time on the camera before shooting 5 When ima...

Страница 198: ...ration the camera is displayed as a drive under My Computer 4 From the displayed drive copy a file to the desired location The figure at right shows the folder configuration in the drive When the cont...

Страница 199: ...eader This is a device connected to a computer to read the contents of cards In addition to the memory card adapter type there are card readers compatible with various types of cards into which you ca...

Страница 200: ...Select USB Mass Storage Device and click Stop 3 Check that USB Mass Storage Device is selected and click OK 4 Click Close 5 Disconnect the USB cable Note If the USB cable is disconnected without disa...

Страница 201: ...be used with Macintosh it is possible to display the Software User Guide Only on computers with Acrobat installed 1 Make sure that the camera power is off 2 Connect the accessory USB cable to a USB p...

Страница 202: ...r the password 2 Disconnect the USB cable Note You can also click Eject on the Special menu in Mac OS 9 or the File menu in Mac OS X to cancel the connection If the USB cable is disconnected without d...

Страница 203: ...write protected Unlock the card P 26 Print settings cannot be set for this file This file movie or other file cannot be selected for printing Insufficient Memory Capacity Short Files cannot be stored...

Страница 204: ...ack on P 30 Battery is running low Charge the rechargeable battery P 27 An unacceptable battery is used Use the dedicated rechargeable battery Never use any other battery P 24 The camera does not turn...

Страница 205: ...display The camera is not on or the picture display is dark Turn the camera on or adjust the brightness of the picture display P 30 P 158 The VIDEO AV cable is connected Disconnect the VIDEO AV cable...

Страница 206: ...nstead of using the flash P 41 P 95 Subject is overexposed The AE symbol appears Correct the exposure Cancel exposure time P 109 P 100 The brightness of the picture display is not appropriate Adjust t...

Страница 207: ...the display to normal symbol display or histogram P 60 The camera is upside down shutter release button is on the bottom Hold the camera correctly The image is tilted even though it was shot with the...

Страница 208: ...ded normally Load a normally recorded card The contact surface of the SD memory card is dirty Wipe with a soft dry cloth There is something wrong with the SD memory card Play back images from another...

Страница 209: ...et Set the correct date time P 181 The set date disappeared The battery was removed If the battery is removed for more than one week the date setting will be lost Make the settings again P 181 Auto po...

Страница 210: ...n the message screen to make sure that it comes from a reputable source and then click the Unblock button Caution If you do not recognize the program you should block it because it may be a virus Clic...

Страница 211: ...the software is in Programs and Services 5 Click the Add Program button to add software that uses the network If you clicked the Ask Me Later button Each time the program is activated the Windows Secu...

Страница 212: ...r weighted Light Metering Spot Metering TTL CCD Metering Exposure Mode Program AE Exposure Compensation Manual exposure compensation 2 0 to 2 0 EV in 1 3 EV Steps Auto bracket function 0 5 EV 0 0 5 EV...

Страница 213: ...ording File Format Still Image JPEG Exif Ver 2 21 2 Movie AVI Open DML Motion JPEG Format Compliant Compression Format JPEG Baseline Format Compliant Still image movie Other Major Shooting Functions C...

Страница 214: ...n shooting for long periods Number of Images That Can be Stored in Internal Memory SD Memory Card Mode Pic Quality Size Internal Memory 1 GB 2 GB 4 GB 8 GB 16 GB Still Image F3648 10M 14 247 503 989 2...

Страница 215: ...O N3648 10M Focus O Multi AF Exposure Metering O Multi Continuous Mode Off Image Settings O Normal Flash Expo Comp O 0 0 Auto Bracket O Off Time Exposure O Off Record Dual Size O Off Custom Self Timer...

Страница 216: ...Sounds O All Vol Settings O Medium LCD Confirm O 0 5Sec Digital Zoom Img O Normal ADJ Btn Set 1 O Expo Cmp ADJ Btn Set 2 O Wht Bal ADJ Btn Set 3 O ISO ADJ Btn Set 4 O Quality Level Setting O Display...

Страница 217: ...untry in which it was purchased The warranty is only valid in the country in which the camera was purchased Should the product fail or malfunction while you are abroad the manufacturer assumes no resp...

Страница 218: ...ed out and images may become hard to view The picture display and panel may contain some pixels that do not remain lit up continually in part or at all Also the brightness may become uneven because of...

Страница 219: ...of the picture display is easily scratched do not rub hard objects against it Clean the surface of the picture display by wiping gently with a soft cloth containing a small amount of display cleaner...

Страница 220: ...plies to the camera and not to the accessories such as the case and strap nor does it apply to the battery and other consumables provided 7 Any consequential damages arising from failure of the camera...

Страница 221: ...ealer or an experienced radio TV technician for help FCC 15 105B Changes or modifications not expressly approved by the party responsible for compliance could void the user s authority to operate the...

Страница 222: ...s 89 Copy To Card 140 Custom Self Timer 102 D Date Imprint 108 Date Settings 32 181 DC Software 186 193 Delete 56 Density 68 DeskTopBinder Lite 190 Digital Zoom 38 Digital Zoom Img 169 Direct Print 14...

Страница 223: ...isplay 18 20 Playback Button 18 52 Playback menu 121 Playback Mode 30 52 Portrait 45 POWER Button 17 Printing 147 Protect 136 R Rechargeable Battery 14 24 27 28 Record Dual Size 101 Recover File 144 R...

Страница 224: ...ut Mode 183 Vol Settings 167 W White Balance 111 White Balance Bracket WB BKT 97 White Balance Compensation 132 White Saturation Highlights Display 61 WIA Driver 186 190 Z Zoom 37 Zoom Lever 17 37 Zoo...

Страница 225: ...38 au erhalb Deutschlands 49 6331 268 438 France partir de la France 0800 88 18 70 en dehors de la France 33 1 60 60 19 94 Italia dall Italia 02 696 33 451 dall estero 39 02 696 33 451 Espa a desde Es...

Страница 226: ...2RICOH http www ricoh usa com RICOH INTERNATIONAL B V EPMMC Oberrather Str 6 40472 D sseldorf GERMANY innerhalb Deutschlands 06331 268 438 au erhalb Deutschlands 49 6331 268 438 http www ricohpmmc com...

Отзывы: