3
How To Set The Code For The PilotTX
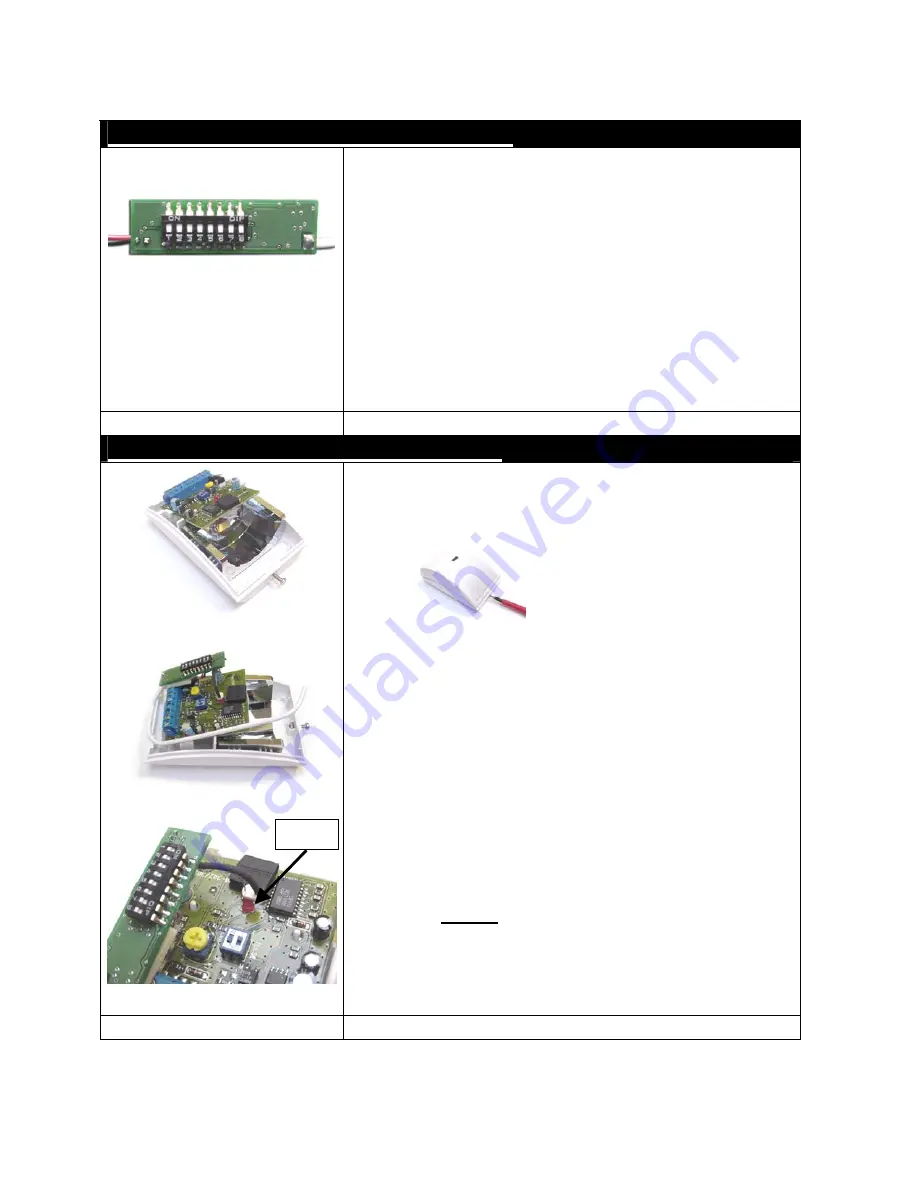
To Set the fixed code that the PilotTX will transmit
when it is activated follow these steps:
1. Using a pair of tweezers or other implement with
a point, flick the some of the white switches to
the “ON” position to form a unique combination.
NOTE: No two PilotTX transmitters can have the same
code as this will cause false alarms. If two do have the
same DIP switch position simply switch one or more
switches to a different position.
Inserting The PilotTX Into A Detector
1. Remove the front cover of the PIR.
NOTE: You may need to undo a screw to be able to
remove the cover.
2. Connect the Red power lead of the PilotTX to
+12V DC. And the Black power lead to
EARTH.
3. The Antenna: For the best range, keep the
antenna away/off the detectors printed circuit
board and arranged so that it follows the edge of
the inside of the detector.
4. Place and secure the PilotTX so that the LDR
will be able to be placed in front of the LED.
You
MUST
ensure that the LDR is facing
directly into the LED.
5. Place the front cover back on the PIR and if
required tighten the screw back up.
ON Position
LED


