background image

English

INSTRUCTIONS FOR SAFE FLYING

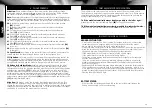
GENERAL FLYING TIPS:

• Always place the model on a level surface. An inclined surface can, under certain 

circumstances, have a negative impact on the starting behavior of the model.

• Always operate the controls slowly and with a gentle touch.

• Always maintain visual contact with the model and do not look at the remote control!

• Move the thrust control down again somewhat as soon as the model lifts off from 

the ground. Maintain flying altitude by adjusting the thrust controller.

• If the model lowers, move the thrust control slightly upward again.

• If the model climbs, move the thrust control down slightly.

• To fly along a curve, tapping the directional  controller very slightly in the respective 

direction often suffices.  

There is a general tendency during preliminary attempts at flight to operate the 

model‘s controls too aggressively.Always operate the controls slowly and carefully. 

Never fast and fitfully.

• Beginners should first master trimming before attempting to master the thrust controller. 

The model does not necessarily have to fly straight at the beginning - initially, it is 

more important to maintain a constant height of approximately one meter above the 

ground by repeatedly tapping the thrust control. Only then should the pilot practice 

steering the model left and right.

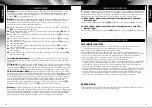
6   FLIGHT CONTROL 

Attention:

 Due to outside influences, the pressure inside the model may change, 

causing the model to automatically rise or lower. This is not a defect. Briefly actuating 

the control for thrust and rotation 

(2A)

 is sufficient to counteract this.

Note: 

Only minimal corrections of the controls are necessary for a smooth flying behavior 

of the model! The direction indication applies when the model is viewed from behind. If 

the model is flying forwards towards the pilot, it must be moved in the opposite direction.

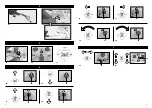
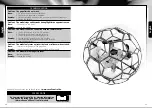
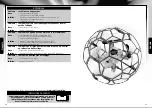
6A

 To take off or gain altitude, carefully move the control for thrust and rotation  

(2A) 

forwards.

6B To land or lose altitude, carefully move the control for thrust and rotation  

(2A)

 backwards.

6C

 Fly forward by moving the controller for forward/backward and sideways  

flight 

(2F) 

carefully forward.

6D

  Fly backward by moving the controller for forward/backward and sideways  

flight

 (2F)

 carefully backward.

6E

 Fly to the left by moving the controller for forward/backward and sideways  

flight

 (2F)

 carefully to the left.

6F

 Fly to the right by moving the controller for forward/backward and sideways  

flight

 (2F)

 carefully to the right.

6G 

Turn the model around to the left by moving the control for thrust and rotation 

(2A)  

to the left.

6H

 Turn model around to the right by moving the control for thrust and rotation 

(2A)


to the right.

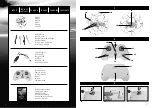
2A Speed levels: 

By pressing in the control for thrust and rotation, you activate the 

second and then the third level and then go back to the first speed level.

2F Flip button:

 Each time you press in the forward/reverse and banking control, the 

model performs a flip in the direction in which the control for forwards/reverse and 

banking 

(2F)

 is moved immediately afterwards. Only activate this function if there is 

enough space available and the model is flying at a height of at least 2 meters.


2D Button for Headless Mode: 

Headless mode supports beginners in the initial 

stages. Regardless of where the quadrocopter turns, the direction of flight always 

corresponds exactly to the direction specified with the control for forwards/backwards 

and sideways movement 

(2F)

. An example: If the model were to be turned 180° 

and flown towards the operator, the operator would have to „convert“ the forwards/

backwards and sideways movement accordingly. This is no longer necessary if head-

less mode is activated, as the internal processor always converts the control directions 

automatically. Another press of the button 

(2D)

 deactivates the mode and the front LEDs 

(1C)

 now stay illuminated again.

Attention:


The model „notes“ the forwards direction during each switch-on. This  

means that the operator must not turn when controlling the model, as this would 

change the concept of „forwards“ and „right/left“ in relation to the model. If the operator 

changes position and wants to use headless mode - or if the control direction is no longer 

correct due to a collision, the model must be restarted.

The model must be switched on first in order to connect it to the remote control.  

Its adjustment is simple, but it requires some patience and a feel for it. Please observe 

the following instructions precisely: Carefully move the thrust control up and raise the 

helicopter approximately 0.5 to 1 metre in altitude.

7   TRIM ADJUSTMENT OF THE CONTROL

7B  If the model automatically moves slowly or quickly forwards or backwards ...

gradually press the forwards/backwards trim 

(2G)

 in the opposite direction.

7A  If the model automatically moves slowly or quickly to the left or right ...

gradually press the trim for sideways flight 

(2B) 

in the opposite direction. 

English

BATTERY STATUS:

• If the front LEDs are flashing and the red LED on the rear of the model lights up, the 

battery is nearly empty.  Land to avoid crashing.

18

19

Содержание MINI CAGER

Страница 1: ...vell GmbH dass sich dieses Produkt in Übereinstimmung mit den einschlä gigen Normen und Richtlinien befindet Die Konfor mitäts erklärung ist unter www revell control de zu finden Legge sui rifiuti elettronici Una volta concluso l utilizzo rimuovere le batterie e smaltire separatamente i vecchi apparecchi elettrici presso i punti di raccolta comunali per i rifiuti elettrici ed elettronici Le altre ...

Страница 2: ...otorset Radiocomando Emisora Zender Télécommande Remote control Fernsteuerung Istruzioni per l uso Manual de instrucciones Gebruiksaanwijzing Mode d emploi Operating manual Bedienungsanleitung 2 2F 2I 2A 2G 2B 2E 2D 2C 2J 3 3A 3B 3C 1 1A 1C Modello Modelo Model Modèle Model Modell USB Ladegerät USB charger Chargeur USB USB lader Cargador USB Caricabatterie USB 1B 1D 1E 2H 2 3 ...

Страница 3: ...6E 2F 2F 6F 2A 2A 6G 6H 4 4A 4B 5 6 6A 6B 2A 2A 5B 6C 6D 2F 2F 7 7B 2B 2G 7A 5A 5C 4 5 ...

Страница 4: ...r Fernsteuerung herausgenommen werden Nicht wiederaufladbare Batterien dürfen nicht geladen werden Aufladbare Batterien dürfen nur unter Aufsichtvon Erwachsenen geladen werden Ungleiche Batterietypen oder neue und gebrauchte Batterien dürfen nicht zusammen verwendet werden Es dürfen nur die empfohlenen Batterien oder die eines gleichwertigen Typs verwendet werden Batterien müssen mit der richtigen...

Страница 5: ... Schalter 2D Headless Mode 2E Keine Funktion 2F Regler für Vor Zurück und Seitwärts senkrechter Druck aktiviert Flip Funktion 2G Trimmung für Vor Zurück 2H Power LED 2I Sicherheitsschraube und Hebel des Batteriefachs 2J Batteriefachabdeckung 2 FERNSTEUERUNG 4 AUFLADEN DES MODELLS Achtung Vor dem Laden und nach jedem Flug müssen Akku und die Motoren ca 15 30 Minuten abkühlen andernfalls können sie ...

Страница 6: ...Regler für Vor Zu rück und Seitwärts 2F gleich danach steuert Aktivieren Sie diesen Funktion nur wenn ausreichend Platz zur Verfügung steht und das Modell mindestens 2 Meter hoch fliegt 2D Taste für Headless Mode Der Headless Mode unterstützt Beginner beim Einstieg denn ganz gleich wohin sich der Quadrokopter dreht entspricht die Flugrichtung immer exakt der Richtung die man mit dem Regler für Vor...

Страница 7: ... Problem Das Modell stoppt ohne ersichtlichen Grund während des Flugs und sinkt ab Ursache Der Akku ist zu schwach Abhilfe Den Akku aufladen Problem Das Modell lässt sich mit der Funk Fernsteuerung nicht steuern Ursache 1 Der ON OFF Schalter steht auf OFF 2 Die Batterien wurde falsch eingelegt 3 Die Batterien haben nicht mehr genug Energie Abhilfe 1 Den ON OFF Schalter auf ON stellen 2 Überprüfen ...

Страница 8: ...e of an equivalent type may be used Batteries must be inserted according to the correct polarity and Depleted batteries must be removed from the transmitter The connection terminals may not be short circuited Remove the batteries from the transmitter if they are not to be used for an extended period of time Charging unit safety instructions Non rechargeable batteries may not be charged This chargi...

Страница 9: ...y must be discharged or their capacity must be fully depleted Cover exposed terminals with adhesive tape in order to prevent short circuiting Maintenance and care Please only use a clean damp cloth to wipe off the model Protect the model and batteries from direct sunlight and or direct heat Never allow the transmitter and charging unit to come into contact with water because the electronics will b...

Страница 10: ... and sideways flight 2F carefully to the right 6G Turn the model around to the left by moving the control for thrust and rotation 2A to the left 6H Turn model around to the right by moving the control for thrust and rotation 2A to the right 2A Speed levels By pressing in the control for thrust and rotation you activate the second and then the third level and then go back to the first speed level 2...

Страница 11: ...ed correctly 3 The batteries do not have enough power Remedy 1 Set the ON OFF switch to the ON position 2 Check whether the batteries are inserted correctly 3 Insert new batteries Problem The model only turns on its vertical axis or rolls over when started Cause Incorrect arrangement of the propellers Remedy Install the propellers and arms as outlined in the manual Problem The model will no longer...

Страница 12: ...s par des piles neuves ou rechargées Consignes de sécurité concernant les piles Les piles rechargeables doivent être retirées de la télécommande avant leur chargement Ne pas recharger les piles jetables Les piles rechargeables doivent être rechargées sous la surveillance d un adulte Ne pas mélanger les piles de type différent ou des piles neuves et des piles usagées Seules les piles recommandées o...

Страница 13: ...re chargeur peut endommager durablement la batterie ainsi que les composants qui la jouxtent et causer des dommages corporels Ne jamais utiliser de chargeur pour batteries Ni Cd NiMH Toujours effectuer le chargement sur une surface non inflammable et dans un environnement sécurisé contre le feu Surveiller la batterie lors du chargement Ne jamais démonter ni modifier les contacts de la batterie Ne ...

Страница 14: ...re car le processeur interne convertit toujours automatiquement les directions des commandes Une nouvelle pression sur la touche 2D désactive le mode et les diodes frontales 1C brillent à nouveau en permanence Attention À chaque mise en marche le modèle enregistre l orientation vers l avant Cela signifie que pour piloter il ne faut pas se retourner sinon on perçoit l avant ainsi que de la droite e...

Страница 15: ...Solution 1 Mettre l interrupteur ON OFF en position ON 2 Vérifiez que les piles sont correctement insérées 3 Insérer de nouvelles piles Problème Le modèle ne fait plus que tourner autour de son axe vertical ou culbute lors du décollage Cause Disposition incorrecte des hélices Solution Installer les hélices tel que décrit dans la notice d utilisation Problème Le modèle n effectue plus de loopings C...

Страница 16: ...et oplaadbare batterijen mogen niet worden opgeladen Oplaadbare batterijen mogen alleen onder toezicht van volwassenen worden opgeladen Gebruik geen batterijen van verschil lende typen of nieuwe en gebruikte batterijen door elkaar Gebruik uitsluitend de aanbevolen batterijen of batterijen van een gelijkwaardig type Plaats batterijen altijd met de polen en in de juiste richting Verwijder lege batte...

Страница 17: ...k leiden tot schade aan naburige onderdelen en tot persoonlijk letsel Gebruik nooit een lader voor NiCd NiMH accu s Laad de accu steeds op op een vuur vaste ondergrond en in een brandvei lige omgeving Laat de accu niet onbeheerd achter tijdens het laden Demonteer de contacten van de accu in geen geval en probeer ze niet aan te passen Beschadig de cellen van de accu niet en maak ze niet open Er bes...

Страница 18: ...stuurrichtingen steeds automa tisch omrekent Druk nogmaals op de knop 2D om de modus weer te deactiveren de voorled s 1C branden weer continu Let op Telkens bij het inschakelen registreert het model uw oriëntatie Dat betekent dat u zich vervolgens bij het sturen niet mag draaien omdat u dan in een andere stand komt ten opzichte van het model Als u van positie bent veranderd en de Headless Mode toc...

Страница 19: ...ichtbare oorzaak tijdens de vlucht en verliest hoogte Oorzaak De accu is te zwak Oplossing De accu opladen Probleem Het model kan niet worden bestuurd met de zender Oorzaak 1 De ON OFF schakelaar staat op OFF 2 De batterijen zijn verkeerd geplaatst 3 De batterijen hebben niet voldoende energie meer Oplossing 1 Zet de ON OFF schakelaar op ON 2 Controleer of de batterijen juist zijn geplaatst 3 Plaa...

Страница 20: ...tilizar baterías de distinto tipo ni tampoco mezclar baterías nuevas y usadas Solo está permitido utilizar las baterías recomendadas o unas equivalentes Las baterías deben colocarse respe tando la polaridad y Las baterías descargadas deben sacarse de la emisora Bajo ninguna circunstancia se deben cortocircuitar los contactos Saque las baterías de la emisora cuando no vaya a utilizarse durante un p...

Страница 21: ...á equipado con una batería LiPo recargable Es necesario tener en cuenta las siguientes instrucciones de seguridad Bajo ninguna circunstancia se deben arrojar las baterías LiPo al fuego ni guardarlas en lugares con temperaturas elevadas Para cargar las baterías solo se debe utilizar el cargador suministrado La utilización de un cargador distinto puede provocar daños permanentes en la batería y comp...

Страница 22: ...mente el control Si vuelve a pulsar el botón 2D se desactiva el modo y los LED frontales 1C se iluminan de nuevo de forma permanente Atención Cada vez que se enciende el modelo registra su orientación hacia delante Esto quiere decir que durante el vuelo el piloto no debe girarse ya que cambiaría la orientación de delante así como de derechas izquierdas con respecto al modelo Si se cambia de posici...

Страница 23: ...modelo se detiene sin motivo aparente durante el vuelo y pierde altura Causa la carga de la batería es insuficiente Solución cargue la batería Problema El modelo no se puede controlar con la emisora Causa 1 el interruptor ON OFF se encuentra en la posición OFF 2 las baterías se han colocado incorrectamente 3 la carga de las baterías es insuficiente Solución 1 coloque el interruptor ON OFF en la po...

Страница 24: ...e solo le batterie consigliate o un tipo simile Inserire le batterie rispettando la giusta polarità e Le batterie scariche devono essere rimosse dal radiocomando I morsetti di raccordo non devono essere cortocircuitati Rimuovere le batterie dal radiocomando quando non vengono utilizzate per molto tempo Avvertenze di sicurezza sul caricabatterie Non ricaricare batterie monouso Questo caricabatterie...

Страница 25: ... Per l operazione di caricamento assicurarsi di avere sempre una base resistente al fuoco in un ambiente tutelato dal pericolo di incendi Non lasciare le batterie incustodite durante la ricarica Non smontare o modificare i contatti delle batterie Non danneggiare o perforare le celle della batteria Vi è il rischio di esplosione Tenere la batteria LiPo lontana dalla portata dei bambini Scaricare le ...

Страница 26: ...ticamente le direzioni di guida Un ulteriore pressi one del pulsante 2D disattiva la modalità e i LED anteriori 1C si riaccendono a luce fissa Attenzione Ad ogni accensione il modello ricorda l orientamento in avanti Ciò significa che non occorre girarsi mentre si guida in quanto rispetto a questo modellino la concezione di avanti e di destra sinistra è diversa Se si cambia posizione e si desidera...

Страница 27: ...a Il modellino si ferma senza motivo durante il volo e cade Causa La batteria è scarica Soluzione Ricaricare la batteria Problema Non si riesce a controllare il modellino con il radiocomando Causa Causa 1 Il tasto ON OFF è su OFF 2 Le batterie sono posizionate in modo scorretto 3 Le batterie non hanno energia sufficiente Soluzione 1 Portare l interruttore ON OFF su ON 2 Verificare la corretta posi...

Страница 28: ...Notes Notes 55 54 ...

Отзывы: