


This is a publication by Conrad Electronic SE, Klaus-Conrad-Str. 1, D-92240 Hirschau (www.conrad.com).
All rights including translation reserved. Reproduction by any method (e.g. photocopying, microfilming, or the capture in
electronic data processing systems) requires prior written approval from the editor. Reprinting, also in part, is prohibited.
This publication represents the technical status at the time of printing.
Copyright 2017 by Conrad Electronic SE.
*1574526_v1_0917_02_DS_m_4L_(1)
c)
Firmware settings
You can configure the firmware settings without connecting the device to a wired network (RJ45) or an
existing Wi-Fi network. You will not be able to connect to the Internet when the device is not connected to a
network. The Wi-Fi repeater will create an open Wi-Fi network named "wireless-N". You can use this network
to access the firmware settings.
Configure the settings as quickly as possible to prevent hackers from accessing the network.
When configuring the settings, place the Wi-Fi repeater in an area shielded from electromagnetic
fields. When you have finished configuring the settings, plug the repeater into a mains socket in
the desired location.
• Search for the "wireless-N" network on your Wi-Fi device (e.g. computer, tablet or smartphone). If you
changed the network name, use the corresponding network.
• Connect your Wi-Fi device to the network created by the Wi-FI repeater. For more information, refer to the
instructions that came with your Wi-Fi device.
• On your Wi-Fi device, open the web browser and enter "http://ap.setup" or "http://192.168.10.1" to access
the firmware settings.
•
The Wi-Fi repeater may need to reboot when you have finished configuring the settings. If so, follow the
steps below to log back in to the web interface.
The following section provides an overview of the different hardware settings and features.
The firmware settings can be easily configured using the web interface. The screenshots are
provided for reference only. The settings must be configured to suit your individual requirements.
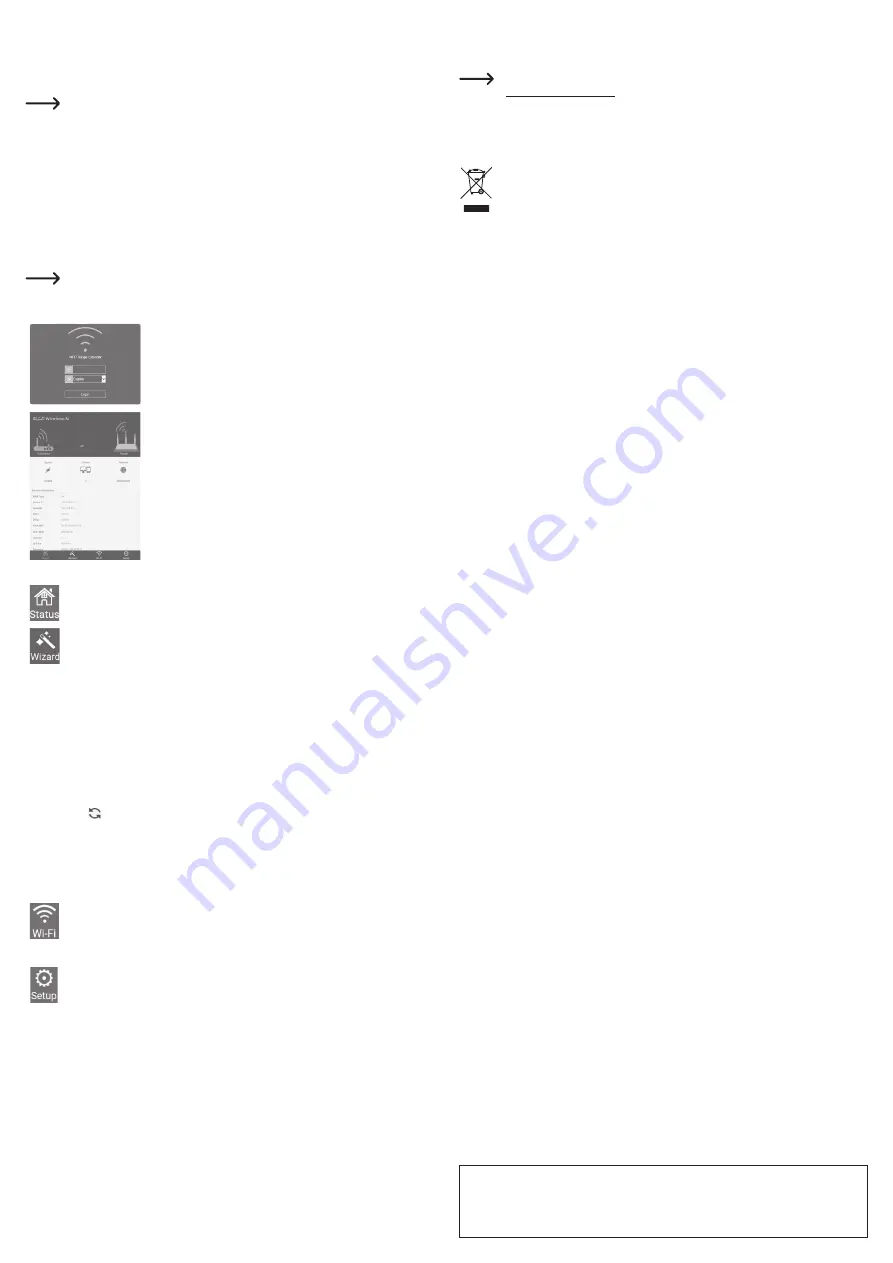
• On the login screen, select the desired language and enter "admin" for
the password. Select "Login".
• The status screen will load, which shows the current device settings.
•
Use the cursor to select the settings that you want to configure. Select
"Apply" to apply the settings. The following options are available.
The status page displays an overview of the most important settings, such as
WAN type
(operating mode),
SSID
(Wi-Fi network name),
speed
,
clients
(connected Wi-Fi devices), and
Internet
connection status. The status page is the default firmware page.
Select this interface. From here, you can choose how you want to configure the device (AP mode
or repeater mode). Click to select the desired mode.
Repeater
(extended Wi-Fi network) or
AP
(standalone Wi-FI network).
Click the desired mode and follow the onscreen instructions. Click
Apply
or
Connect
to confirm
your selection. A restart may be required.
AP
Use a LAN cable to connect the Wi-Fi repeater to a network. This will give you access to your
Ethernet network and all corresponding resources (e.g. Internet access).
The following options are available:
Wi-Fi SSID
(for configuring the network name)
Security type
(select an encryption method, open is not recommended)
Wi-Fi password
(secure the network with a custom password)
Repeater
Click to search for available Wi-Fi networks. Select the desired network from the list.
Connect to
(
SSID of the selected Wi-Fi network)
Wi-Fi Password
(
The Wi-Fi password is required when you are extending the range of your
existing network with the repeater function).
Repeater SSID
(assigned automatically, enter a new name to change the network name).
Select "Manually enter" to manually enter the network data.
Configure the settings for your Wi-Fi network.
Wi-Fi Set up
(SSID, security and Wi-Fi password).
Wi-Fi signal
(select the required signal strength).
More settings
(country setting, channel, bandwidth and more).
Configure the options for
LAN settings
(IP address and mask),
Time settings
(system time
settings), LED on/off (LED settings),
System Safety
,
Backup/Restore
(back up settings and
restore factory settings),
Upgrade Firmware
,
Device Status
, and
Device Reboot
.
Care and cleaning
• Always disconnect the product from the mains socket before cleaning it.
• Never use aggressive detergents, rubbing alcohol or other chemical solutions, as these may damage the
casing or cause the product to malfunction.
• Use a dry, lint-free cloth to clean the product.
Declaration of Conformity (DOC)
Conrad Electronic SE, Klaus-Conrad-Straße 1, D-92240 Hirschau, hereby declares that this product
conforms to the 2014/53/EU directive.
Click on the following link to read the full text of the EU declaration of conformity:
www.conrad.com/downloads
Select a language by clicking on a flag symbol, and then enter the product order number in the
search box. The EU Declaration of Conformity is available for download in PDF format.
Disposal
Electronic devices are recyclable waste and must not be placed in household waste. Always
dispose of the product according to the relevant statutory regulations.
You thus fulfill your statutory obligations and contribute to the protection of the environment.
Technical data
Supported Wi-Fi standards ...................... IEEE 802.11 b/g/n
Wireless frequency range ........................ 2.4 – 2.485 GHz
Bandwidths .............................................. 20 M & 40 M
Wireless class .......................................... Class 2
Transmission power................................. <20 dBm
Antenna ................................................... Integrated
Ethernet (wired LAN) ............................... 10/100 MBit/s
Transfer rates (wireless) .......................... 11/54/150/270/300 Mbps
Modulation ............................................... CCK, OFDM, QPSK, 16QAM, 64QAM
Encryption protocols ................................ WPA2, WPA and WEP(128/64)
Operating conditions ................................ 0 to +40 °C, 10 – 90 % relative humidity (non-condensing)
Storage conditions ................................... -10 to +70 °C, 10 – 90 % relative humidity (non-condensing)
Dimensions (L x W x H) ........................... 42 x 42 x 70 mm
Weight ..................................................... 41 g