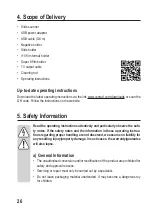
background image

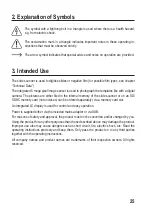
2. Explanation of Symbols

  The symbol with a lightning bolt in a triangle is used where there is a health hazard, 

e.g. from electric shock.

  The exclamation mark in a triangle indicates important notes in these operating in-

structions that must be observed strictly.

  The arrow symbol indicates that special advice and notes on operation are provided.

3. Intended Use

The slide scanner is used to digitise slides or negative film (for possible film types, see chapter 

“Technical Data”).
The integrated 5 mega pixel image sensor is used to photograph the templates like with a digital 

camera. The pictures are either filed in the internal memory of the slide scanner or on an SD/

SDHC memory card (not enclosed, can be ordered separately) via a memory card slot.
An integrated LC display is used for control and easy operation.
Power is supplied either via the included mains adapter or via USB.
For reasons of safety and approval, the product must not be converted and/or changed by you. 

Using the product for any other purposes than those described above may damage the product. 

Improper use also may cause dangers such as short circuit, fire, electric shock, etc. Read the 

operating instructions precisely and keep them. Only pass the product on to any third parties 

together with the operating instructions.
All company names and product names are trademarks of their respective owners. All rights 

reserved.

25

Содержание 1507246

Страница 1: ...Best Nr 1507246 Seite 2 21 Operating Instructions Slide scanner DS100 5M Item No 1507246 Page 22 41 Mode d emploi Scanner de dia DS100 5M N de commande 1507246 Page 42 61 Gebruiksaanwijzing Diascanner...

Страница 2: ...m in den Halter einlegen 10 a Dia einlegen 10 b Negativ einlegen 10 c Super 8 Film einlegen 10 d 110er Film einlegen 10 8 Halter einsetzen entnehmen 11 9 Inbetriebnahme 11 10 Bedienung im OSD Men 12 a...

Страница 3: ...Seite 11 Video Ausgang 18 12 Behebung von St rungen 18 13 Wartung und Reinigung 20 14 Entsorgung 20 15 Technische Daten 21 a Diascanner 21 b Steckernetzteil 21 3...

Страница 4: ...e als Anwender diese Bedienungsanleitung beachten Diese Bedienungsanleitung geh rt zu diesem Produkt Sie enth lt wichtige Hinwei se zur Inbetriebnahme und Handhabung Achten Sie hierauf auch wenn Sie d...

Страница 5: ...des Diascanners oder ber einen Speicherkarteneinschub auf einer SD SDHC Speicherkarte nicht im Lieferumfang ge trennt bestellbar abgelegt Ein eingebautes LC Display dient zur Kontrolle und au erdem zu...

Страница 6: ...durch und beachten Sie insbesondere die Sicherheitshinweise Falls Sie die Sicherheitshinweise und die Angaben zur sachgem en Handhabung in dieser Bedienungsanleitung nicht befolgen bernehmen wir f r...

Страница 7: ...schlossen ist zugeh rigen Sicherungsautomat abschalten bzw Sicherung herausdrehen anschlie end FI Schutzschalter abschalten so dass die Netzsteckdose allpolig von der Netzspannung getrennt ist Ziehen...

Страница 8: ...n St e Schl ge starke Magnetfelder wie in der N he von Maschinen oder Lautsprechern Es ist anzunehmen dass ein gefahrloser Betrieb nicht mehr m glich ist wenn das Ger t sichtbare Besch digungen aufwei...

Страница 9: ...4 Taste OK ENTER 5 Power LED 6 Taste Convert Mode 7 Taste Right Flip 8 Einschub hier den Dia bzw Negativ Halter einschieben 9 Videoausgang 10 Einschub f r SD SDHC Speicherkarte 11 MiniUSB Buchse f r...

Страница 10: ...hlie en Sie den Negativ Halter vorsichtig c Super 8 Film einlegen ffnen Sie den Negativ Halter mit Negative Adapter beschriftet klappen Sie den Deckel mit THIS SIDE UP beschriftet nach oben Legen Sie...

Страница 11: ...ebene ausreichend gro e Fl che Stecken Sie eine SD SDHC Speicherkarte nicht im Lieferumfang in den Speicherkarten Einschub 10 auf der R ckseite ein Achten Sie dabei auf die richtige Orientierung wend...

Страница 12: ...gew nschte Untermen auszuw hlen Dr cken Sie zur Best tigung kurz die Taste OK ENTER 4 Mit der Taste Convert Mode 6 wird das Untermen bzw eine ausgew hlte Funktion verlassen A Sprache einstellen B USB...

Страница 13: ...etzteil an Wenn Sie den USB Modus aktivieren so arbeitet der Diascanner wie ein USB Stick bzw Kartenleser Windows erkennt neue Hardware und bindet die SD SDHC Speicherkarte oder den internen Speicher...

Страница 14: ...nn diese falsch in den Halter eingelegt wurden Mit der Taste Right Flip 7 k nnen Sie das Bild vertikal oben unten spiegeln Um die Helligkeit bzw den Rot Gr n oder Blau Anteil einzustellen dr cken Sie...

Страница 15: ...Computer Haben Sie die Funktion zum Speichern ausgew hlt und best tigt so erscheint nach dem Speichervorgang wieder das Vorschaubild Sie k nnen nun ein weiteres Dia Negativ scan nen e Speicherkarte od...

Страница 16: ...internen Speicher Um die Diashow anzuhalten dr cken Sie kurz die Taste OK ENTER 4 Nun k nnen Sie mit der Taste Left Mirror 2 oder Right Flip 7 das gew nschte Bild manuell ausw hlen Dr cken Sie die Ta...

Страница 17: ...Mirror 2 oder Right Flip 7 bis das entsprechende Untermen ausgew hlt ist siehe Bild rechts bzw Ka pitel 10 a Dr cken Sie zur Best tigung kurz die Taste OK ENTER 4 W hlen Sie die gew nschte Aufl sung...

Страница 18: ...gebaut wurde und betriebssicher ist Dennoch kann es zu Problemen und St rungen kommen Deshalb m chten wir Ihnen hier beschreiben wie Sie m gliche St rungen beheben k nnen Beachten Sie unbedingt s mtl...

Страница 19: ...Port z B an der Tastatur oder eines USB Hubs ohne Netzteil liefert nicht genug Strom Bilder werden im Wieder gabe Modus nicht angezeigt Der Diascanner kann nur Bilder anzeigen die mit ihm gescannt wu...

Страница 20: ...fl che im Inneren ist der mitgelieferte Reinigungsstab zu verwen den An einem Ende ist eine weiche Reinigungsfl che integriert Halten Sie den Reinigungsstab so dass diese Fl che nach unten zeigt Schie...

Страница 21: ...ei Anschluss USB2 0 Hintergrundbeleuchtung LED Verwendbare Speicherkarte SD max 2GByte SDHC max 32GByte Interner Speicher 128 MByte ein Teil davon wird f r interne Zwecke ben tigt deshalb steht nicht...

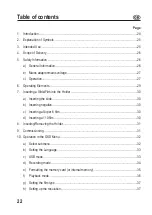
Страница 22: ...ting a Slide Film into the Holder 30 a Inserting the slide 30 b Inserting negative 30 c Inserting a Super 8 film 30 d Inserting a 110 film 30 8 Inserting Removing the Holder 31 9 Commissioning 31 10 O...

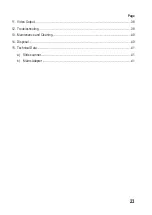
Страница 23: ...Page 11 Video Output 38 12 Troubleshooting 38 13 Maintenance and Cleaning 40 14 Disposal 40 15 Technical Data 41 a Slide scanner 41 b Mains Adapter 41 23...

Страница 24: ...observe these operat ing instructions These operating instructions are part of this product They contain important notes on commissioning and handling Also consider this if you pass on the product to...

Страница 25: ...re either filed in the internal memory of the slide scanner or on an SD SDHC memory card not enclosed can be ordered separately via a memory card slot An integrated LC display is used for control and...

Страница 26: ...e operating instructions attentively and particularly observe the safe ty notes If the safety notes and the information in these operating instruc tions regarding proper handling are not observed we a...

Страница 27: ...nected switch off the circuit breaker or turn out the fuse then switch off the FI protection switch so that the mains socket is separated from the mains voltage on all poles Then unplug the mains adap...

Страница 28: ...magnetic fields as present near machines or speakers It can be assumed that safe operation is no longer possible if the device shows any visible damage the device no longer works the device has been...

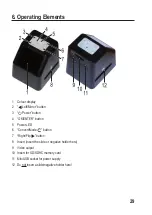
Страница 29: ...er button 4 OK ENTER button 5 Power LED 6 Convert Mode button 7 Right Flip button 8 Insert insert the slide or negative holder here 9 Video output 10 Insert for SD SDHC memory card 11 MiniUSB socket f...

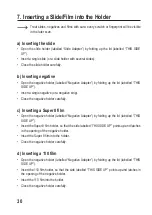
Страница 30: ...negative strip Close the negative holder carefully c Inserting a Super 8 film Open the negative holder labelled Negative Adapter by folding up the lid labelled THIS SIDE UP Insert the Super 8 film hol...

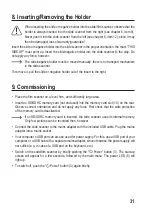
Страница 31: ...on a level firm and sufficiently large area Insert an SD SDHC memory card not enclosed into the memory card slot 10 on the rear Observe correct orientation and do not apply any force First check that...

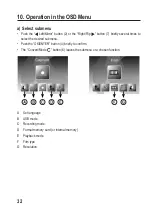
Страница 32: ...ton 7 briefly several times to select the desired submenu Push the OK ENTER button 4 briefly to confirm The Convert Mode button 6 leaves the submenu or a chosen function A Set language B USB mode C Re...

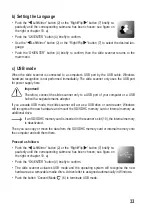
Страница 33: ...USB hub with a separate mains adapter If you activate USB mode the slide scanner will act as a USB drive or card reader Windows will recognise the new hardware and mount the SD SDHC memory card or in...

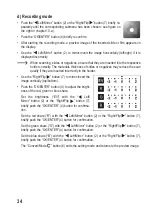
Страница 34: ...y if they are inserted incorrectly in the holder Use the Right Flip button 7 to mirror invert the image vertically top bottom Push the OK ENTER button 4 to adjust the bright ness of the red green or b...

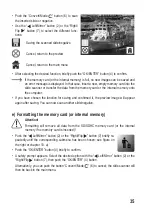
Страница 35: ...uter If you have chosen the function for saving and confirmed it the preview image will appear again after saving You can now scan another slide negative e Formatting the memory card or internal memor...

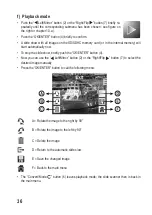
Страница 36: ...art automatically now To stop the slide show briefly push the OK ENTER button 4 Now you can use the Left Mirror button 2 or the Right Flip button 7 to select the desired image manually Press the OK EN...

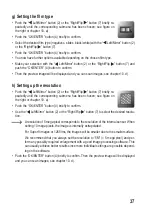
Страница 37: ...Mirror button 2 or the Right Flip button 7 briefly re peatedly until the corresponding submenu has been chosen see figure on the right or chapter 10 a Push the OK ENTER button 4 briefly to confirm Use...

Страница 38: ...e following contains descriptions for the removal of possible interferences Always observe all safety information in these operating instructions Problem Remedy Colours are presented incor rectly Sele...

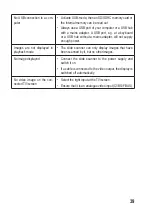
Страница 39: ...not supply enough power Images are not displayed in playback mode The slide scanner can only display images that have been scanned by it but no other images No image displayed Connect the slide scanne...

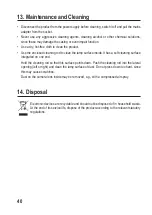
Страница 40: ...clean the lamp surface inside It has a soft cleaning surface integrated on one end Hold the cleaning rod so that this surface points down Push the cleaning rod into the lateral opening left or right a...

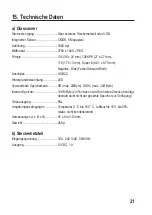
Страница 41: ...lides colour black white Connection USB2 0 Backlighting LED Usable memory card SD max 2 GByte SDHC max 32 GByte Internal memory 128 MByte part of this is needed for internal purposes therefore not the...

Страница 42: ...u un film dans le support 10 a Placer la diapositive 10 b Placer le n gatif 10 c Placer le film super 8 10 d Placer le filme 110e 10 8 Utiliser ou retirer le support 11 9 Mise en service 11 10 Command...

Страница 43: ...Page 11 Sortie vid o 18 12 limination des pannes 18 13 Maintenance et nettoyage 20 14 limination 20 15 Donn es techniques 21 a Scanner de diapositives 21 b Bloc d alimentation enfichable 21 43...

Страница 44: ...ivement observer le pr sent mode d emploi Le pr sent mode d emploi fait partie int grante de ce produit Il contient des re marques importantes propos de la mise en service et de la manipulation Observ...

Страница 45: ...sont plac es soit dans la m moire interne du scanner de diapositives ou sur un emplacement de carte m moire sur une carte m moire SD SDHC non livr e commander s par ment Un cran LCD int gr permet de...

Страница 46: ...et respectez notamment les consignes de s curit Si vous ne suivez pas les consignes de s curit et les informa tions sur la manipulation conforme dans ce mode d emploi nous d clinons toute responsabili...

Страница 47: ...trique Coupez d abord la tension de secteur pour la prise de courant laquelle le bloc d alimentation enfichable est branch couper le disjoncteur automatique corres pondant ou retirer le fusible ensuit...

Страница 48: ...ion ou lors du transport poussi re ou gaz inflammables vapeurs ou solvants fortes vibrations chocs coups Puissants champs magn tiques comme proximit de machines ou de hauts parleurs On peut supposer q...

Страница 49: ...r DEL DEL de puissance 6 Touche Convert Mode convertir mode 7 Touche Right Flip droite retourner 8 Fente d insertion ins rer ici le support de diapos ou de n gatif 9 Sortie vid o 10 Fiche d insertion...

Страница 50: ...de n gatifs Fermez le support de diapo avec pr caution c Placer le film super 8 Ouvrez le support de diapositive intitul Negative Adapter soulevez le couvercle ti quet avec THIS SIDE UP Placez le sup...

Страница 51: ...et suffisamment grande Ins rez une carte m moire SD SDHC non livr e dans l emplacement de carte m moire 10 au dos Respectez la bonne orientation ne forcez pas Contr ler au pr alable si la protection...

Страница 52: ...r s lectionner le sous menu souhait Pour confirmer appuyez bri vement sur la touche OK ENTER 4 Vous quittez le sous menu ou une fonction s lectionn e avec la touche Convert Mode 6 A Param trer la lang...

Страница 53: ...tation r seau Lorsque vous activez le mode USB le scanner de diapositives fonctionne comme une cl USB ou un lecteur de carte Windows d tecte le nouveau mat riel et int gre la carte m moire SD SDHC ou...

Страница 54: ...positive ou du n gatif peut produire une qualit de num risation moins bonne Avec la touche Right Flip 7 vous pouvez dis poser l image verticalement haut bas Pour r gler la luminosit ou les proportions...

Страница 55: ...r Si vous avez s lectionn et confirm la fonction pour enregistrer alors l aper u r appara t apr s le processus d enregistrement Vous pouvez maintenant scanner une autre diapo ou un autre film e Format...

Страница 56: ...arr ter le diaporama appuyez sur le bouton OK ENTER 4 Choisissez maintenant manuellement avec la touche Left Mirror 2 ou Right Flip 7 l image souhait e Appuyez sur la touche OK ENTER pour faire appar...

Страница 57: ...ue le sous menu correspondant soit s lectionn voir figure droite ou cha pitre 10 a Pour confirmer appuyez bri vement sur la touche OK ENTER 4 S lectionnez la r solution souhait e avec la touche Left M...

Страница 58: ...fonctionnement est s r Cependant il peut y avoir des probl mes et des d faillances C est pourquoi nous souhaitons vous d crire ici comment vous pouvez liminer les pannes possibles Respectez imp rativ...

Страница 59: ...Un port USB par exemple sur le clavier ou un concentrateur USB sans alimentation ne fournit pas assez de courant Les images ne sont pas affi ch es en mode reproduction Le scanner de diapositives ne pe...

Страница 60: ...toyer la surface lumineuse l int rieur Une surface de nettoyage douce est int gr e une extr mit Tenez le b tonnet de nettoyage de fa on de fa on ce que cette surface pointe vers le bas Glissez le b to...

Страница 61: ...diapos couleur noir et blanc Raccordement USB2 0 R tro clairage DEL Carte m moire compatible SD max 2Go SDHC max 32Go M moire interne 128 Mo une partie est n cessaire des fins internes donc l int gral...

Страница 62: ...9 7 Dia Film in de houder inbrengen 10 a Dia inbrengen 10 b Negatief inbrengen 10 c Super 8 film inbrengen 10 d 110 film inbrengen 10 8 Houder installeren verwijderen 11 9 Ingebruikname 11 10 Bedienin...

Страница 63: ...11 Video uitgang 18 12 Verhelpen van storingen 18 13 Onderhoud en reiniging 20 14 Afvoer 20 15 Technische gegevens 21 a Diascanner 21 b Stekkervoeding 21 Pagina 63...

Страница 64: ...e handhaven en een ongevaarlijke werking te garanderen Deze gebruiksaanwijzing hoort bij dit product Deze bevat belangrijke instructies voor de ingebruikname en bediening Let hierop ook wanneer u dit...

Страница 65: ...De foto s worden ofwel in het interne geheugen van de diascanner ofwel via een geheugenkaartslot op een SD SDHC geheugenkaart niet inbegrepen afzonder lijk te bestellen opgeslagen Er is een ingebouwd...

Страница 66: ...anwijzing en let in het bijzonder op de veilig heidsvoorschriften Als u de veiligheidsvoorschriften en de informatie met betrekking tot het correct gebruik in deze gebruiksaanwijzing niet volgt zijn w...

Страница 67: ...is aangesloten uit bv bijhorende zekeringsautomaat uitschakelen of zekering uit draaien vervolgens bijhorende FI beschermschakelaar uitschakelen zodat de contactdoos aan alle polen van de stroomtoevo...

Страница 68: ...ke trillingen stoten vallen sterke magnetische velden bijv in de buurt van machines of luidsprekers U mag ervan uitgaan dat een veilig gebruik niet meer mogelijk is indien het apparaat zichtbaar is be...

Страница 69: ...Knop Power 4 Knop OK ENTER 5 Power LED 6 Knop Convert Mode 7 Knop Right Flip 8 Slot hier de dia of negatievenhouder inbrengen 9 Video uitgang 10 Slot voor SD SDHC geheugenkaart 11 Mini USB voor voedi...

Страница 70: ...orzichtig de negatievenhouder c Super 8 film inbrengen Open de negatievenhouder gemarkeerd met Negative Adapter klap het deksel gemar keerd met THIS SIDE UP naar boven Breng de super 8 filmhouder in z...

Страница 71: ...e grote oppervlakte Breng een SD SDHC geheugenkaart niet inbegrepen in het geheugenkaartslot 10 aan de achterzijde in Let op de juiste ori ntering gebruik geen geweld Controleer vooraf of de schrijfbe...

Страница 72: ...Flip 7 om het gewenste submenu te selecteren Druk ter bevestiging kort op de knop OK ENTER 4 Met de knop Convert Mode 6 verlaat men het submenu of een geselecteerde functie A Taal instellen B USB modu...

Страница 73: ...netadapter aan Wanneer u echter de USB modus activeert dan werkt de dia filmscanner zoals een USB key of kaartlezer Windows herkent nieuwe hardware en bindt de SD SDHC geheugenkaart of het interne ge...

Страница 74: ...liteit slechter is wanneer deze verkeerde in de houder werd geplaatst Met de knop Right Flip 7 kunt u de afbeelding verti caal boven beneden spiegelen Om de helderheid of het rood groen of blauwgehalt...

Страница 75: ...n op uw computer over Als u de functie voor het opslaan hebt gekozen en bevestigd verschijnt na het opslaan op nieuw de voorbeeldweergave U kunt nu een andere dia negatief scannen e Geheugenkaart of i...

Страница 76: ...n Om de diashow te stoppen drukt u kort op de knop OK ENTER 4 Nu kunt u met de knop Left Mirror 2 of Right Flip 7 de gewenste afbeelding manueel selecteren Druk dan op de knop OK ENTER zodat het volge...

Страница 77: ...kom stige submenu is geselecteerd zie afbeelding rechts of hoofdstuk 10 a Druk ter bevestiging kort op de knop OK ENTER 4 Kies met de knop Left Mirror 2 of Right Flip 7 de gewenste re solutie De resol...

Страница 78: ...komen Hieronder vindt u enkele manieren om eventuele storingen te verhelpen Neem absoluut alle veiligheidsinstructies in deze gebruiksaanwijzing in acht Probleem Oplossing Kleuren zijn verkeerd Kies...

Страница 79: ...in de weergavemodus niet weerge geven De diascanner kan alleen afbeeldingen weergeven die door het toestel zelf werden gescand maar geen ande re afbeeldingen Geen beeld op het scherm Verbind de diasca...

Страница 80: ...reinigen moet het meegeleverde schoonmaakstaafje worden gebruikt Aan een einde is een zacht reinigingsvlak ge ntegreerd Houd het schoonmaakstaafje steeds zo dat dit oppervlak naar beneden wijst Schui...

Страница 81: ...kleur zwart wit Aansluiting USB2 0 Achtergrondverlichting LED Bruikbare geheugenkaart SD max 2GByte SDHC max 32GByte Intern geheugen 128 MByte een deel daarvan is voor interne doeleinden nodig daarom...

Страница 82: ......

Страница 83: ......

Страница 84: ...nt the technical status at the time of printing Copyright 2016 by Conrad Electronic SE Ceci est une publication de Conrad Electronic SE Klaus Conrad Str 1 D 92240 Hirschau www conrad com Tous droits r...

Отзывы: