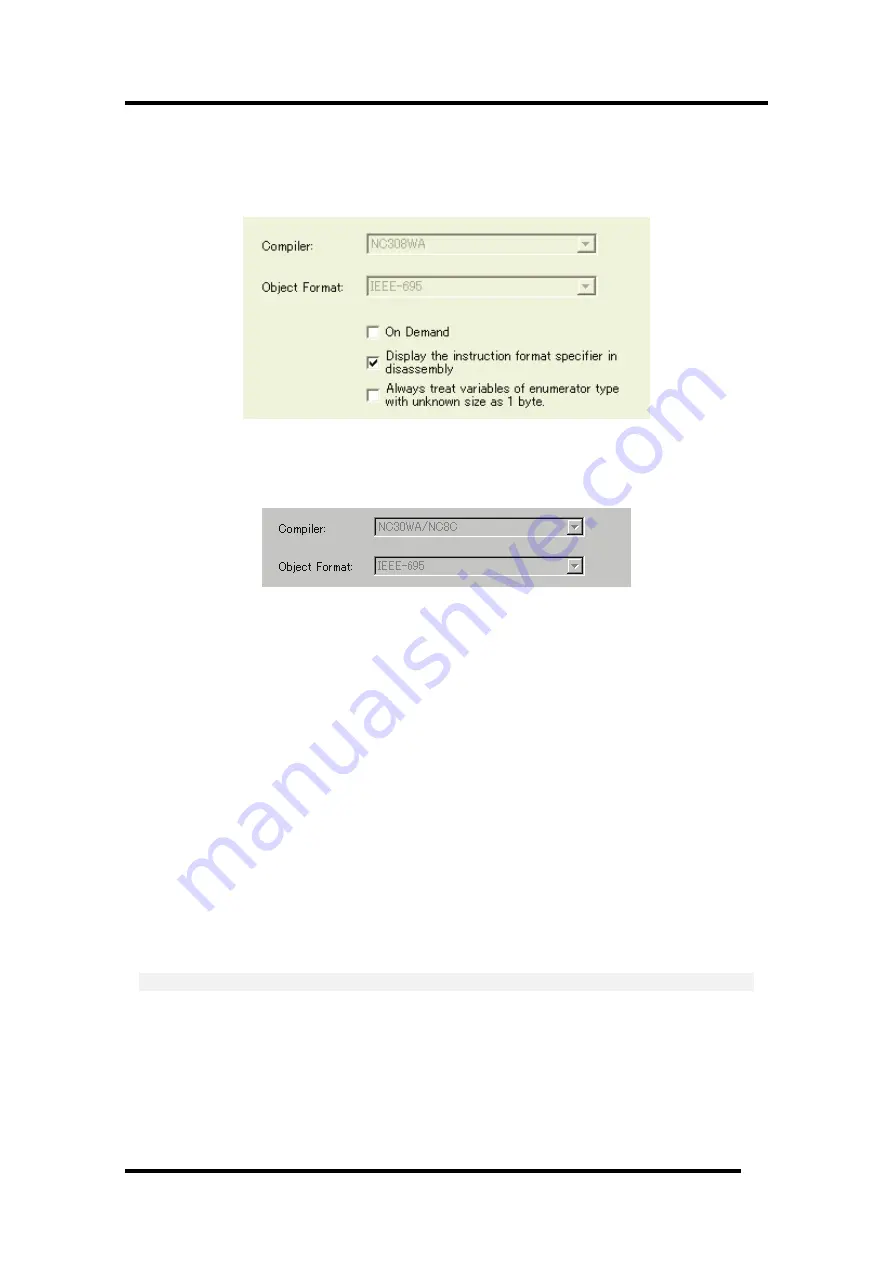
5 Setup the Debugger
5.1.2 Debugging Information Tab
The specified content becomes effective when the next being start.
5.1.2.1 display the compiler used and its object format
Display the compiler used and its object file format.
Please specify the compiler used and its object file format in the dialog opened by menu [Debug] ->
[Debug Settings...].
5.1.2.2 Specify the Storing of Debugging Information
There are two methods for storing debugging information: on-memory and on-demand.
Select one of these two methods. (The on-memory method is selected by default.)
To select the on-demand method, click the On Demand check box.
The specified content becomes effective when the next being download.
•
On-memory method
Debugging information is stored in the internal memory of your computer.
Usually, select this method.
•
On-demand method
Debugging information is stored in a reusable temporary file on the hard disk of your computer.
Because the stored debugging information is reused, the next time you download the same load
module it can be downloaded faster.
This method is suitable when it takes so long time to download the debugging information,
because the PC has less memory against the load module file size.
Notes
•
If the load module size is large, the on-memory method may be inefficient because it requires a
very large amount of time for downloading. In such a case, select the on-demand method.
•
In the on-demand method, a folder in which to store a reusable temporary file is created in the
folder that contains the downloaded load module. This folder is named after the load module
name by the word "~INDEX_" to it. If the load module name is "sample.abs", for example, the
folder name is "~INDEX_sample". This folder is not deleted even after quitting the debugger.
37
Содержание Emulator Debugger M16C PC4701
Страница 13: ...Setup of Debugger 1...
Страница 14: ...Blank Page 2...
Страница 73: ...Tutorial 59...
Страница 74: ...Blank Page 60...
Страница 95: ...Reference 81...
Страница 96: ...Blank Page 82...
Страница 119: ...7 Windows Dialogs When TRIGGER is selected Breaks for the status of signal input from external trace cable 105...
Страница 127: ...7 Windows Dialogs 7 7 6 1 1 Writing Reading a Specified Address Set as below Example Writing to even address 400h 113...
Страница 128: ...Example Writing byte length data 32h to even address 400h 114...
Страница 130: ...16 bits bus width 116...
Страница 132: ...2nd point 118...
Страница 133: ...7 Windows Dialogs 16 bits bus width 119...
Страница 134: ...Example Writing data 10h 3Fh to even address 400h 120...
Страница 138: ...Example Writing byte length data 32h to even address 400h 124...
Страница 140: ...16 bits bus width 126...
Страница 141: ...7 Windows Dialogs Example Writing word length data 1234h to even address 400h 127...
Страница 142: ...Example Writing data 10h 3Fh to even address 400h 128...
Страница 146: ...Example Writing byte length data 32h to even address 400h 132...
Страница 147: ...7 Windows Dialogs Example Writing data 10h 3Fh to even address 400h 133...
Страница 153: ...7 Windows Dialogs 7 7 8 2 Interrupt Termination Set as below 139...
Страница 172: ...For condition 7 choose the Mode shown below and set the Start event 158...
Страница 177: ...7 Windows Dialogs When TRIGGER is selected Measures for the status of signal input from external trace cable 163...
Страница 294: ...MEMO 280...


