background image

26

6.7 Flying – Using Return-To-Home

6.7.1 Introduction

Return-To-Home is a flight assistance feature: it returns the aircraft to base automatically.
How it works after activation:

• 

if the aircraft flies below 30 meters, the aircraft will automatically ascend to 30 meters before returning home.

• 

if the aircraft flies above 30 meters, the aircraft will return home at the current altitude. 

  Remember

•  Use the 

Position Flight Mode

 in combination with Return-To-Home.

• 

For Return-To-Home to work, the aircraft must be able to record the GPS coordinates before take-off, and 

be receiving a good quality GPS signal.

• 

Keep your flying path free of obstacles to avoid accidents. Fly the aircraft in open flat terrain (no tall buildings 

within a 50 meter radius and flat terrain within a 10 meter radius).

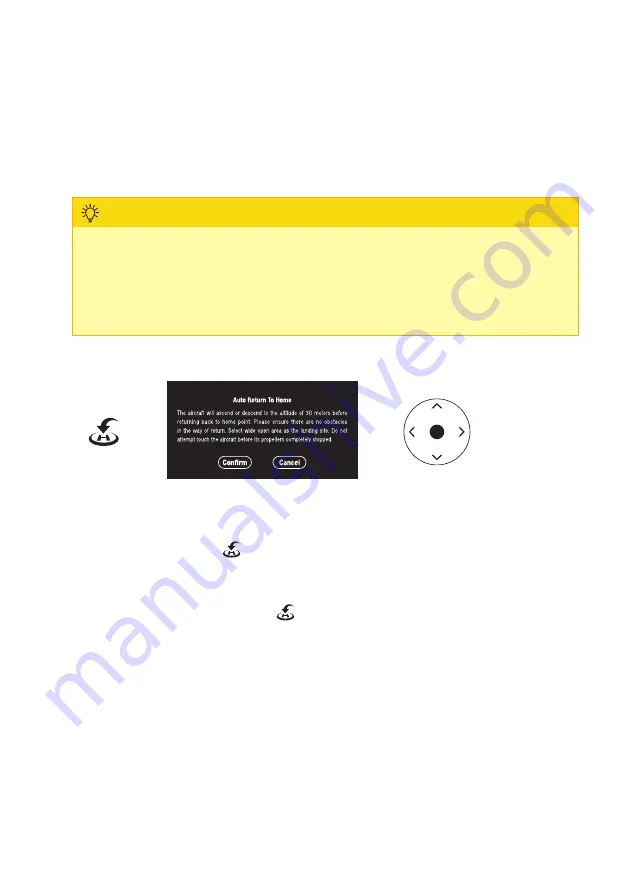
6.7.2 Activating

RTH button

Confirmation box

Forward/Backward

Activate and use the Return-To-Home function as follows:

1. 

In Position Flight Mode, tab on 

 to activate Return-To-Home.

2. 

Confirm the pop-up message to initiate returning home.


- The aircraft does not react to joystick input as long as returning to home is in progress.


- If you want to cancel the function, tap on 

 .

3. 

When the aircraft is landing, use the joysticks to guide the aircraft to the desired landing position.

4. 

After the aircraft has landed and the motors stopped, shut it off completely.

Содержание 2280967

Страница 1: ...Operating Instructions GPS Drone GeNii Mini RtF Item No 2280967 Item No 2282654 Super Combo WARNING Read the safety instructions before using the product ...

Страница 2: ...ge 11 5 Flying with the Remote controller 12 5 1 Introduction 12 5 2 Understanding the controls 12 5 3 Flying Getting ready for take off 13 5 4 Flying Taking off 14 5 5 Flying Landing 15 5 6 Flying Switching off 16 5 7 Flying Using Return To Home 16 5 8 Flying Using flight modes 17 5 9 Flying When safety features take over 18 5 10 Taking photos and recording video 19 6 Flying with the Mobile app 2...

Страница 3: ...nd remote controller 34 7 2 Calibrating the compass 34 8 Technical data 36 8 1 General 36 8 2 Drone 36 8 3 Remote control 36 8 4 Flight battery 37 8 5 Balance charger for drone battery charging 37 8 6 App 37 9 Disposal 37 9 1 Product 37 9 2 Rechargeable batteries 37 10 Declaration of Conformity DOC 38 11 Appendix About optical flow positioning 38 11 1 Introduction 38 11 2 Usage Scenarios 38 ...

Страница 4: ...ed above the product may be damaged In addition improper use can result in short circuits fires electric shocks or other hazards All company names and product names are trademarks of their respective owners All rights reserved Google Play and the Google Play logo are trademarks of Google LLC App Store is a service mark of Apple Inc Safety instructions Download the safety instructions from www conr...

Страница 5: ...nents 1 2 5 6 3 4 7 8 9 1 Propeller 2 Gimbal Camera 3 Flight Status Indicator Light 4 Optical Positioning Status Indicator Light 5 Motor 6 Power button 7 Memory Card Slot 8 Micro USB Interface for manufacturer only 9 Aircraft Battery ...

Страница 6: ...t located BBB R Blue and red light flashing alternately Horizontal calibration process G R Red and green light flashing alternately Vertical calibration process BBB Flashing blue light No remote controller signal BBB Solid blue light Remote controller and aircraft are not paired GPS is located R Solid red light Serious error R Double flashing red light Seriously low battery level R Flashing red li...

Страница 7: ... k a a c g h j b d f i e a Antenna b Flight Mode Switch c One Key Return d Mode Indicator e Status Indicator f Left Joystick g Right Joystick h Power i One Key Take Off Land j Picture Video k Mobile Phone Bracket l USB Charge Port m Gimbal Adjustment ...

Страница 8: ... Low battery warning Immediately charge the battery R Quickly flashing red light B B B Battery level critically low Remote controller turns off when the sound stops R Solid red light Serious error G Double flashing green light BB BB BB If there is no input for 5 minutes the transmitter switches off automatically 3 2 3 Flight mode indication Indicator light Sound Status indication G Solid green lig...

Страница 9: ...ort Step 1 Step 2 Install the mobile phone support in the slot of the back of the remote controller Pull the support up Step 3 Step 4 Put the mobile device on the mobile support Adjust support and mobile phone to the right angle ...

Страница 10: ...while they are charging 1 Connect the USB charging cable to the flight battery charger 2 Connect the end of the charging cable to a USB power supply CAUTION Do not charge on a computer USB port 3 Insert the aircraft battery into the charger as shown below Indications Blinking green light Insert a battery Blinking red light Charging Solid green light Battery fully charged 4 2 Installing and removin...

Страница 11: ...the battery 4 3 2 Charging the battery Warning Disconnect the charging cable before using the remote controller Indicator Light Household power socket USB adapter USB charging cable Indications G Blinking green light Charging G Solid green light Battery fully charged 4 4 Installing an SD card for media storage Picture and videos are saved to the SD card for storage Insert a microSD card max 32 GB ...

Страница 12: ...et the aircraft return to the starting position automatically Use the mobile app to monitor the real time image and video footage and the flight status of the aircraft 5 2 Understanding the controls Mode 2 Left Joystick Ascend Descend Left Rotation Right Rotation Right Joystick Forward Backward Right Left Mode 1 Ascend Descend Right Joystick Right Left Left Joystick Left Rotation Right Rotation Fo...

Страница 13: ...d the remote controller battery are fully charged You understand what the controls do 5 3 1 Powering on and initializing the aircraft WARNING Always power on the remote controller before you turn on the aircraft to prevent accidents 1 Put the aircraft on a flat surface 2 Power on the remote controller Hold down the Power button for 2 seconds Fig A 3 Power on the aircraft Push the Power button once...

Страница 14: ...on interface Note It can take a while for the Start Flying button to show Start Flying 5 3 3 Calibrating the compass Calibrate the compass whenever you change flying sites Refer to 7 2 Calibrating the compass for instructions 5 4 Flying Taking off Remember When you turn on the aircraft the Position Flight Mode is activated by default It is highly recommended you only take off after the indicator l...

Страница 15: ...ff 3 Control the aircraft with the joysticks 5 5 Flying Landing NOTICE Prevent product damage Choose an open and flat space as your landing site Be aware of obstacles and ensure the aircraft is hovering over the landing site before landing CAUTION After landing stay away from the aircraft until the propellers have stopped rotating to avoid injury 5 5 1 Landing via the one key program Hold down the...

Страница 16: ...atically This is useful in case you lose control or sight of the aircraft How it works after activation if the aircraft flies below 30 meters the aircraft will automatically ascend to 30 meters before returning home if the aircraft flies above 30 meters the aircraft will return home at the current altitude 5 7 2 Activating Activate and use the Return To Home function as follows 1 In Position Fligh...

Страница 17: ... you take off Activating Indicator lights Notes It is the default mode after powering on the aircraft Press the Flight mode switch button on the remote controller until you hear a beep sound Left indicator light on the control ler turns solid green Wait until the GPS turns on before flying The aircraft automatically posi tions itself and hovers steadily 5 8 2 Altitude flight mode Altitude Flight M...

Страница 18: ...d Alert on mobile app Return to home is activated and cannot be disabled Battery level is critically low Status indicator light of the aircraft turns quickly blinking red Aircraft lands immediately 5 9 2 When the remote controller signal is lost Condition Action Position flight mode is enabled GPS positioning is available Aircraft hovers at current altitude for 5 seconds If no signal reconnection ...

Страница 19: ...le For best results tilt the camera upward or downward when taking photos or videos On the remote controller scroll the wheel to control the pitch angle See below image Scroll the button downward to tilt the camera downward Scroll the button upward to tilt the camera upward 5 10 3 Taking pictures Press the button to take a picture You will hear a confirmation sound 5 10 4 Recording video 1 To star...

Страница 20: ... you and make a V shape 3 If your gesture is recognized an automatic 3 second countdown is set before taking pictures Square gesture video 1 Keep 2 meters from the drone and face the camera 2 Make a square gesture for shooting around your chin 3 If your gesture is recognized video recording starts 4 To stop recording earliest 3 seconds after starting repeat the same gesture Palm gesture video 1 Ke...

Страница 21: ...modes You can use the Return To Home function to let the aircraft return to the starting position automatically 6 2 Understanding the controls Mode 2 Left Joystick Ascend Descend Left Rotation Right Rotation Right Joystick Forward Backward Right Left Mode 1 Ascend Descend Right Joystick Right Left Left Joystick Left Rotation Right Rotation Forward Backward ...

Страница 22: ...t is initialized and the mobile device linked Go through section 6 3 Flying Getting ready for take off before you enable gravitational control 1 In the mobile app select to turn on gravitational control 2 Tilt your mobile phone to control the aircraft to move forward or backward or turn left or right 3 Select again to turn off gravitational control 6 3 Flying Getting ready for take off Requirement...

Страница 23: ...irements Your mobile device can connect to 5 GHz Wi Fi networks You have installed the mobile app GeNii Mini scan QR code to the right or download it from the respective app store Link mobile device and aircraft 1 Turn on Wi Fi on your mobile device 2 Select the Drone xxxxxx serial number network to link your mobile device 3 Open the mobile app and select Start Flying to enter the operation interf...

Страница 24: ... a beginner you can enable Beginner mode in the mobile app which only permits take off when the GPS signal is sufficient 6 4 1 Taking off via the one key program 1 In the mobile app tap on 2 Confirm the pop up message to initiate automated take off Stay away from the aircraft during take off 3 Control the aircraft with the joysticks 6 4 2 Taking off manually 1 Click the blank area of the screen to...

Страница 25: ... app tap on 2 Confirm the pop up message to initiate landing Stay away from the aircraft during landing 6 5 2 Landing manually Use the throttle joystick to land After the aircraft has landed move the throttle to the lowest position and wait for the motors to turn off 6 6 Flying Switching off After the aircraft has landed and the propellers have stopped rotating do the following 1 On the aircraft h...

Страница 26: ...ceiving a good quality GPS signal Keep your flying path free of obstacles to avoid accidents Fly the aircraft in open flat terrain no tall buildings within a 50 meter radius and flat terrain within a 10 meter radius 6 7 2 Activating RTH button Confirmation box Forward Backward Activate and use the Return To Home function as follows 1 In Position Flight Mode tab on to activate Return To Home 2 Conf...

Страница 27: ...es Remember This mode supports Return To Home as long as the GPS coordinates are recorded before you take off Activating Indicator lights Notes It is the default mode after powering on the aircraft Select the mode from the mode dropdown menu On aircraft Indicator light turns solid green or blue GPS signal is located Wait until the GPS turns on before flying The aircraft automatically posi tions it...

Страница 28: ...sulting in drifting or hovering failure 6 8 4 Point of Interest flight mode In point of interest mode the aircraft will circle around a definite subject You can control the aircraft position and the orbiting radius as follows 1 Select the Position flight mode and take off 2 In the mobile app select ORBIT from the flights mode menu The aircraft will start orbiting Fig C about the set location 3 Use...

Страница 29: ...ircraft maintains a 5 m horizontal distance to the mobile device select the desired height 5 50 m 6 9 Flying When safety features take over Built in safety features protect the product and the pilot and automatically take over control when certain conditions are met 6 9 1 When the aircraft battery runs out Condition Indication Action Battery is running out Status indicator light of the aircraft tu...

Страница 30: ...aypoints 3 Tap on Waypoint Flying or Flight Planning to start the configuration Read the important notifications Add waypoints to the map within a 100 m radius and set the altitude on the right side of the screen 4 Tap on to start the sequence The aircraft sequentially flies to each set point Tap on to exit the sequence The aircraft will hover at its current location 5 When the aircraft reaches th...

Страница 31: ... videos when the drone is in Position Flight Mode 6 11 2 Adjusting the camera angle For best results tilt the camera upward or downward when taking photos or videos In the mobile app slide the scroll bar on the right side to control the pitch angle See below image Slide up to tilt the camera upward Slide down to tilt the camera downward 6 11 3 Taking pictures and recording video Video Photo Album ...

Страница 32: ... you and make a V shape 3 If your gesture is recognized an automatic 3 second countdown is set before taking pictures Square gesture video 1 Keep 2 meters from the drone and face the camera 2 Make a square gesture for shooting around your chin 3 If your gesture is recognized video recording starts 4 To stop recording earliest 3 seconds after starting repeat the same gesture Palm gesture video 1 Ke...

Страница 33: ...er the MV filming mode Image Rotation Photo Video Filter Album Joystick On Off Turn off MV Mode Recorded Time Recording Progress Bar Music Time Image Rotation 1 Tap on to turn on image rotation 2 Use two fingers to rotate or zoom the image ...

Страница 34: ... for the pairing to complete Successful pairing is indicated as follows Your mobile device should list two networks Drone xxxxxx and Controller xxxxxx Both must show the same serial number The rear indicator lights on the aircraft flash green or are solid green 7 2 Calibrating the compass Remember Keep away from environments with magnetic interference to prevent failing During usage if the aircraf...

Страница 35: ...app instructions to complete the calibration procedure The app will remind you which step to perform 1 Horizontal calibration 2 Vertical calibration 1 Put the aircraft in your hand 2 Rotate it horizontally until the indicator lights alter nately flash red and green 1 Put the aircraft in your hand 2 Rotate it horizontally until the indicator lights alter nately flash red and green 3 Hold the aircra...

Страница 36: ...t mode without wind Altitude above sea level max 4000 m Front camera sensor 1 3 2 CMOS Image format 4096 x 3072 12 MP Video resolution 1920 x 1080 front camera 1280 x 720 optical flow camera Image resolution 4096 x 3072 12 MP front camera 1280 x 720 optical flow camera Video format MP4 Photo format JPEG Flight time max 21 min Drone weight without battery 165 g Maximum take off mass MTOM 247 g Micr...

Страница 37: ...erted rechargeable batteries and dispose of them separately from the product 9 2 Rechargeable batteries You as the end user are required by law Battery Ordinance to return all used rechargeable batteries Disposing of them in the household waste is prohibited Contaminated rechargeable batteries are labeled with this symbol to indicate that disposal in the domestic waste is forbidden The designation...

Страница 38: ...ositioning function cannot be activated if the aircraft s front indicator light turns slow blinking red Please pay proper attention for a safe flight The optical flow positioning system is significantly affected by the intensity of the light and the surface texture of the physical object If the optical flow positioning system fails to work its function of horizontal centered absolute position ing ...

Страница 39: ...jects such as the crowds and bushes or brushwood with strong wind blowing The environment where the light changes rapidly Badly lit light intensity less than 300 lux or brightly lit light intensity more than 10 000 lux surfaces of the objects Poorly textured surfaces The surfaces that have been featured with highly repeated textures such as same colored checker bricks Tiny barriers Control the air...

Страница 40: ... Reproduction by any method e g photocopy microfilming or the capture in elec tronic data processing systems require the prior written approval by the editor Reprinting also in part is prohibited This publication represent the technical status at the time of printing Copyright 2020 by Conrad Electronic SE 2280967_2282654_V4_1120_jh_im_en ...

Отзывы: