background image


Dosing pump

 device manual


10/16


6.


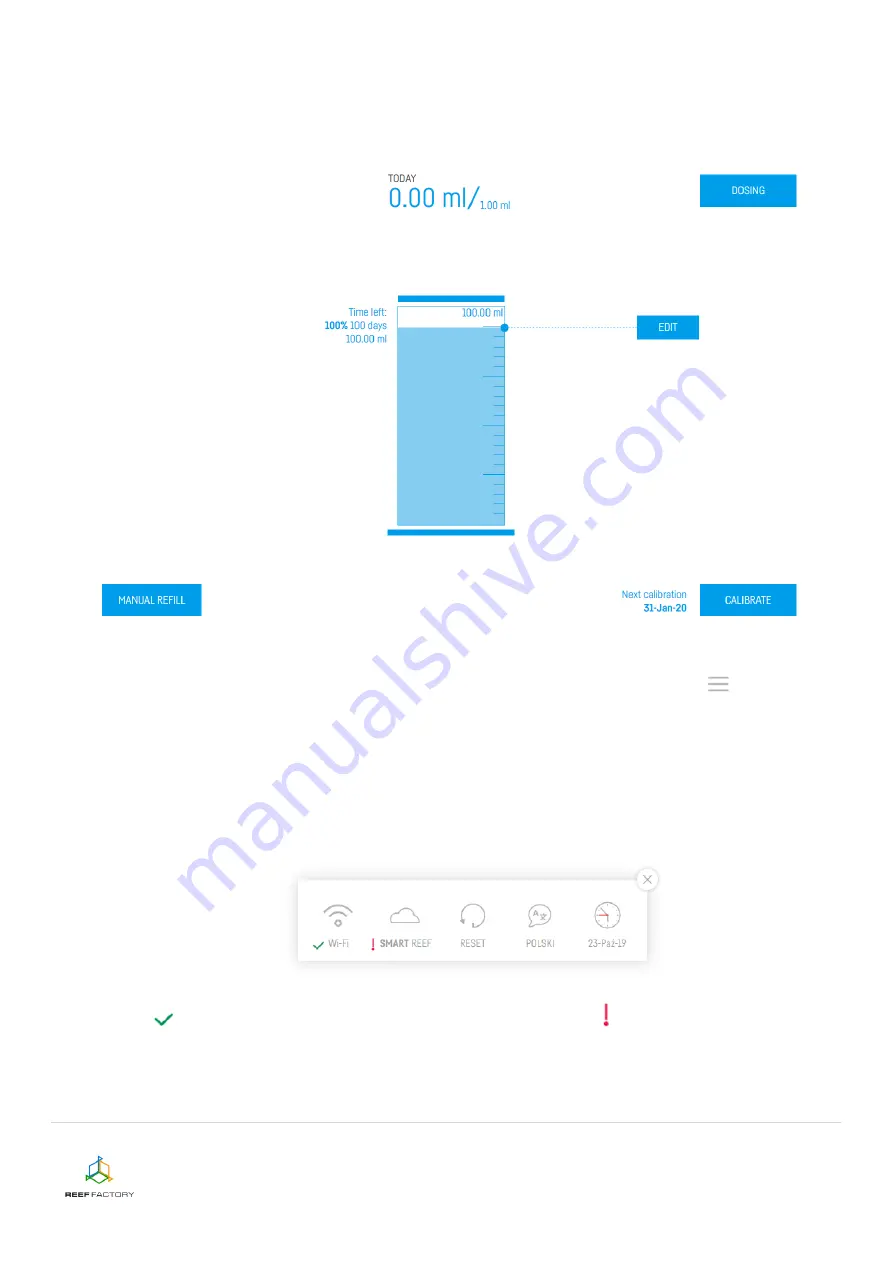
After the setup procedure is finished (after pressing the “FINISH” button), the current status 
of your device will appear on the screen. Please note that your new smart dosing pump has 
some additional features. They will be described in the following sections of this instruction.


7.

  In the upper right corner of the screen you will find a drop-down menu icon 

.  There  you 

can introduce any necessary changes or repeat the device setup procedure. It also contains 
additional  functions,  including  options  for  Wi-Fi  network  management,  device  network 
password, which protects your device against any unauthorized remote access, 

Smart Reef 

account management, time and date setting, language selection and the possibility to restore 
your device to default settings. Moreover, the icons show the current status of connection to 
your wireless network and to the 

Smart Reef 

system. 


The 

 symbol means that the connection is OK, while the 

 symbol means that there is 

no connection. 


Содержание Dosing pump

Страница 1: ...Dosing pump device manual 1 16 Thank you for purchasing our device Dosing pump ...

Страница 2: ...dual elements so as not to confuse them while connecting 2 Install the dosing head on the pump cut the silicone hoses to appropriate length remove the connector guards from the pump cylinder head and then connect the hoses to the connectors Place the ends of silicone hoses in the tank with a liquid to be dosed and in the aquarium tank CAUTION check whether the pump flow direction is correct that i...

Страница 3: ...ponding to the serial number of your device in accordance with the following pattern RFDPXXXXXXXXXXXX Our device is compatible with 2 4 GHz networks To log in enter the following password reeffactory 5 Open an Internet browser on the same device and type the following address in the website address field www dosingpump io If you entered the address correctly and you see the following message it me...

Страница 4: ...Dosing pump device manual 4 16 ...

Страница 5: ...5 16 Step two set the amount of a selected liquid to be dosed during a day the number of dosing cycles and the hour of the first dosing Using this information the pump will automatically calculate the size and frequency of doses ...

Страница 6: ...he device cannot connect to your home Wi Fi network at first repeat the procedure Successful connection may depend on the type of network device you use and its manufacturer The signal of your wireless network should be as strong as possible Remember that in order to enable communication with the Smart Reef system the network device which is connected to Dosing pump needs to have Internet access ...

Страница 7: ...ice manual 7 16 When the Dosing pump device successfully connects to your Wi Fi network its IP number will appear in the upper left corner of the screen The appearance of the IP number means that everything is alright ...

Страница 8: ...d be appropriately obscure and difficult to crack Connecting the device to your Smart Reef account will enable you to operate the device remotely control the water purity and use additional functionalities If you already have a Smart Reef account enter your login data to add your new device If you don t need to manage your device remotely you may ignore this step However by doing so you will miss ...

Страница 9: ...Dosing pump device manual 9 16 Step five congratulations you have successfully set up your Dosing pump device ...

Страница 10: ... you can introduce any necessary changes or repeat the device setup procedure It also contains additional functions including options for Wi Fi network management device network password which protects your device against any unauthorized remote access Smart Reef account management time and date setting language selection and the possibility to restore your device to default settings Moreover the ...

Страница 11: ...e should be calibrated right after the set up procedure so that the dosing process is carried out appropriately and the pump is able to correctly indicate the amount of liquid poured to the tank Before starting the calibration procedure prepare a container for the liquid poured during the process During calibration the device activates the pump for 30 seconds and then automatically deactivates it ...

Страница 12: ...ive number increases the liquid dose while entering a negative value decreases the daily dose After activating the abovementioned function enter the amount of liquid per a dose and the number of days for which such a dose should be added EXAMPLE If you plan to dose 6 ml of liquid a day in 6 cycles 1 ml each then after increasing the daily dose entering a positive dose value by 3 ml the pump will d...

Страница 13: ...viously configured cycles 13 The middle part of the screen shows the level of liquid in the container from which the pump adds it to the aquarium tank This information helps the user to control the amount of liquid left in the container so the liquid can be ordered before it is needed Editing options make it possible to manually set up the liquid container size and the amount of liquid currently h...

Страница 14: ... reminder in the form of a Smart Reef system notification 14 In the upper right corner of the screen you will find additional advanced dosing functions the Dosing button that will help you to specify the number of daily doses and the amount of liquid dosed The information you provide will be used by the pump to automatically calculate and set the dosing hours and indicate a percentage share of eac...

Страница 15: ...centage share of a daily dose of the liquid by using the Adjust function 15 Resetting the device If your device does not work properly or you want to repeat the setup procedure or you cannot connect to it despite several attempts you may restore it to its default settings by placing a magnet included in the package on the top part of its housing near the light bar Tip move the magnet along the sid...

Страница 16: ... corner of the screen Our devices are SMART therefore we constantly improve them From time to time you will receive information about firmware updates that will make your device work even better 17 Notice the icons located in the upper right corner of the screen They make it possible to change the language view the history of notifications registered by the device contact us and access many more i...

Отзывы: