
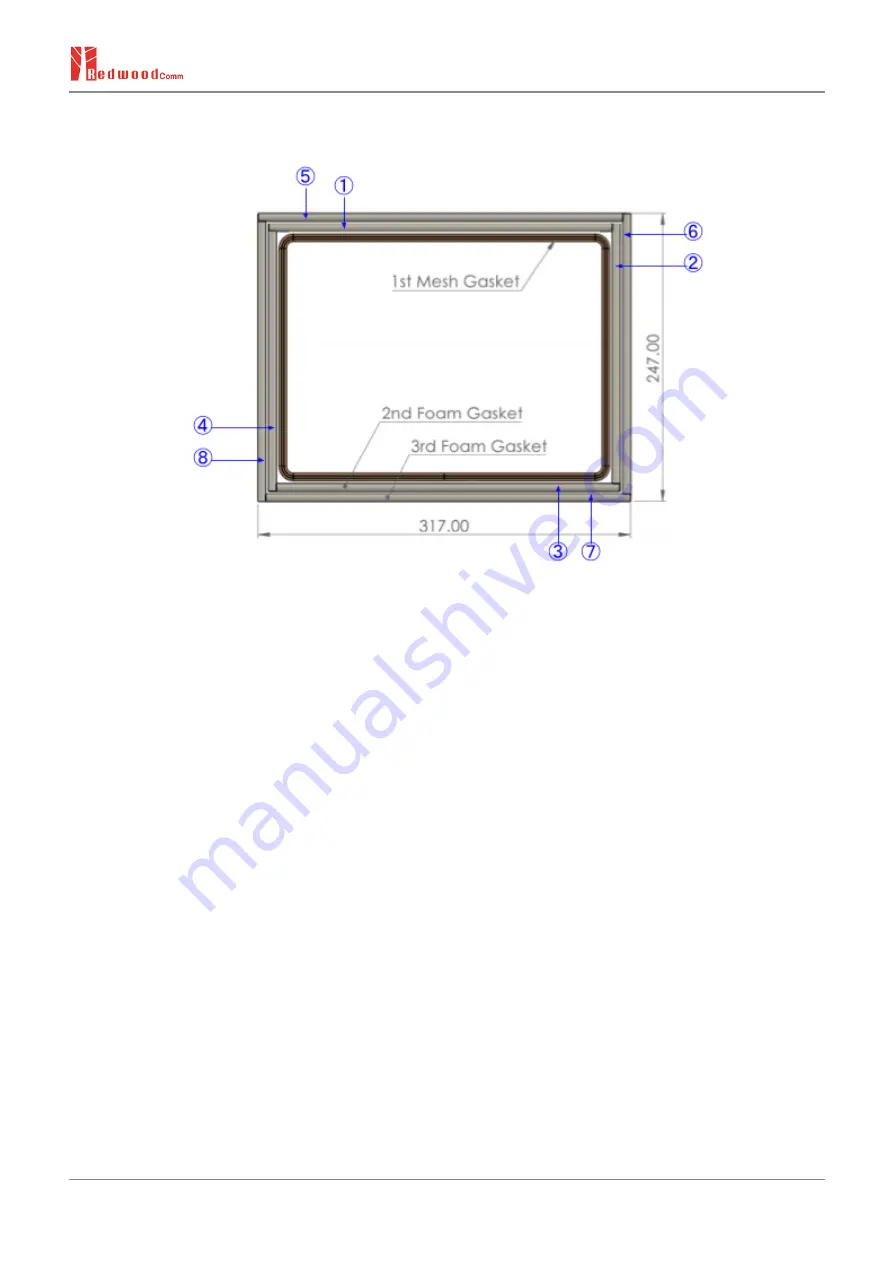
2.3.3 How to Replace EMI Gasket
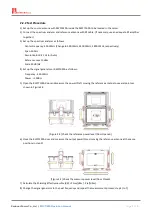
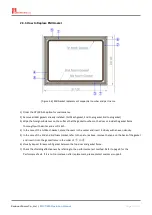
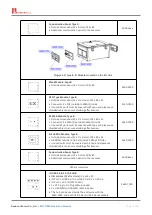
[Figure 2-6] EMI Gasket replacement sequential number and part name
1) Order the O7100A-91 option for maintenance.
2) Remove all EMI gaskets already installed. (1st Mesh gasket, 2nd Foam gasket, 3rd Foam gasket)
3) Wipe the foreign substances on the surface that the gasket touches on the door or inside the gasket frame
thoroughly with alcohol and a soft cloth.
4) In the case of the 1st Mesh Gasket, place the seam in the center and insert it slowly with an even density.
5) In the case of the 2nd and 3rd Foam Gasket, refer to the picture above, remove the tape on the back of the gasket
and insert it into the gasket frame in the order of
①
to
⑧
6) Visually inspect for excess RF gasket between the top door and gasket frame.
7) Check the shielding effectiveness by referring to the performance test method. Refer to page 9 for the
Performance Tests. If it is not normal even after replacement, please contact customer support.
RedwoodComm Co., Ltd. |
RWC7100A Operation Manual
Page 11 of 16


