39
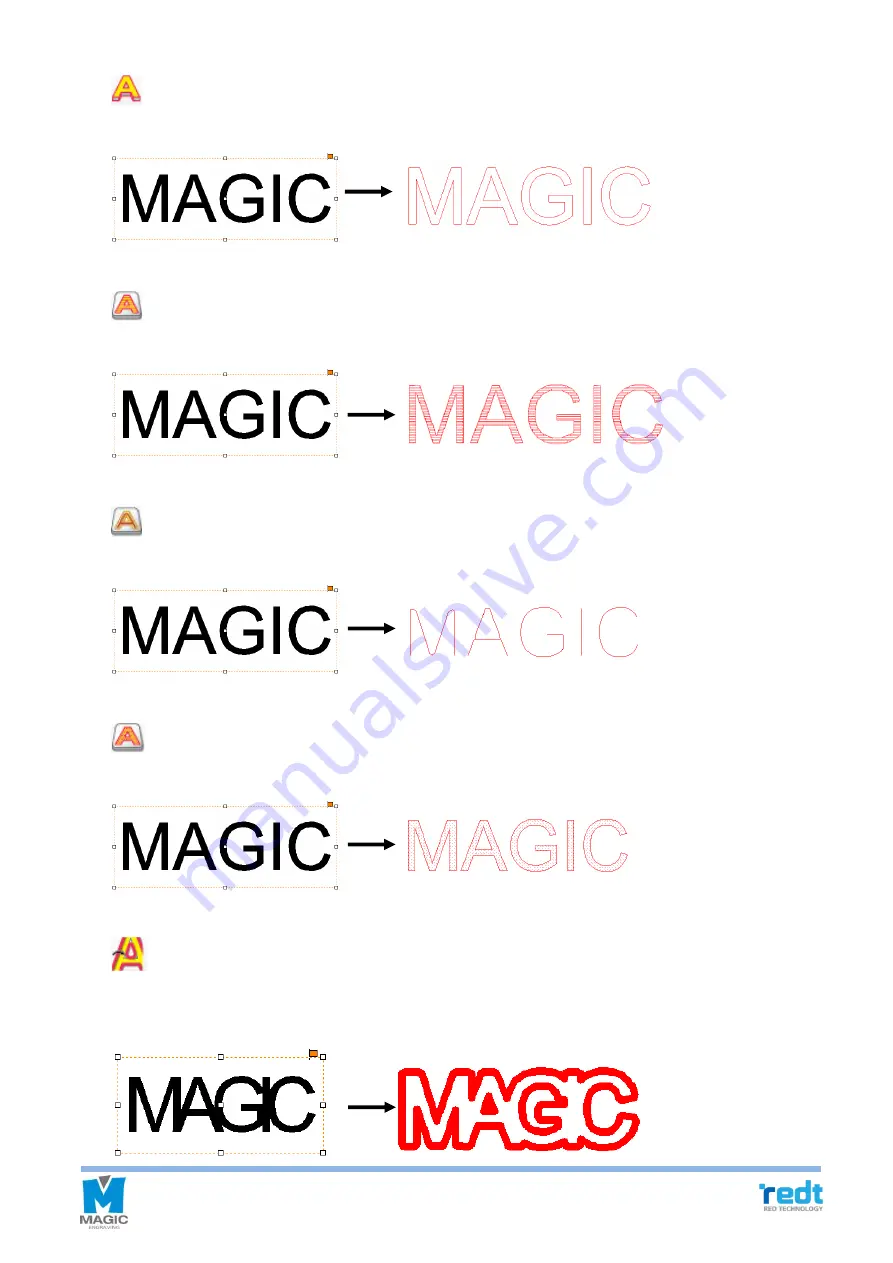
[Cutting tool path]
Create a tool path that will engrave the selected object’s border.
[Hatching tool path]
Create a tool path that will engrave the inside of the selected object.
[Single line tool path]
Create a tool path that will engrave the center line of the selected object.
[Text input engraving tool path]
Create a tool path that will engrave the inside of the selected object with dots.
[Simulate tool path cut]
The prospected image of the result of tool path processing done by the selected tool is shown.
The following is an example of the cutting tool path that uses 0.6mm End mill.
Содержание R&D MAGIC-70
Страница 13: ...12 R Communication port Connects USB cable to the computer ...
Страница 22: ...21 If the thickness of ring is not even mix different sized chuck fingers to hold it ...
Страница 27: ...26 ...
Страница 31: ...30 ...
Страница 36: ...35 Left top Origin point Left bottom Origin point Center Origin point ...
Страница 101: ...100 ...
Страница 113: ...112 3 Drag the work area by the mouse and decide picture size to load the picture ...
Страница 117: ...116 3 Click File Import button from the Magic Art menu to import a file ...
Страница 119: ...118 ...
Страница 123: ...122 ...


