


13
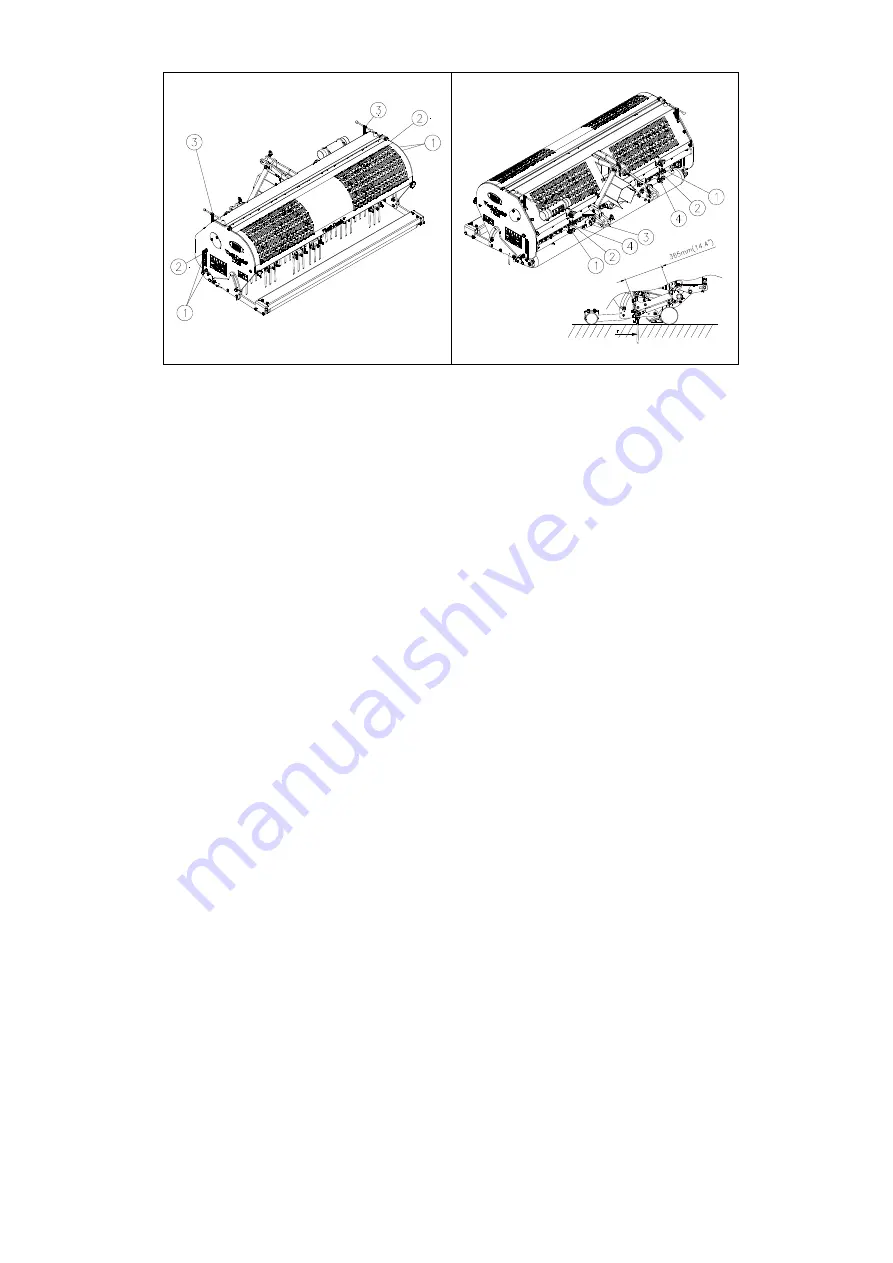
Fig. 11
Fig. 12
5.0 OPERATING-DEPTH ADJUSTMENT
The operating depth can be adjusted when the machine is lifted, see fig. 11.
Loosen nuts 1 one turn on both sides of the machine.
Then turn spindle 3 in or out. Each rotation is 4 mm (0.160”). Label 2 on the side of the
machine indicates the depth setting. After having reached the correct working depth,
retighten nuts 1.
@
Never adjust one side more than 4 turns. Before continuing, compensate the other
side.
@
A spanner is included in the machine’s tool tube.
@
The depth-adjustment on the decals only applies when 200 mm (8”) long pins are
used. When shorter pins are used, subtract the difference in length, compared to 200
mm (8”), from the value shown on the decals.
@
The spindle and the nut must be cleaned every 100 hours and sprayed with thin oil
that does not attract dirt, to prevent dirt from remaining on the nut.
6.0 PIN ANGLE ADJUSTMENT
All pins can simultaneously be adjusted with 2 spindles 1 located on the front of the machine;
see fig. 12. Lift the machine above the ground and loosen counter nut 2 on both sides of the
machine. Adjust the angle by turning the handle 3. The angle can be read on indicator 4.
Then retighten counter nut 2.
@ An angle of 90 degrees means almost no draught. This is required for hollow pins and is
advised for the 8 mm (5/16”) pins.
@ From 90 to 65 degrees means more draught. This is advised for solid pins and is
dependent of the ground conditions, the pin size and the client’s preference.
@
At 90 degrees, the pins only go straight into the ground if the machine is correctly
installed, see fig. 8. If this is not correct, force F can be produced, see fig. 12, which will
damage the machine.
@ The length of the assembled drawbar must be 365 mm (14.4”), which can be
calibrated using shims. (see parts page)


