background image

Page 4


3.1   Set Up Guide 

 
1)


Install Batteries 

Remove back cover by unscrewing the attachment screws. Install 4 AA Batteries according to the 
marking in the bottom of each pocket. 


2)


Turning Power ON  

Press and hold Power/Advance Button 5 seconds until red indicator starts flashing slowly on the 
front of the camera. When the LED stops blinking the camera is in picture capture mode with the 
factory default settings.  


3)


Turning Power OFF 

Press and hold Power/Advance Button until red indicator starts flashing fast on the front of the 
camera (about 5 seconds). Note: If camera is busy and the LED does not flash, release the Button 
and press again. 


4)


Opening Menu and Navigation 

A.


With the camera powered on, press Button 2 (Menu/Select Button) to open status screen. With 
the status screen showing on the LCD, press Button 2 again to enter menu/setup mode. 

B.


Make desired changes to camera settings. See sections 4.1 and 4.2 below. 
Always navigate the settings menu by pressing the 2 buttons: 

Button 1 will move to the next menu screen or menu item. 
                It will also increase the value in input screens  
Button 2 will select highlighted item screen. Then it is used to  
                select the setting and exit to the higher menu. 

C.


Always advance to “Exit” screen with Button 1 then select it with Button 2 to exit the features 
menu. NOTE: The camera will automatically go into picture capture mode after 1 minute of 
inactivity while in the features menu.  


5)


To Remove MicroSD Memory Card  (Card is installed at factory) 

Remove back cover by unscrewing the attachment screws. Next, remove the MicroSD memory 
card by gently pushing it inward until it releases and pops out. To install slide it into the slot with 
the 

gold contacts


facing up

 and press it in until the card latches in place. 


3.2   Accessing and viewing Pictures 


USB Cable  

With the camera on and the status screen showing, plug the micro USB cable into the micro USB 
port in the back of the camera. Then plug the other end into a USB port on a PC computer. The 
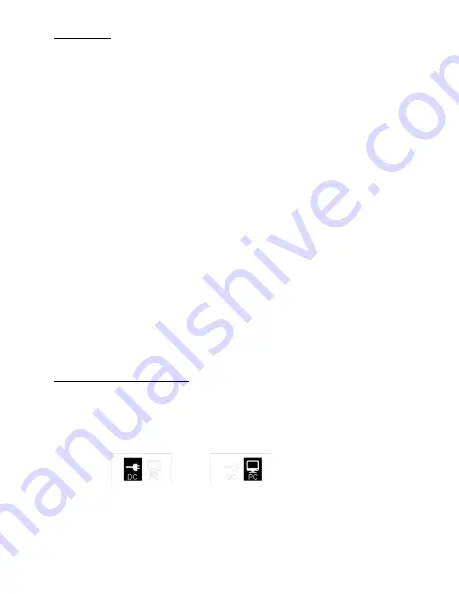
DC/PC screen will appear on the status LCD display as shown below.  The DC setting is for running 
the camera on an external 5 Volt USB DC source.  

                                       External Power                       PC Connection 


Use button 1 to move selection to “PC”. Then use button 2 to select. When a PC connection is 
made, a window will appear on the PC monitor that displays the main DCIM camera folder. 
Captured pictures and video will be in a media sub-folder under the DCIM folder.  


Card Removal  

The microSD card may also be removed and accessed in any standard card reader or PC slot.

Содержание HS100 Series

Страница 1: ...HS Series 100 User s Manual ...

Страница 2: ...and personalized customer service to match In a continuing tradition Recon Outdoors has developed the new HS100 series cameras to provide you with years of service These are cameras capable of capturing digital photos in some of the worst weather environments possible This 8 megapixel high definition digital camera has been engineered based on feedback and requirements from our customers We hope y...

Страница 3: ...y 4 Burst multi capture picture option up to 7 pictures per trigger 5 Color pictures during day black and white at night 6 Adjustable time delay between trigger events 7 Cold temperature operation down to 28 C 20 F with high operation up to 60 C 140 F 8 Time Lapse for automatically taking pictures videos 9 Operation Schedule to automatically pre set on off by time of day 10 Time Stamp of custom us...

Страница 4: ...SB Port Back Cover Attachment Screws Hole for 3 16 Lock Cable Brackets for Mounting Strap Number Pictures Stored Memory Capacity Number Pictures Highest Number of pictures displayed is 9999 memory card capacity may be higher Time of Day 24 Hour Format Picture Resolution 8MP Shown Number of Burst shots 1 Picture per Trigger Shown Date YY MM DD 20 Stud Mount ...

Страница 5: ...t the setting and exit to the higher menu C Always advance to Exit screen with Button 1 then select it with Button 2 to exit the features menu NOTE The camera will automatically go into picture capture mode after 1 minute of inactivity while in the features menu 5 To Remove MicroSD Memory Card Card is installed at factory Remove back cover by unscrewing the attachment screws Next remove the MicroS...

Страница 6: ...era Name ID Picture Mode Video Mode Picture delete and memory card format The camera Name or ID will be shown in the picture stamp At the Camera Name screen press Button 2 then press Button 1 to turn Camera name ID on and off When ON is selected a 4 alpha numeric character can be entered Picture and Video Mode Feature Settings Exit setup menu Press Button 2 to select video only mode NOTE OK in low...

Страница 7: ...Length Default length is 05 seconds Press Button 2 to enter Then press Button 1 to increment the length of video taken from 5 seconds to 1 minute in time Press Button 2 again to select time and exit Video Speed Default is 30 Frames Per Second Press Button 2 to enter Then press Button 1 to select 30 frames per second FPS or 15 frames per second Press Button 2 again to select time and exit Video Fre...

Страница 8: ... 2 to enter then press Button 1 to select ON or OFF When ON is selected Button 2 will enter the time entry screen Use Button 1 to set the hours minutes and seconds that is desired for the delay between pictures Button 2 will save and exit to the Features Menu Press Button 2 to enter then press Button 1 to select ON or OFF When ON is selected the Name of the camera if entered per 1 7 above battery ...

Страница 9: ...nt the Month Day Year Hour and Minute values for the date and time Button 2 saves value and moves to the next field and exits to the Features Menu Press Button 2 to enter then press Button 1 to turn Camera password on and off When camera is ON press MENU button to enter 6 character password Press Button 2 to enter then press Button 1 to YES to reset the camera to its factory default settings Exit ...

Страница 10: ...tree branches wave action or swinging objects These will create false triggers as the motion of these inanimate objects causes the camera to capture pictures with no field subject 10 Don t have heat generating devices within the detection zone of the camera Examples of these can be automobile traffic air conditioner or exhaust vents 11 For surveillance applications mount the camera high above head...

Страница 11: ...ce is 25 feet or less IF NOT STORING PICTURES SD CARD Make certain the MicroSD memory card is not full Make certain the MicroSD memory card is installed correctly in camera Verify the camera recognizes the card and that the card capacity picture count shows in the lower left LCD screen If card capacity or picture count does not show format or replace the card NUMBER OF PICTURES TAKEN IS LOW The PI...

Страница 12: ...for products and accessories of other manufacturers which may be distributed by Recon Outdoors is the responsibility of the manufacturers of such products and accessories in accordance with the terms and duration of such manufacturers warranties b any Product which has been disassembled repaired tampered with altered changed or modified by persons other than Recon Outdoors s own authorized service...

Страница 13: ...oved by an expressly authorized officer of Recon Outdoors This limited warranty is the complete and exclusive statement of warranty which Recon Outdoors agrees to provide with respect to the Products and it shall supersede all prior and contemporaneous oral or written agreements understandings proposals and communications pertaining to the subject matter hereof This limited warranty is exclusively...

Отзывы: