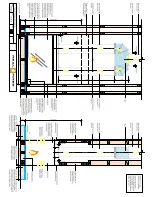
To make the gas connection, place the burner in the firebox so that it is positioned
central and controls drop into cut outs in base of firebox.
The gas pipe should be bent into position and marked for cutting.
Remove the burner, cut the pipe and make a flare connection.
Clean the glass panel as required to ensure there are no marks on the inside.
Remove the protective coating from the fascia panel for the glass side of the fire
(this is the panel without the remote control receiver)
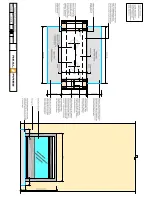
Fit the fascia panel on the glass side of the fire, the slots in the fascia drop onto the
screws in the sides of the firebox. Ensure that there are no marks on the fascia, it is
difficult to clean once the burner has been installed.
Fit the burner in place. Connect the gas supply and test for soundness.
The electrical leads to the burner control and from the burner control to the fan will
need to be connected. These are nylon plug connectors.
Line in 3 pin socket connects to 3 pin plug to control box
4 pin plug from control box connects to 4 pin socket to fan
The lead with the small jack plug connects to the remote control receiver board on the
stainless steel fascia panel. Leave this unplugged at this stage.
Natural Gas Burner
Fill the burner tray with the vermiculite supplied ensuring the burner tube is
completely covered.
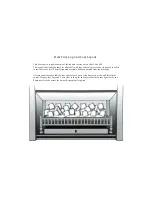
Place the large logs across each other in the centre of the burner and the twigs and
coals around them to cover the burner with open spacings to allow the radiant heat
escape.
See drawings of log & coal layout
Do not place logs or coals close to the pilot.
See Diagram.
L.P.G. Burner
The L. P.G. burner is a flat steel burner. This burner is supplied with a bag of coarse
grain vermiculite, spread this thinly (5 to 10mm ) over the surface of the burner.
Follow instructions for Log and Coal placement as with Natural Gas burner.
Commissioning of the burner
Ensure all protective covering is removed from all stainless steel panels before
subjecting to heat.
Connect the small jack plug lead to the receiver board on the fascia panel
Leave the fascia panel placed in front of the fire but not fitted.
The mains power supply needs to be connected and turned on. See instructions for
remote control. Press the power on at the remote. The pilot should ignite, it may take
several attempts until the air has been purged out and gas is through. Once the pilot
has ignited the burner will light. Check that the flame travels easily across the burner
and that coal placement does not affect ignition. Re- position logs & coals if required.
Ensure that there is no vermiculite touching the pilot, ignition electrode, or flame
sense electrode. This will cause ignition failure.


