Installation instructions
Firstly the firebox and flue are installed and then the burner is installed. The burner
may be installed at a later date when all the construction work is complete and the
hearth is in place.
The firebox is placed on the platform provided and the 10mm gas pipe is pushed
through the hole in the firebox. The pipe is to be connected to the burner but may be
left sealed if the burner is to be installed later. Leave enough pipe to connect the
burner.
When placing the firebox in the timber cavity it is important to ensure it is centred
correctly
. Centre the firebox from the front flange on the firebox. Not from the
insulation kit inside the cavity
Once the firebox is in place ensure it is level and positioned correctly. From the
positioned fire the flue can be assembled. The flue is in 1200mm lengths with both
inner and outer flue. Each flue length has a crimped end to join tightly to the next
length. Each joint must be securely fixed by at least three stainless steel rivets.
The firebox has two spigots for the two 1200mm x 150/200mm lengths flues to locate
over. The Y piece is then connected, joining the two flues into one.
From the Y piece a single 200/ 250mm flue is used to the termination of the flue.
The flue lengths should be installed with the crimped end facing up.
The Firebox and the flue should be secured by fixing with seismic strapping and/or
brackets to framing.
Flue bends are available from Real Fires if the flue needs to be offset.
Appropriate weatherproof roof flashing/ chimney capping must be used to comply
with NZS 5261
Once the installation of the firebox and flue is complete, the building work around the
fireplace can continue. Ensure any timber fitted around the flue and top of firebox has
a minimum clearance of 25mm.
Looking at the fire from the open side, there will be an electrical lead for the fire from
the Right hand side of the firebox. It is intended to be connected by an electrician to a
wall switch facing the room.
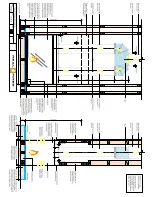
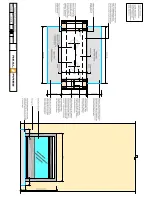
See installation drawing
( Please ensure the electrical lead is not left beside the firebox and overlooked . It is
difficult to gain access once the giboard is fixed)
Timber surrounds
If a timber surround is to be fitted ensure it meets Real Fires
minimum requirements.
See installation drawing
Installation of Real Fires burner into firebox
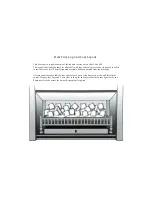
The burner is supplied boxed complete with firebox reflectors, fascia panels,
vermiculite, logs & coals.


