background image

3

Install the RCM  -  Sprayer: RCM  -  Sprayer Installation

15

IN STALL THE RCM  -  SPRAYER

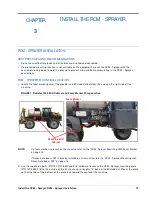
2. Remove the hardware holding the foam marker mounting bracket and slip the bracket off of the existing u-

bolts.

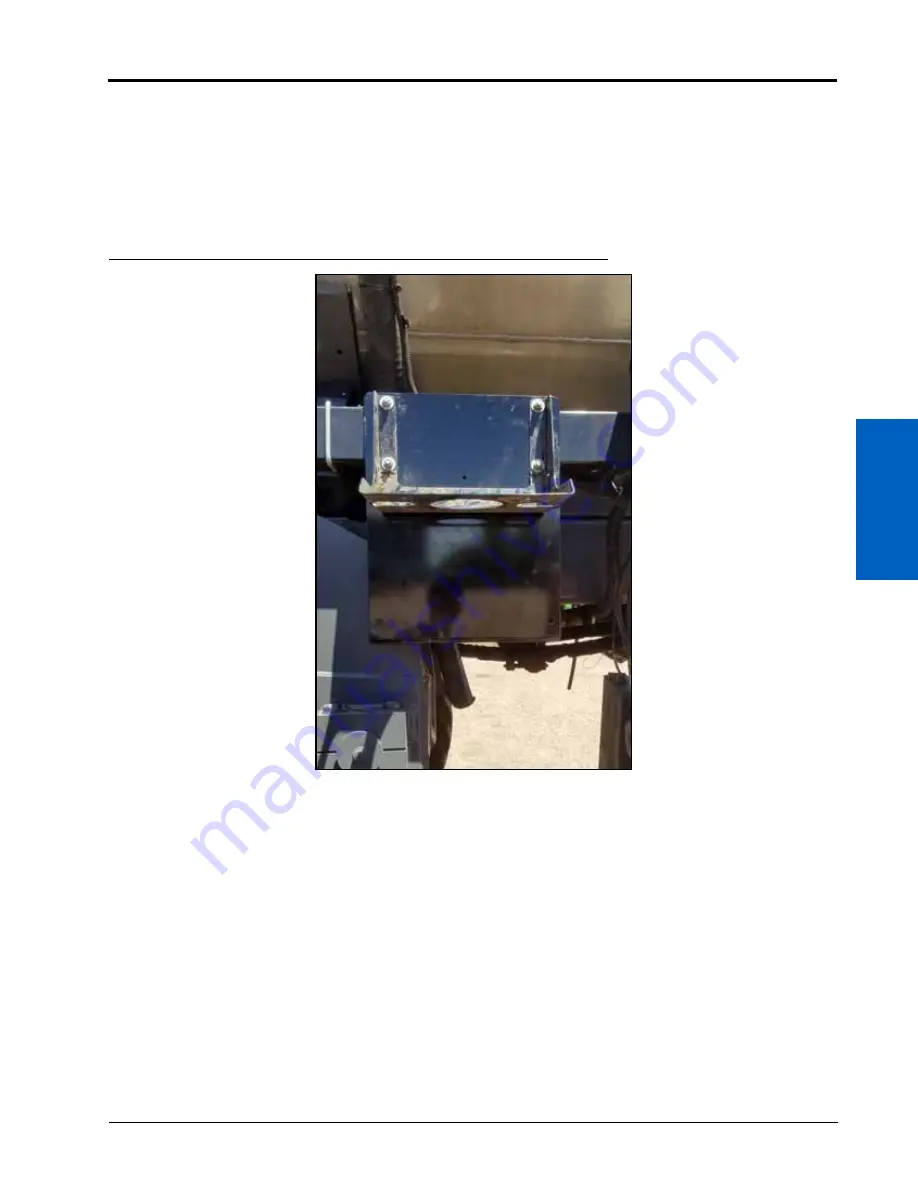
3. Place the RCM  -  Sprayer mounting plate (P/ N 107- 0235- 015) on the existing u-bolts with the tabs at the bottom 

of the bracket facing toward the center of the machine.

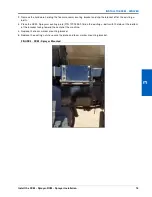
4. Replace the foam marker mounting bracket.

5. Replace the existing nuts to secure the plate and foam marker mounting bracket.

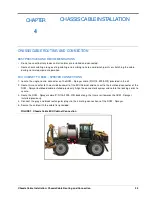
FIGURE 4. RCM  -  Sprayer M ounted

Содержание RG1100

Страница 1: ...Copyright 2021 RCM Sprayer Installation M anual for AGCO RoGator C Series RG900 RG1100 RG1300 016 7100 037 Rev A 4 2021 E36950 ...

Страница 2: ...aven Industries shall not be held responsible for any modifications or repairs made outside our facilities nor damages resulting from inadequate maintenance of this system As with all wireless and satellite signals several factors may affect the availability and accuracy of wireless and satellite navigation and correction services e g GPS GNSS SBAS etc Therefore Raven Industries cannot guarantee t...

Страница 3: ...tents 11 Updates 12 Chapter 3 Install the RCM Sprayer 13 RCM Sprayer Installation 13 Best Practices and Recommendations 13 RCM Sprayer Mounting Location 13 ECU Cabinet Preparation 17 In Cab Connections 21 Chapter 4 Chassis Cable Installation 23 Chassis Cable Routing and Connection 23 Best Practices and Recommendations 23 ECU Cabinet to RCM Sprayer Connections 23 System Diagram 24 Chapter 5 Sidekic...

Страница 4: ...Table of Contents ii RCM Sprayer Installation M anual for AGCO RoGator C Series RG900 RG1100 RG1300 ...

Страница 5: ...serve the following safety measures when operating the implement after installing this Raven system Do not operate this Raven system or any agricultural equipment while under the influence of alcohol or an illegal substance Be alert and aware of surroundings and remain in the operator seat at all times when operating this Raven system Do not operate the implement on any public road with this Raven...

Страница 6: ...ns for chemical mixing handling and disposal Avoid direct contact with agricultural chemicals or inhaling chemical dust or spray particulate Seek immediate medical attention if symptoms of illness occur during or soon after use of agricultural chemicals or products After handling or applying agricultural chemicals Thoroughly wash hands and face after using agricultural chemicals and before eating ...

Страница 7: ...g especially in articulation and pivot points Clamp harnessing securely to force controlled movement of the harness Avoid abrasive surfaces and sharp edges such as sheared or flame cut corners fastener threads or cap screw heads hose clamp ends etc Do not connect affix or allow harnessing to come into contact with components with high vibration forces hot surfaces or components carrying hot fluids...

Страница 8: ...CHAPTER 1 4 RCM Sprayer Installation M anual for AGCO RoGator C Series RG900 RG1100 RG1300 ...

Страница 9: ...llowing equipment TABLE 1 Compatible Equipment Information SECTION SPACING The information located in Table 2 on page 6 and in Table 3 on page 7 is required for the machine configuration process on the Universal Terminal Refer to the RCM Sprayer Calibration and Operation Manual section Calibration Wizard for additional machine assistance with system setup or operation NOTE Each column shown in Tab...

Страница 10: ... 30 20 40 30 38 20 11 30 30 40 40 30 38 40 12 30 30 40 40 45 38 40 13 40 30 40 40 45 38 40 14 40 45 40 40 45 38 40 15 40 45 40 40 45 57 40 16 40 45 40 40 45 38 40 3 17 40 30 40 40 30 38 40 18 30 45 60 30 45 19 60 19 40 30 60 40 30 38 60 4 20 40 45 40 40 45 38 40 21 40 45 40 40 45 57 40 22 40 45 40 40 45 38 40 23 40 30 40 40 45 38 40 24 30 30 40 40 45 38 40 25 30 30 40 40 30 38 40 26 30 30 40 40 30...

Страница 11: ...0 57 40 11 40 45 38 40 40 57 40 12 40 45 38 40 40 57 40 13 40 45 38 40 40 57 40 14 40 45 38 40 40 57 40 15 40 45 38 40 40 57 60 16 50 45 38 40 40 76 60 3 17 40 30 38 40 40 38 60 18 30 45 19 60 60 19 60 19 40 30 38 60 60 38 60 4 20 50 45 38 40 40 76 60 21 40 45 38 40 40 57 60 22 40 45 38 40 40 57 60 23 40 45 38 40 40 57 40 24 40 45 38 40 40 57 40 25 40 45 38 40 40 57 40 26 40 30 38 40 40 57 40 27 4...

Страница 12: ...o software version of v21 2 1 7 or newer When prompted to setup the machine configuration complete the following steps 1 Refer to Table 2 on page 6 and Table 3 on page 7 to find the matching boom spacing configuration column to the physical machine 2 Input the number of sections of the matching boom spacing in the section setup screen as shown in Figure 1 Section Setup Number of Sections below The...

Страница 13: ... to the color code in the tables FIGURE 2 Switch M apping Assigning Sections NOTE Number of switches may vary from the images shown above 5 Ensure that the displayed values match the table and then press Next 6 For each section enter the corresponding section width value from Table 2 on page 6 or Table 3 on page 7 as shown in Figure 3 Section Setup Section Widths below FIGURE 3 Section Setup Secti...

Страница 14: ...ost Installation Notes for machine configuration tips REQUIRED COMPONENTS The following components must be installed with the RCM Sprayer nozzle control system Updated software on field computers or control monitors and other ECUs Contact your local AGCO dealer for the latest software PWM pump control valve Raven compatible flow meter Raven compatible pressure transducer TOOLS AND MATERIALS NEEDED...

Страница 15: ...MM GRADE 8 CLASS II COATING ENVELOPE PLASTIC SHEET WARRANTY HELP 016 0171 712 016 0171 638 3 3 2 4 2 1 RAVEN RCM SPRAYER LEVEL 2 CABLE BULKHEAD ROGATOR C HAWKEYE 2 CABLE ECU BOX TO RCM HAWKEYE 2 PLATE MOUNTING REM ABM ROGATOR C T H 053 0159 193 N 063 0174 118 N 115 2005 018 N 115 2005 019 N 107 0235 015 N N 053 0159 015 N 016 0171 649 N N 053 0159 110 N 311 4050 145K N 311 4050 147K N 312 4000 216...

Страница 16: ...tation and the overall service we provide We appreciate the opportunity to see ourselves as our customers see us and are eager to gather ideas on how we have been helping or how we can do better To serve you best please send an email with the following information to techwriting ravenind com RCM Sprayer Installation Manual for AGCO RoGator C Series RG900 RG1100 RG1300 016 7100 037 Rev A Any commen...

Страница 17: ... applicable and ECU cabinet between the axles on the right side of the machine FIGURE 1 RoGator 1300 ECU Cabinet and Foam M arker Pump Location NOTE If a foam marker is present on the machine refer to the RCM Sprayer Mounting With Foam Marker on page 14 If Raven Autoboom XRT is already installed on this machine refer to RCM Sprayer Mounting with Raven Autoboom XRT on page 16 2 Use the supplied u b...

Страница 18: ...upplied bolts M6 x75mm qty 2 M6 x 65mm qty 1 and flanged nylon lock nuts qty 3 It is recommended to mount the RCM Sprayer to the inside of the mounting plate FIGURE 2 RCM Sprayer M ounted RCM SPRAYERMOUNTING WITH FOAM MARKER 1 Remove the four bolts from the bottom of the foam marker mounting bracket and remove the foam marker FIGURE 3 Remove the Foam M arker ...

Страница 19: ...e bracket off of the existing u bolts 3 Place the RCM Sprayer mounting plate P N 107 0235 015 on the existing u bolts with the tabs at the bottom of the bracket facing toward the center of the machine 4 Replace the foam marker mounting bracket 5 Replace the existing nuts to secure the plate and foam marker mounting bracket FIGURE 4 RCM Sprayer M ounted ...

Страница 20: ...m is installed on this machine the Autoboom XRT ECU is mounted in this same location so alternative RCM Sprayer mounting steps are required 1 Remove the hardware securing the Autoboom XRT REM to the mounting plate 2 Place the RCM Sprayer on the opposite side of the mounting plate from the REM aligning with the mounting holes NOTE Some drilling may be required depending on the revision of the mount...

Страница 21: ...between the axles and remove the cover FIGURE 6 RoGator 1300 ECU Cabinet Location 2 Locate the Raven ISO Product Control ECU 3 Use a socket and socket extension to loosen the bolt securing the ECU mounting plate to the rear cabinet wall and remove the plate from the ECU cabinet FIGURE 7 ECU M ounting Plate M achine ECU Cabinet Raven ISO Product Controller ECU ...

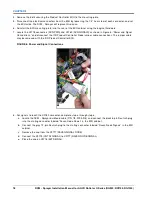
Страница 22: ...e 8 Power and Signal Connections and disconnect the ISO Product Controller Node jumper cable connections The jumper cable may be removed with the ISO Product Controller ECU FIGURE 8 Power and Signal Connections 8 For signals to reach the X0780 connector complete step a through step e a Locate the RCM Sprayer bulkhead cable P N 115 2005 018 and connect the black 6 pin Deutsch plug into the mating c...

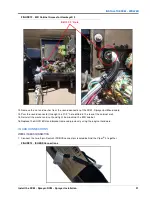
Страница 23: ...the CANbus Hub in the base of the ECU cabinet 10 Locate the connector X0150 labeled RVN CAN to RVN Node on the CANbus Hub and move it to the open connection where the plug was removed in the previous step Replace the plug in this location This will connect the RCM Sprayer to the ISObus FIGURE 9 Connecting RCM Sprayer to ISOBUS Drawing FIGURE 10 Connecting RCM Sprayer to ISOBUS Picture Swap Swap ...

Страница 24: ...Use a 1 1 2 hole saw to drill a hole through the back of the ECU cabinet for the bulkhead connection of the RCM Sprayer bulkhead cable P N 115 2005 018 to pass through The recommended location for this port is toward the left edge of the box behind and below the ECU bracket just removed about 1 0 below the bracket and 2 5 from the left edge of the ECU cabinet as shown in Figure 12 on page 21 NOTE ...

Страница 25: ...ss the round connector through the 1 1 2 hole drilled in the rear of the cabinet wall 15 Reinstall the washer and nut hand tight from behind the ECU cabinet 16 Replace the AGCO ECU and bracket removed previously using the original hardware IN CAB CONNECTIONS VIPER4 ISOBUSCONNECTION 1 Connect the two 2 pin Deutsch ISOBUS connectors located behind the Viper 4 together FIGURE 13 ISOBUS Connections Dr...

Страница 26: ...CHAPTER 3 22 RCM Sprayer Installation M anual for AGCO RoGator C Series RG900 RG1100 RG1300 ...

Страница 27: ...ONS 1 Locate the single round connector on the RCM Sprayer cable P N 115 2005 019 provided in the kit 2 Route this connector to the outside back wall of the ECU Cabinet and connect to the bulkhead connector of the RCM Sprayer bulkhead cable installed previously Align the connector keyways and rotate the locking collar to secure 3 Route the RCM Sprayer cable P N 115 2005 019 back along the frame ra...

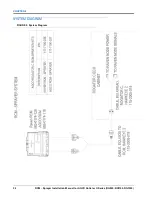
Страница 28: ...CHAPTER 4 24 RCM Sprayer Installation M anual for AGCO RoGator C Series RG900 RG1100 RG1300 SYSTEM DIAGRAM FIGURE 2 System Diagram ...

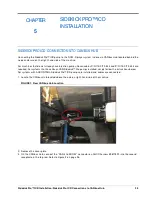
Страница 29: ...ave injection pumps Raven cables P N 115 0172 443 and P N 115 0172 444 are required For systems that have Raven CAN Sidekick Pro pumps installed simply follow the instructions below For systems with AGCONTROL Sidekick Pro ICD pumps are installed and cables are connected 1 Locate the CANbus Hub located above the axle on right hand side of the machine FIGURE 1 Rear CANbus Hub Location 2 Remove the c...

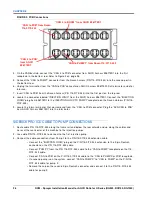
Страница 30: ...N to PCB from AGCO harness 596775D1into the terminator SIDEKICK PRO ICD CABLE TO PUMP CONNECTIONS 1 Route cable P N 115 0172 443 along the frame rail and below the rear catwalk and up along the cables and hoses at the rear center of the machine to the injection pumps 2 Use cable P N 115 0172 444 to connect to the first injection pump 3 Connect the cable connections from Pump 1to the P N 115 0172 4...

Страница 31: ...ARNESS MAINTENANCE 1 Disconnect the ECU harness connectors and inspect for signs of moisture or corrosion 2 If moisture or corrosion is detected use Deoxit D5 brushes and compressed air to clean and dry the connector 3 When clean apply a coating of Corrosion X HD to the connector mating surfaces and contacts ...

Страница 32: ...CHAPTER A 28 RCM Sprayer Installation M anual for AGCO RoGator C Series RG900 RG1100 RG1300 ...

Страница 33: ...er s responsibility The Return Materials Authorization RMA number must appear on the box and all documentation including proof of purchase must be included inside the box to be sent to Raven Industries WHAT WILL RAVEN INDUSTRIES DO Upon confirmation of the warranty claim Raven Industries will at our discretion repair or replace the defective product and pay for the standard return freight regardle...

Страница 34: ... claim and send it to Raven Industries for final approval The freight cost to Raven Industries will be the customer s responsibility The Return Materials Authorization RMA number must appear on the box and all documentation including proof of purchase must be included inside the box to be sent to Raven Industries In addition the words Extended Warranty must appear on the box and all documentation ...

Отзывы: