


Setup and Connections
9
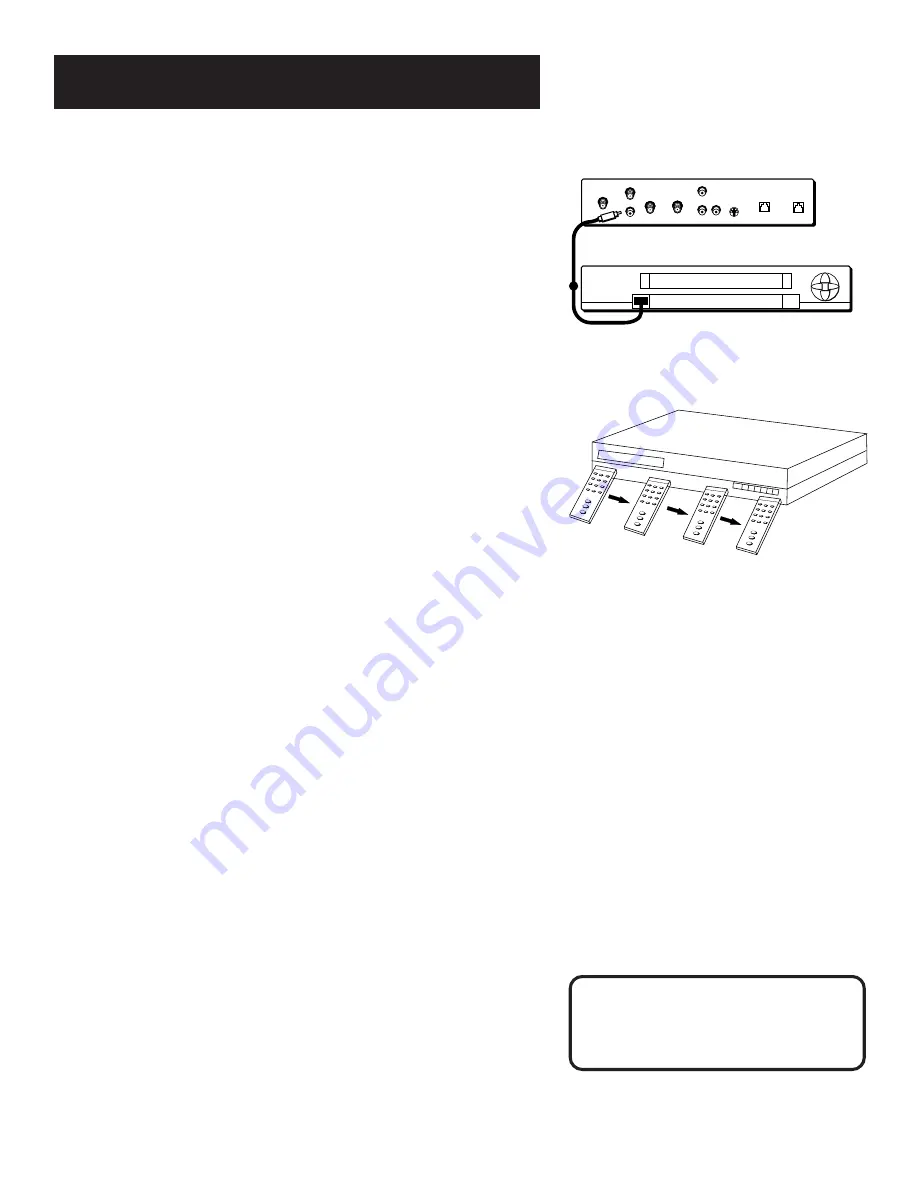
Step 3: Connect the VCR Controller
In order for the receiver and VCR to communicate, you need to attach
the VCR Controller to the back of the receiver.
1.
Plug the VCR Controller into the VCR CONTROL jack on the back of
the receiver.
2.
Affix the other end to the remote sensor on your VCR.
Locating the VCR’s Infrared Remote
Control Sensor
The VCR Controller must be affixed directly over the infrared remote
sensor on your VCR.
Some VCRs have a label that identifies the infrared remote sensor, and
others do not. If the IR sensor is labeled on your VCR, affix the VCR
controller directly over the sensor.
For VCRs that do not label the remote sensor, you need to use the VCR’s
remote to locate the sensor before affixing the VCR controller.
1.
Hold the VCR’s remote control so that it is touching the front
of the VCR.
2.
Slowly move the remote over the front of the VCR while pressing
the remote power button on and off.
3.
When your VCR turns off or on, you have located the sensor.
To test the VCR controller, use a piece of clear tape to temporarily
attach the VCR controller to the spot where you think the sensor is
located, and then follow the steps described under “Selecting a VCR
Type.”
Selecting a VCR Type
You need to tell the receiver which VCR brand you are using.
1.
Press MENU on the remote to bring up the Main menu.
2.
Point to
Options
and press OK.
3.
Point to
System Options
and press OK.
4.
Point to
Set VCR Type
and press OK.
REMOTE SENSOR
VCR
Front of VCR
Back of Receiver
SATELLITE IN
OUT
TO
TV
RF REMOTE
S-VIDEO
VIDEO
R
L
AUDIO
HOME CONTROL
VCR CONTROL
IN
FROM
ANT
PHONE JACK
If the Main menu doesn’t appear when you
press MENU, the remote might not be in
satellite mode. Try pressing the DIRECTV button
on the remote, and then MENU.


