


5
Copyright © 2020 RCA Communications Systems
www.RCACommunicationsSystems.com
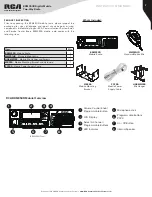
Communications Systems
BRM350D Digital Mobile
Two-Way Radio
INSTRUCTION MANUAL
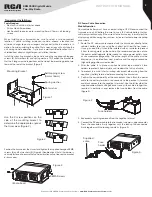
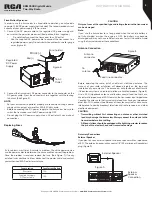
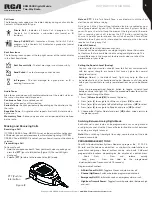
Microphone Jack
For voice communications, connect a 600 Ω microphone equipped with
an 8-pin modular plug into the modular socket on the front of the main unit.
Press firmly on the plug until the locking tab clicks. (Figure 10)
Figure 10
Microphone Hanger
Attach the supplied microphone hanger using included screws in an easy
to access location that will not interfere with vehicle operation. (Figure 11)
Figure 11
Microphone hanger screws -
3mm x 10mm
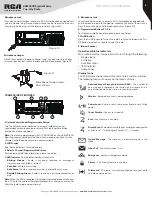
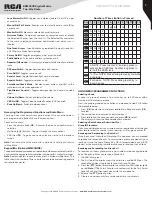
TRANSCEIVER FEATURES
1. Volume Control Knob/Programmable Button
Turn the Volume Control clockwise to increase radio volume and
counterclockwise to reduce radio volume. For Programmable Button
information, please see below.
Note:
If the radio is programmed with CTCSS/CDCSS or 2-Tone, MDC1200,
Signaling squelch, nothing will be heard from speaker even if you turn the
Volume Control Knob clockwise to maximum volume.
2. LCD Display
See “Status Indicators” for display details.
3. Select a Channel/Programmable Buttons
For Programmable Button information, please see below.
4. LED Indicator -
LED Indicator identifies radio status.
• Blinking Orange -
Radio is scanning, receiving an emergency
transmission or has failed a self-test.
• Solid Red -
Radio is transmitting.
• Solid Green -
Radio is receiving or carrier is present/busy channel.
• Rapidly Blinking Green -
Radio is receiving a privacy-enabled call or
data.
Note:
When the LED is solid green, it indicates the radio detects activity over
the air. Due to the nature of the digital protocol, this activity may or may not
affect the radio’s programmed channel.
5. Microphone Jack
For voice communications, connect a 600 Ω microphone equipped with
an 8-pin modular plug into the modular socket on the front of the main unit.
Press firmly on the plug until the locking tab clicks. (Figure 10)
6. Programmable Buttons P1 - P4
For Programmable Button information, please see below.
7. On/Off Button
Press the On/Off Button to turn on the radio. Press and hold down the On/
Off Button for about 1 second to turn off the radio.
8. Internal Speaker
Operational Status Indicators
Your radio indicates its operational status through the following:
• Display Icons
• Call Icons
• Sent Item Icons
• LED Indicator
• Audio Tones
Display Icons
The LCD display shows radio status, text entries, and menu entries.
The following icons will appear on the radio’s display.
Received Signal Strength Indicator (RSSI) -
The number of
bars displayed represents the radio signal strength and is
only displayed while the radio is in receiving mode.
Monitor -
Selected channel is being monitored.
or
Power Level -
Radio is set at Low power. Radio is set at High
power.
Tones Disable -
Tones are turned off.
Scan -
Scan feature is enabled.
Priority Scan -
Radio detects activity on channel/group designated
as Priority 1 (if “•” is blinking) or Priority 2 (if “•” is steady)
Unread Message -
The radio has unread message(s) in the
Inbox.
Inbox Full -
The radio’s Inbox is full.
Emergency -
Radio is in Emergency mode.
Privacy -
The Privacy feature is enabled.
Talkaround -
The radio is currently configured for direct radio
to radio communication.


