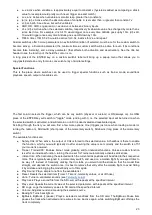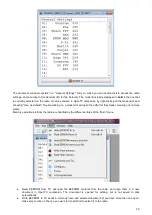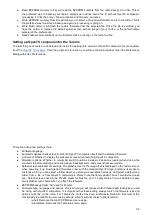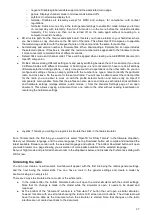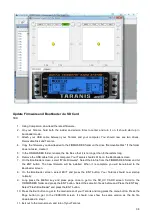
normal as it's been deactivated by the Replace type of the second line. Again that seems long, but takes as much
as about 30 seconds when you're used to it.
Of course if you've followed you'll certainly understood that we could have set the second line to use switch
"SAup", and that subsequently the role of the 2 lines would be swapped (second active when switch is up, first in
the other 2 positions). But then I wouldn't have had the opportunity to explain the !, and also as a personal
preference I like my switch default positions to be UP, and the first mixer line on a channel to be the default value.
A little simple one next: You have 2 ailerons with separate servos. Using a Y-cable to link them is too old-school
nowadays, so let's use another channel. We already have the first aileron on CH1, CH5 and 6 are taken by gear
and flaps, so let's use CH7. We have an aileron that must move with the aileron stick, which is actually just like the
first one. So let's just copy the first mixer by highlighting it and pressing ENTER LONG, and selecting copy. Move it
to CH7 and press ENTER. This would work just fine, but I'll throw in a personal preference again, and change its
weight to -100% because "logically" that aileron is supposed to move in the opposite direction. We'll see later why
this makes sense.
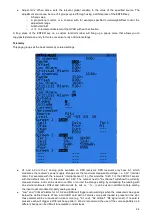
Next up: a little mix. I'm going to be lazy and just tell you to go back up and check the
mixer screen description
a bit
further up for the throttle -> elevator compensation. I'm sure it will seem much more clear now!
Let's do a delta mix. Again, what kind of control surfaces do we have, and what do we want them to do?
We have 2 elevons. They must move in the same direction when the elevator stick is moved, but they must move
in opposite directions when the aileron stick is moved.
So, let's pick 2 channels to connect our servos to. CH3 and 7, because... why not. Trying to make you forget about
old school fixed channel assignments here ;)
CH3 must move with the elevator stick, so we create a mixer line with Ele as source on it. CH3 must also move
with the aileron stick, so we create a 2nd mixer line with Ail as source. We leave multiplexing set to "Add", as that's
exactly what we want to do - the 2 inputs must be added together.
Now let's discuss the weights a little. They are now set to 100%. This means that a full deflection of the aileron
stick will create a full deflection of CH3, same for the elevator stick. But now as we add the 2 together, if we put the
stick in the upper right corner (assuming mode 2) we have 100% + 100% = 200% output on CH3. Now, the limits
defined on the SERVOS screen are set to 100% - which means that the output will be clipped. When the mixer's
output for a channel goes beyond 100%, the servo won't move any further. This is not different from other radios -
predefined delta mixes will usually give you ratios to enter for elevator and aileron authority, which is just the same.
If you enter too high ratios some of the stick throw will be ineffective.
Now the discussion as to what to set the ratios to is probably endless - some are happy with 100% and clipping,
some will like 50% so that there is never any clipping, and some like myself will like something a bit in the middle - I
use 70%.
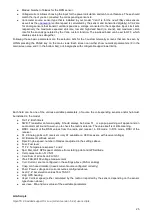
So, let's say we now have 2 mixer lines on CH3, 70% Ail and 70% Ele. As we said, CH7 must respond the same
way to the elevator input, so we add a 70% Ele mixer too. It must respond to the aileron stick by the same amount,
but in the opposite direction, so we'll set... -70%.
This is the reason for which I set -100% in the previous dual aileron example. Forcing yourself to enforce that logic
thinking even when not really necessary will help you to get it right when it's needed. For example in the dual
aileron scenario we could have set both ailerons to 100%, then used servo reverse to invert one aileron to achieve
the same result on the model. BUT in the delta scenario this wouldn't work.
Servos screen
Now that the mixer is configured and the controls' behaviors are defined, the next step is to set up the way these
orders will be carried through to the servos. At this point you'll want to actually connect your servos to your
receiver, remove the control horns from the servos, the props from the motors (safety first), and connect a receiver
battery. Bind the receiver if not done yet.
Center all controls (you can look at the channel monitor and aim for 0), and for each servo start by mounting the
horns so that they're as close to perpendicular to the control linkage they're going to drive as possible. Murphy's
law ensures that it's always right between 2 of the steps, so use the PPM center adjustment to make them perfectly
perpendicular. Using this setting instead of subtrim avoids losing throw, and makes sure the outputs seen in the
29

