background image

3

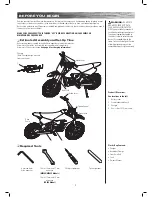
Speed Control

Drive 

Chain 

Front Fork

Brake Lever

Brake Lever

Brake Lever

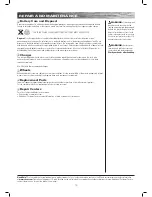
Remove contents from box. Remove the separators that protect the components from damage during shipping. Inspect 

the contents of the box for scratches in the paint, dents or kinked cables that may have occurred during shipping. 

Because the motor bike was 95 percent assembled and packed at the factory, there should not be any problems, even if 

the box has a few scars or dents.

MAKE SURE POWER SWITCH IS TURNED “OFF” BEFORE CONDUCTING ANY ASSEMBLY OR  

MAINTENANCE PROCEDURES.

 Estimated Assembly and Set-Up Time

Razor recommends assembly by an adult with experience in bicycle mechanics. 

Allow up to 30 minutes for assembly, not including initial charge time. 

Allow up to 12 hours for charge 

(see page 6 for charging information).

WARNING:

 DO NOT USE 

NON-RAZOR PRODUCTS WITH 

YOUR RAZOR ELECTRIC MOTOR 

BIKE. The motor bike has been built 

to certain Razor design specifications. 

The original equipment supplied at 

the time of sale was selected on the 

basis of its compatibility with the 

frame, fork and all other parts. Certain 

aftermarket products may not be 

compatible and will void the warranty.

 Required Tools

5 mm and 6 mm

Allen wrenches

10 mm, 14 mm and 17 mm 

wrenches


(MX500/MX650 Models)

10 mm, 17 mm and 19 mm 

wrenches 

(SX500 Model)

Phillips screwdriver

Spoke tightener

Charger 

(Note: Charger design may vary 

from one shown)

Product ID Locations: 
See locations to the left

1.  Battery cover
2.  Frame (underneath unit)
3.  Charger
4.  Box - side of UPC (not shown)

Plastic Bag Contents:

• Charger
• Handlebar Clamps
• Front Axle Bolt
• Tools
• Owners Manual

1.

2.

3.

BEFORE YOU BEGIN

Содержание Dirt Rocket SX500

Страница 1: ...re for demonstration purposes only Illustrations may not reflect exact appearance of actual product Specifications subject to change without notice Please have your 19 character product I D code ready...

Страница 2: ...00 kg for MX650 Rider weight alone also does not necessarily mean a person s size is appropriate to fit or maintain control of the SX500 MX500 MX650 Keep these products away from small children and re...

Страница 3: ...ys wear proper protective equipment such as an approved safety helmet with chin strap securely buckled elbow pads and kneepads A helmet may be legally required by local law or regulation in your area...

Страница 4: ...nitial charge time Allow up to 12 hours for charge see page 6 for charging information WARNING DO NOT USE NON RAZOR PRODUCTS WITH YOUR RAZOR ELECTRIC MOTOR BIKE The motor bike has been built to certai...

Страница 5: ...ars should not move forward or backward 3 Adjust the brake lever adjuster to the proper place and tighten it with the 5 mm Allen wrench 1 Align fender with the hole in the fork and insert the bolt Tig...

Страница 6: ...ey invariably lose some pressure between the point of manufacturing and your purchase WARNING Failing to properly adjust and tighten the nuts and bolts that affix the fork can cause you to lose contro...

Страница 7: ...in use Failure to recharge battery periodically may result in a battery that will not accept a charge Make sure the power switch is turned OFF when unit is not in use If the power switch is left on fo...

Страница 8: ...ge the rear tire Testing the Brakes To use the brakes squeeze the levers to increase the pressure on the brake The brake levers are fitted with a cable adjuster to compensate for cable stretch and or...

Страница 9: ...to loosen the chain and remove the chain from the wheel sprocket and motor sprocket Push and remove the wheel downward Note Your hands will get greasy doing this 1 Loosen screws and remove chain guard...

Страница 10: ...g the spokes into proper tension Continue tightening all spokes no more than 1 2 turn in sequence until all spokes are tight Note More than a 1 2 turn each can cause the wheel to become distorted and...

Страница 11: ...ironmentally safe manner Do not dispose of a lead acid battery in a fire the battery may explode or leak Do not dispose of a lead acid battery in your regular household trash The incineration land fil...

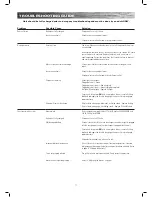
Страница 12: ...lete No lights Blinking lights Replace Charger Secure unit turn power ON with no weight on the unit carefully lift up back end and apply the throttle to engage the motor If motor engages replace batte...

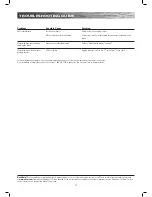
Страница 13: ...onnection s Motor or electrical switch damage Check for loose connections wires Contact your local Razor authorized service center for diagnosis and repair Motor bike does not stop when applying the b...

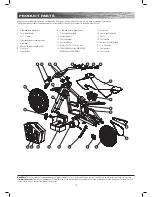
Страница 14: ...rottle 02 1 Sleeve 3 Front brake lever assembly right 4 Handlebar 5 Rear brake lever assembly left 6 Front fork 7 Front fender 8 Handlebar clamp upper lower 9 Front wheel complete 10 Caliper brake 2 1...

Страница 15: ...NCE YOUR INSURANCE POLICIES MAY NOT PROVIDE COVERAGE FOR ACCIDENTS INVOLVING THE USE OF THIS SCOOTER ELECTRIC RIDE ON PRODUCT TO DETERMINE IF COVERAGE IS PROVIDED YOU SHOULD CONTACT YOUR INSURANCE COM...

Страница 16: ...d by improper assembly maintenance storage or use of the Razor Dirt Rocket SX500 MX500 and MX650 This Limited Warranty will be void if the product is ever used in a manner other than for recreation or...

Отзывы: