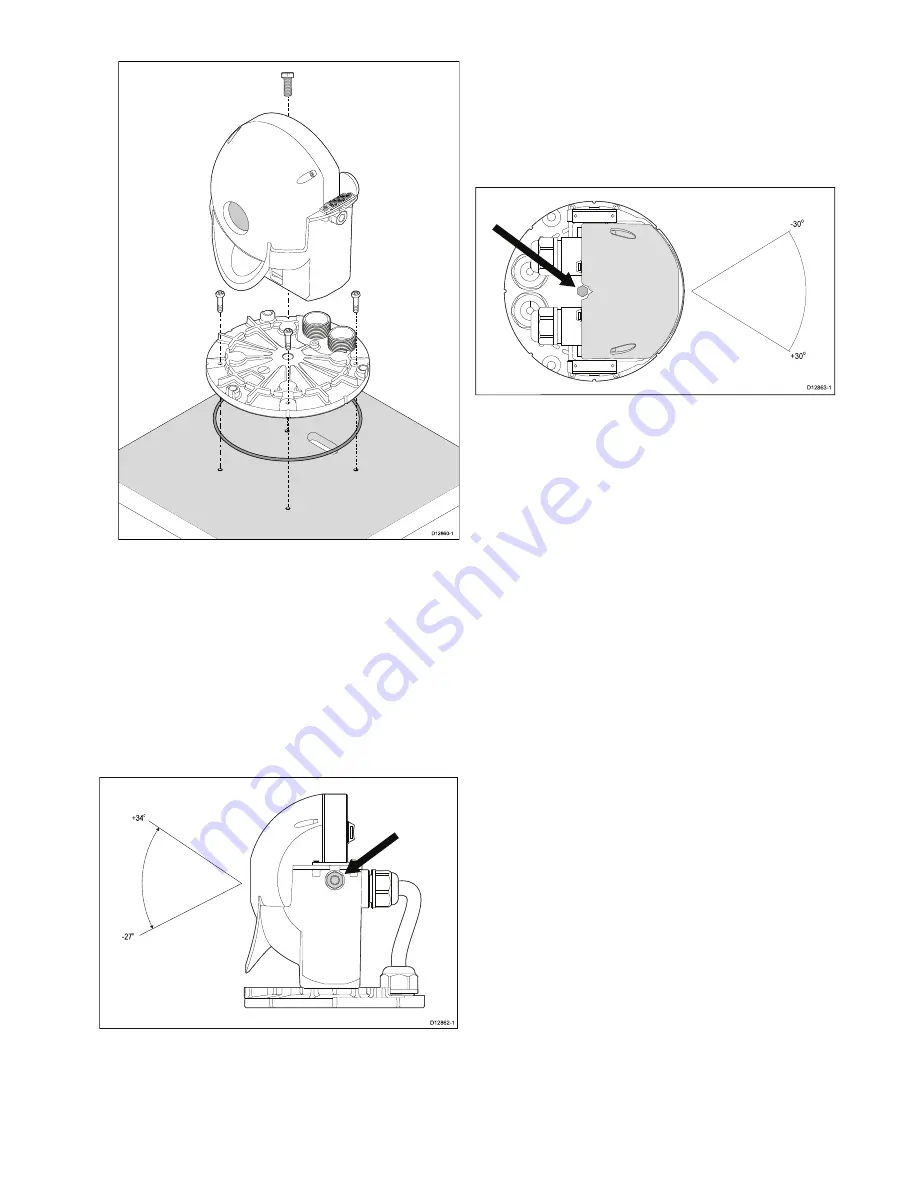
11. Secure the ball assembly to the base plate using the bolt
removed earlier.
0
0
D12860-1
• You must ensure that the camera is facing the correct way
depending upon whether the camera is to be mounted ball
up or ball down.
• Ensure the rubber O-ring is positioned correctly in the
base of the camera.
12. Make the required cable connections to the camera tails.
13. Secure the cables using the glands removed earlier.
14. Use a marine grade sealant to seal around the fixings to
prevent water ingress.
Adjusting the thermal camera’s tilt angle
Once mounted the thermal camera’s tilt angle can be adjusted
to the required position.
D12862-1
-27
o
+34
o
Once the thermal camera is installed:
1. Remove the camera’s outer cover.
2. Loosen the securing nuts half a turn so that the camera ball
assembly can be tilted up and down.
3. You may also need to loosen the cable glands to allow the
ball assembly to rotate freely.
4. Adjust the tilt to the required position.
5. Retighten the securing nuts to a torque of 13.6 Nm (10 ft-lbs)
— Do not overtighten.
6. Replace the cover.
7. Ensure that the cover is seated correctly all the way around
the base of the camera ball assembly.
Adjusting the thermal camera’s pan angle
Once mounted the thermal camera’s pan angle can be adjusted
to the required position.
-30
o
+30
o
D12863-1
With the outer cover removed
1. Loosen the securing bolt half a turn.
2. You may also need to loosen the cable glands to allow the
ball assembly to rotate freely.
3. Swivel the camera ball assembly’s position to the required
location.
4. Retighten the securing bolt, ensuring the camera ball
assembly does not move.
5. Replace the cover.
6. Ensure that the cover is seated correctly all the way around
the base of the camera ball assembly.
Installation


