background image

Navigation Aid System Setup and Operation Manual


Page 19 of 21 


10  Setup of 210 WiFi Navigation Aid System 

 
This system contains a 210-WiFi GPS receiver, a WiFi WPI (Wireless Pilot Interface), a TBA-2 antenna, 
50 feet of antenna cable, cable reel, antenna clamp, and a laptop computer. 

This system is no longer in 

production,  and  is  gradually  being  replaced  in  the  field  by  systems  that  use  Bluetooth 
communication.


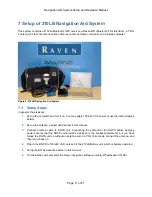
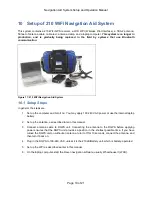
Figure 17: 210 WiFi Navigation Aid System 

10.1  Setup Steps 

In general, the steps are: 
 

1.  Set up the computer and turn it on. You may apply 100-240 VAC power or use the internal laptop 

battery. 
 

2.  Set up the antenna, as described later in this manual. 


3.  Connect  antenna  cable  to  DGPS  unit.  Connecting  the  antenna  to  the  DGPS  before  applying 

power ensures that the DGPS unit  provides a position in the shortest possible time. If  you  have 
turned the DGPS unit on without an antenna, turn it off for 10 seconds, connect the antenna, and 
then turn it back on. 
 

4.  Plug in the DGPS to 100-240 VAC, unless it is the 210LB/Battery unit, which is battery-operated. 


5.  Set up the WPI as described earlier in this manual. 


6.  On the laptop computer, start the Raven navigation software, usually Wheelhouse II (WHII). 


Содержание 210LB

Страница 1: ...Navigation Aid System Setup and Operation Manual 016 0171 055 Revision G 5 8 2012...

Страница 2: ...Navigation Aid System Setup and Operation Manual Page 2 of 21...

Страница 3: ...em and for 210LB Battery system setup Updated pictures text and organization D 03 23 2009 Updated logo Replaced contact info with reference to contact info Updated logo on title page C 01 16 2008 Adde...

Страница 4: ...7 2 Pack Up Steps 12 8 Setup of 210LB Battery Navigation Aid System 13 8 1 Setup Steps 13 8 2 Pack Up Steps 14 8 3 Charging the Battery 15 9 Setup of Traffic Management System 16 9 1 General Setup St...

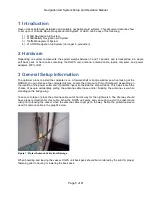
Страница 5: ...forward shelf or bridge window so when looking at the RADAR you can also see the computer display Locate the antenna to Port or Starboard depending on the location of the power outlet and if possible...

Страница 6: ...ble Navigation Aid System 4 Even though the Raven system shows remote AIS and SEND vessels see SEND AIS Operation Manual the pilot s visual lookout and the RADAR are as critical as ever in knowing the...

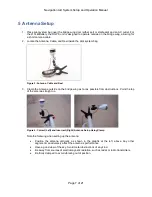
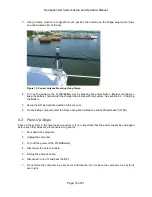
Страница 7: ...l 3 Clamp the Antenna outside on the bridge wing as far as possible from obstructions Point the top of the antenna straight up Figure 4 Correct Left and Incorrect Right Antenna Setup Using Clamp Note...

Страница 8: ...t Antenna Setup Using Magnet Mount 4 Un spool the cable back into the wheelhouse and connect to the DGPS 5 Locate the DGPS AC power cable 6 Connect the AC power cord from the DGPS to an AC outlet use...

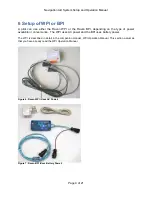
Страница 9: ...BPI depending on the type of power available or convenience The WPI uses AC power and the BPI uses battery power The WPI is described in detail in the companion manual WPI Operation Manual This secti...

Страница 10: ...t 2 Connect the WPI or BPI pilot plug to the vessel s pilot port 3 Connect the AC power 100 240 VAC to the WPI The BPI is battery operated 4 Verify the WPI or BPI blue light is on solid 5 Verify the W...

Страница 11: ...power or use the internal laptop battery 2 Set up the antenna as described earlier in this manual 3 Connect antenna cable to DGPS unit Connecting the antenna to the DGPS before applying power ensures...

Страница 12: ...be unplugged before any other wires are disconnected In general 1 Shut down the computer 2 Unplug the computer 3 Unplug the DGPS unit 4 Disconnect the antenna cable s 5 Roll up the cable s and dismou...

Страница 13: ...System 8 1 Setup Steps In general the steps are 1 Set up the computer and turn it on You may apply 100 240 VAC power or use the internal laptop battery 2 Connect the antenna cable to the antenna inpu...

Страница 14: ...the Battery 5 Setup the BPI as described earlier in this manual 6 On the laptop computer start the Raven navigation software usually Wheelhouse II WHII 8 2 Pack Up Steps Pack up the system in the rev...

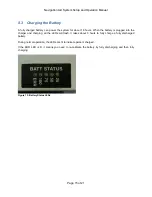
Страница 15: ...the battery is plugged into the charger and charging all the LEDs will flash It takes about 3 hours to fully charge a fully discharged battery During normal operation the LEDs are lit to indicate per...

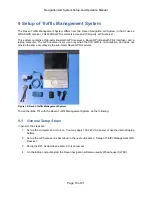
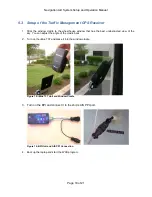
Страница 16: ...when the AIS GPS is not available and does not provide the same accuracy as the sub meter Raven GPS receivers Figure 14 Raven Traffic Management System To use the iBlue 737 with the Raven Traffic Mana...

Страница 17: ...der It is very important that the power supply be unplugged before any other wires are disconnected In general 1 Shut down the computer 2 Unplug the computer 3 Turn off disconnect and pack the BPI 4 P...

Страница 18: ...se window that has the best unobstructed view of the sky You can adjust the angle of the cradle back 2 Turn on the iBlue 737 and place it into the window cradle Figure 15 iBlue 737 Unit and Window Cra...

Страница 19: ...t up the computer and turn it on You may apply 100 240 VAC power or use the internal laptop battery 2 Set up the antenna as described later in this manual 3 Connect antenna cable to DGPS unit Connecti...

Страница 20: ...y be unplugged before any other wires are disconnected In general 1 Shut down the computer 2 Unplug the computer 3 Unplug the DGPS unit 4 Disconnect the antenna cable s 5 Roll up the cable s and dismo...

Страница 21: ...pplications You may be able to use one of these security applications to remove the malicious software The Laptop Admin folder is on the desktop for most systems If it is not on the desktop consult yo...

Отзывы: