background image

Programming/Save mode

V-12 - 02/2018 - PM/Stme - English - © RATIONAL

81 / 153

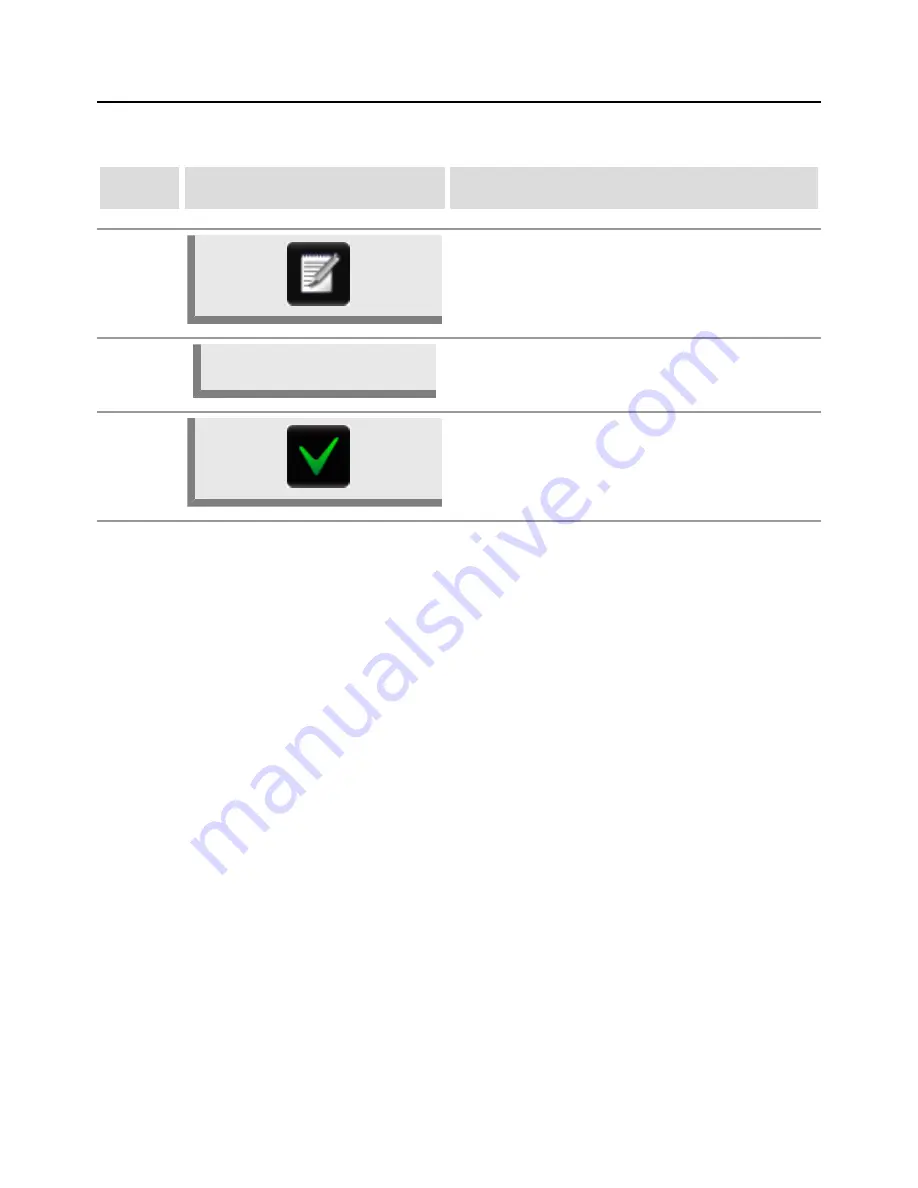
Save while in operation

step

info/button

instructions

1

Press the "Program" button shown in the

display footer while the unit is in operation.

2

Wiener schnitzel

Use the keyboard on the display to enter a

program name.

3

Press the button to save the name.

Содержание VarioCookingCenter 112T

Страница 1: ...VarioCookingCenter Original operating instructions ...

Страница 2: ...can create your own cooking programs As an end customer we give a 24 month warranty from the date of initial installation provided that you have correctly completed the warranty registration in full The General Terms and Conditions of the manufacturer shall apply The warranty excludes seals glass damage and damage resulting from incorrect installation use maintenance and repair To be able to make ...

Страница 3: ...15 Working parts VarioCookingCenter 112T 112L 15 Working parts VarioCookingCenter 112 211 311 15 General notes on use 17 Working with the core temperature probe 18 Working with the hand shower 21 Operating instructions 22 Touchscreen and dial 22 Start level display 23 Explanation of the buttons 24 Filling volumes in the pan 31 Help function 35 Overview of the cooking modes 36 Precondition 37 Vario...

Страница 4: ...ime setting or continuous operation 64 Preheat 64 Cooking with baskets 66 Working with the core temperature probe 68 Programming Save mode 70 Buttons in Programming Save mode 70 View 72 Programming Save VarioCooking Control mode 74 Programming Save Manual mode 76 Start test program 78 Change program 79 Save while in operation 81 Delete program 82 Copy program 83 Key lock 84 MyVCC appliance configur...

Страница 5: ...pad sound volume 91 Loading action request 91 Programme step end 91 End of cooking time 91 Process interruption error found 91 Acoustics factory setting 91 MyVCC System Management 93 Download HACCP data 93 Download information data 95 Download service data 97 Download program 98 Upload program 98 Delete all programs 98 Download profile 100 Upload profile 100 Download image 102 Upload images 102 ...

Страница 6: ...oad profile 108 Software update 110 Automatic dimming 112 Loading retention time 113 MyVCC Expert Settings 114 Pre program start time 114 VarioClose for model 112L only 114 MyVCC MyDisplay 117 Activate change profile 117 Upload profile 117 Download profile 117 Edit profile 117 Add new profile 117 MyVCC MyDisplay Example 125 MyVCC Service 135 Information on appliance type software 135 ChefLine 135 ...

Страница 7: ...Contents Interim cleaning 137 Basic cleaning 139 Service reports 140 Before you call customer service 144 Domestic appliances 146 Unit accessories 147 ...

Страница 8: ...ury or death Warning A possibly hazardous situation that may result in severe injury or even death Caution A possibly hazardous situation that may result in minor injury Danger of explosion Danger of fire Danger of burns Danger of injury Please read the manual carefully prior to initial start up Attention Damage may be caused if this is ignored Handy tips for everyday use ...

Страница 9: ...fore using the unit for cooking ensure that there are no cleaning agent residues in the pan Remove all objects which have been placed on the unit Warning Do not store any easily flammable substances near the unit Danger of fire Food that contains easily flammable substances must not be cooked Substances with a low flashpoint can ignite spontaneously Danger of fire Warning The VarioCookingCenter mu...

Страница 10: ...an be hot Danger of burns Do not use pots or pans with handles on the VitroCeran option not 112T 112L Danger of tipping when the cover is closed and when the pan is moved Danger of burns Do not place any cooking utensils or aluminium containers etc on the VitroCeran option not 112T 112L while it is still hot Danger of burns Do not use the VitroCeran option not 112T 112L as a storage area Danger of...

Страница 11: ... installing the VarioCookingCenter 112T 112L with screwed on feet a pinch point is created at the basin leading edge risk of injury Position the core temperture sensor on the lid Please ensure that the point is not protruding danger of injury Do not allow the lever of the pan vent 112T 112L to snap back as hot water or oil may splash danger of burning Safety instructions for deep frying Danger Do ...

Страница 12: ...ting bars are hot Danger of burns Use the oil cart see the Unit accessories section or another sufficiently wide drip container to empty the pan Position it so as to avoid spills Danger of burns Tilt the pan carefully in order to avoid spillage Danger of slipping and burns Hot oil may spit out as you are emptying the pan Danger of burns Observe the recommended load sizes given in the application m...

Страница 13: ...r pointed tools to clean the pan Do not use high pressure cleaners for cleaning Do not use hydrochloric acid sulphurous or other oxygen consuming substances to clean the unit and its accessories since this can damage the passive layer of the chrome nickel steel and discolour the unit or accessories If necessary boil a little diluted vinegar in the pan to remove limescale or discolouration rainbow ...

Страница 14: ...d that the power cables and water and drain pipes are correctly disconnected If the unit is returned to its original position the movement locks and the power cables and water and drain pipes must be correctly attached Attention The unit must be levelled horizontally again Your unit should be serviced at least once a year by an authorised service partner to ensure that it remains in perfect techni...

Страница 15: ... important data such as power consumption voltage number of phases and frequency along with the unit type unit number and weight Control panel Central dial Unit cover Cover handle Hand shower with retraction mechanism VarioDose Core temperature probe Lifting arm hook Pan valve Pan Steam nozzles Pan valve lever VarioCookingCenter 112T 112L ...

Страница 16: ...with the unit type unit number and weight Control panel Central dial Unit cover Cover handle Cover for the electronic components Hand shower with retraction mechanism VarioDose VitroCeran option Unit feet height adjustable Socket 1N A C 230V Core temperature probe Lifting arm hook Interlock for pressure cooking option Pan valve Pan Steam nozzles VarioCookingCenter 112 112T without 9 11 VarioCookin...

Страница 17: ...an three days or after the unit has been transported we recommend flushing the VarioDose and the hand shower with about 10 litres of water depending on the length of the pipe Check that there are no food residues in the area of the pan valve Do not dispose of this unit in the domestic waste or local collection point We will be happy to help you with the disposal of your unit Maximum load size for ...

Страница 18: ... probe risk of injury Insert the core temperature probe into the thickest point of your food to be cooked The needle must pass through the middle of the food You will find a detailed description of the optimum positioning of the core temperature probe in the application manual which can be viewed by pressing the button When the core temperature probe is not in use put it back in the place provided...

Страница 19: ...s shown risk of damage Do not allow the core temperature probe to hang out of the pan risk of damage Remove the core temperature probe from the food before you remove the food from the pan risk of damage If at the beginning of a cooking process the core temperature probe is hotter than the core temperature set e g because it was in the frying oil during preheating allow it to cool before putting i...

Страница 20: ...wer Appliance max Power Fuse VarioCookingCenter 112 not 112T 112L 2 3 kW 10 A VarioCookingCenter 211 311 3 6 kW 16 A Unit weights Appliance without pressure option with pressure option 112T 99 kg not available 112 168 kg 186 kg 112L 132 kg not available 211 195 kg 223 kg 311 251 kg 279 kg ...

Страница 21: ...er retracts automatically Always allow the hand shower to slide back slowly and in a controlled manner Warning Do not use the hand shower when working with oil deep frying Close the plug socket cover before using the hand shower Pulling the hand shower out sharply beyond the maximum available length will damage the hose Make sure that the hand shower hose is fully rewound after use ...

Страница 22: ...t touching it lightly with your finger Press a button to activate it The active state is identified by the flashing red border In the active state you can make settings with the central dial Alternatively you can make settings by moving dragging the slider Your setting is accepted when you press the button or the central dial or after 4 seconds have elapsed ...

Страница 23: ...TIONAL 23 153 Start level display On Off switch Manual Mode Boiling Pan fried Deep fried VarioCooking Control mode Top 10 Meat Fish Vegetables and Side Dishes Egg dishes Soups sauces Milk Desserts Finishing and Service Other function Programming Save mode ...

Страница 24: ...er A cooking process is running in the left hand pan display view for right hand pan is active If action is required on the left hand side the border flashes model 112 112T 112L Function button Shows the buttons for operating the unit components such as cover pan VarioDose pan valve and VitroCeran plate optional not 112T 112L Back button Exits the process or jumps to the higher level MyVCC unit co...

Страница 25: ...e cover is opened by pressing the button Pressing the button again stops the movement On the model 112 112T 112L the cover must be opened manually If the VarioClose setting has been activated model 112L only one other button will appear This lowers the cover mechanically in order to be able to reach the handle to close the cover when placed high up After 3 seconds the cover will reopen completely ...

Страница 26: ...t activate the lock Inform your Service partner immediately In this case the following warning sign must be attached to the unit order to inform all users Warning Cover mechanism defective Do not move the cover Risk of injury Do not place any objects on the cover or in its swivelling range risk of injury Caution Open the appliance cover with care Vapours can escape risk of burning ...

Страница 27: ...e pan in models 211 and 311 will lower automatically to 10 The Lower pan button can then be pressed again and the pan lowered completely This option will only appear model 211 311 only if the pan has been automatically lowered to 10 Now press the Lower pan button to lower the pan completely Caution Do not place any objects under the pan or in its swivelling range Risk of injury The pan is raised b...

Страница 28: ... The VarioDose function allows precisely measured water to be added directly to the pan Press the button and then set the volume of water using the central dial Filling and counting down of the number of litres starts when you press the button the dial or after 4 seconds Pressing the dial again stops the inflow before the set number of litres has been reached Maximum filling volumes with the VarioD...

Страница 29: ...valve lever The pan valve is closed by pressing the button The pan valve is automatically closed when you select a process or a manual cooking mode On model 112T 112L the pan valve is closed manually using the pan valve lever On the VarioCookingCenter 112T 112L the integrated pan outlet is opened and closed manually by operating the pan valve lever If the pan valve is opened during or after deep f...

Страница 30: ...ot risk of burning Do not use steel pots or pans the VitroCeran optional not 112T 112L or place on the user console Danger of tipping when the cover is closed and when the pan is moved risk of buring Do not place any cooking utensils or aluminium containers etc on the VitroCeran optional not 112T 112L while it is still hot risk of burning Do not use the VitroCeran optional not 112T 112L as a stora...

Страница 31: ...perating instructions V 12 02 2018 PM Stme English RATIONAL 31 153 Filling volumes in the pan For your safety always observe the filling limits as indicated by the marks in the pan 112 112T 112L 211 311 ...

Страница 32: ...es 35 litres 311 45 litres 49 litres Basically the maximum permissible filling quantities as per DIN 18869 6 must be observed With the VarioCookingCenter 311 only fill with cold oil up to the MIN mark 45 litres The oil will automatically reach the MAX mark 49 litres due to the expansion of the oil at the operating temperature This complies with the safety regulations and this quantity of oil can e...

Страница 33: ... not absorbed by the food during cooking Unit type Permitted Minimum fill level for pressure cooking Maximum fill level Fill level for pressure cooking 112 2 litres 14 litres 211 20 litres 80 litres 311 30 litres 100 litres Unit type Maximum load size 112 112T 15 kg pan 112L 25 kg pan 211 100 kg 311 150 kg Maximum load size of the accessory baskets The maximum load size of the accessory baskets depe...

Страница 34: ...Caution Observe the maximum and minimum fill levels in the pan for each of the cooking modes There is a risk of fire or burning if the pan is used incorrectly if the levels are too high or too low Exceeding the maximum load sizes allowed can result in damage to the unit ...

Страница 35: ...ng instructions and an application manual with practical examples and useful tips stored on the unit Press the button to select the Help function Explanation of the buttons Start the Help function Display safety instructions Scroll forward one page Open the next section Open the selection menu and select manual Exit the help function Scroll back one page Open the previous section ...

Страница 36: ...de Manual mode Programming Save mode When you press the Meat Fish Vegetables and Side Dishes Egg Dishes Soups and Sauces Milk Desserts or Finishing and Service button the window for selecting the cooking processes in VarioCooking Control mode opens When you press the Boil Pan Fry or Deep Fry button you switch to manual mode If you have a unit with the Non deep frying option the Deep Fry button is ...

Страница 37: ...ailure and you then select a process or manual mode Precondition lower pan Please lower the pan completely This message appears if you select a process or a manual mode with the pan not lowered completely Precondition lift pan Please lift the pan completely This message appears when you have selected a frying process or manual frying last After the pan has been lifted completely the automatic wate...

Страница 38: ...oo high risk of burning Precondition unlock cover optional not 112T 112L Please unlock the cover This message appears when the cover is still locked after pressure cooking Precondition pressure relief optional not 112T 112L Please wait until the pressure has been completely relieved This message appears when the pressure process has been cancelled prematurely Precondition close the basin outlet 11...

Страница 39: ...nglish RATIONAL 39 153 Warning Close pan valve 112T 112L Please close the pan valve immediately This message appears if you open the pan valve during or after deep frying Lift the pan completely to empty all the oil before you reopen the pan valve ...

Страница 40: ...ted The remaining time as currently calculated is displayed You will find examples and useful notes in the application manual which can be viewed by pressing the button Buttons and pictograms in VarioCooking Control mode Cooking speed Delta T Cooking time Browning Temperature Core temperature probe Basket Chocolate variety Core temperature cooking level Cooking level for Boil eggs Size of food Fry...

Страница 41: ...compression display option not 112T 112L Cooking step display End of cooking step display Power failure Insert roasting rack prompt Load prompt Request to load chocolate in water bath Deglaze prompt Prompt to insert core temperature probe in food in this case meat Request to insert the core temperature probe again Prompt to insert core temperature probe in cooking liquid Request to insert the core...

Страница 42: ...rgency process if core temperature probe is not inserted or inserted incorrectly Display of defective core temperature probe Some processes cannot be selected Consult a technician Prompt to stir in and insert core temperature probe Prompt to mix Prompt to chop Kaiserschmarrn Confirm Yes button Cancel No button Options following the end of cooking Continue with time Keep hot Move core temperature p...

Страница 43: ...er Pan fried New load Continue with time The information or prompts shown in the boxes represent the workflow for the cooking process The adjacent buttons in this row show the options that are available when cooking has ended If a box contains two different prompts then the top or the bottom prompt will be display depending on how the cooking parameters are set In the above example the Load prompt...

Страница 44: ...lled up by pressing the button Example 1 Braised beef step info button instructions 1 Select the Meat product category 2 Braise Select the Braise preparation type 3 Press the button and select the desired frying level 4 Press the button and select the desired core temperature 5 The unit heats up automatically 6 Fry Prompt to load and fry 7 Fully seared Confirm in order to end the frying phase when...

Страница 45: ...its with the pressure cooking option not 112T 112L 11 Lower cover prompt 12 Prompt to lock cover if you selected pressure optional not 112T 112L 13 Cooking step hour glass and remaining time appear on display 14 Prompt to unlock cover if you selected pressure optional not 112T 112L 15 End of cooking time buzzer sounds and the total cooking time is displayed Follow up options may be selected ...

Страница 46: ... recognised that the core temperature probe is not or incorrectly inserted a signal is emitted and a message appears in the display prompting you to re insert the core temperature probe Press the Program button to save your individual settings see the Programming Save mode section ...

Страница 47: ...ct the Boil pasta preparation type 3 Select Cooking with without basket 4 Press the button and select the desired boiling behaviour 5 Press the button and select the desired cooking time as per the manufacturer s instructions 6a The unit fills with water automatically if you selected with basket 6b Filled Prompt to fill with water if you selected without basket 7 The unit heats up automatically ...

Страница 48: ...tructions 8 Load prompt 9 Cooking step hour glass and remaining time appear on display 10 End of cooking time buzzer sounds and the total cooking time is displayed Follow up options may be selected Press the Program button to save your individual settings see the Programming Save mode section ...

Страница 49: ...M Stme English RATIONAL 49 153 Top 10 provides fast and direct access to your 10 most frequently used applications Press the VCC button in the start screen to access the Top 10 No manual programs are displayed in the Top 10 ...

Страница 50: ...s of the VarioCookingCenter are available Buttons and pictograms in Manual mode Boil Pan fried Deep fried Cooking temperature Boiling temperature Delta T cooking PowerBoost TM Cooking time Core temperature Preheat Continuous operation Pressure cooking optional not 112T 112L Cooking with baskets ...

Страница 51: ...tton to call up the current data such as the actual cooking temperature actual core temperature and elapsed cooking time The actual values are displayed continuously if you hold down the Cooking temperature button for 10 seconds Press the Cooking temperature button again to return to the set values ...

Страница 52: ...t the desired cooking temperature 3a Press the button and select the desired cooking time 3b Alternatively press the button and select the desired core temperature In Boil cooking mode you can select the additional functions PowerBoost Preheat Continuous operation Boil with baskets Pressure cooking option not 112 112L and Delta T cooking If the lid is closed the unit is heated to a maximum of 3 C ...

Страница 53: ...une the boiling behaviour from gently simmering to a rolling boil You can select one of the PowerBoost TM levels from 1 to 6 It can be selected in Boil manual cooking mode Press the button and turn the dial to the right beyond boiling temperature PowerBoost TM level 1 gently simmering PowerBoost TM level 6 rolling boil ...

Страница 54: ... The slow rise in the cooking cabinet temperature to the end of the cooking process at a constant differential from the core temperature means that the meat undergoes a slower and thus very gentle cooking process Delta temperatures from 10 C to 40 C can be set It can be selected in Boil manual cooking mode step info button instructions 1 Select Boil cooking mode 2 Press the Delta T cooking button ...

Страница 55: ...al mode V 12 02 2018 PM Stme English RATIONAL 55 153 step info button instructions 4 Press the button and select the desired core temperature It is not possible to set the cooking time with Delta T cooking ...

Страница 56: ...h can be viewed by pressing the button Caution When pressure cooking observethe minimum fill levels required to build up the pressure and the maximum fill levels see label in the pan and the Operating instructions Fill levels section risk of burning due to excessive foaming or spraying when opening the cover Minimum fill level Model 112 2 litres Model 211 20 litres Model 311 30 litres Maximum fill lev...

Страница 57: ...hat the cover seal and the seal contact surface on the pan are clean and that there are no objects between the cover and edge of the pan 5 The Lock cover button appears when the cover is fully closed Press the hold down the button to lock the cover 6 The pressure starts to build up as soon as the cover is locked The time then starts to run 7 The pressure is dissipated automatically after the time ...

Страница 58: ... can also be cancelled by resetting the time to 00 00 The pressure dissipates automatically Carry out a cleaning cycle on the pressure system once a week by filling the minimum fill level of water 112 2 litres 211 20 litres 311 30 litres into the pre cleaned pan and operating for 5 minutes in pressure mode If pressure cooking can no longer be selected the button will be grayed out Pressure cooking ...

Страница 59: ... fry cooking mode 2 Press the button and select the desired pan temperature 3a Press the button and select the desired cooking time 3b Alternatively press the button and select the desired core temperature In Pan fry cooking mode you can select the additional functions Preheat and Continuous operation If the cover is closed the pan will not heat to any more than 150 C even if a higher temperature ...

Страница 60: ...Manual mode 60 153 V 12 02 2018 PM Stme English RATIONAL Caution Do not fill cold water into the preheated empty pan risk of burning ...

Страница 61: ... or with the bain marie see the Unit accessories section Make sure that no liquid sprays into the pan Do not use pots or pans with handles on the VitroCeran Danger of tipping when the cover is closed and when the pan is moved Warning Hot oil in Deep frying cooking mode Do not exceed the minimum and maximum fill levels when deep frying risk of burning from spitting oil Minimum fill level Model 112 11...

Страница 62: ...g the pan Observe the recommended load sizes given in the application manual which can be called up by pressing the button Oil foams up and spits particularly badly when you lower large quantities of wet food into it The external temperature of the unit may be higher than 60 C Only touch the control elements of the unit Warning Regularly check the quality of the oil Old oil may catch fire step inf...

Страница 63: ... off if the oil temperature rises above 230 C On the VarioCookingCenter 112T 112Lthe integrated basin outlet is manually opened and closed by operating the basin valve lever If the basin valve is opened during or after deep frying an acoustic warning signal is sounded and the basin valve is to be closed again immediately Hot oil is to be emptied by tipping it over the basin lip and by following th...

Страница 64: ... the Cooking time button and set the desired cooking time 2b For continuous operation press the Continuous operation button CONTINUE is displayed above the cooking time slider Preheat step info button instructions 1 Select a cooking mode e g Boil 2 Press the button and select the desired preheat temperature 3 Press the Preheat button An animation is displayed while preheating is active ...

Страница 65: ...the time See the Time section under MyVCC Setting the real time format See the Real time format section under MyVCC Setting the cooking time format See the Cooking time format section under MyVCC Setting the start time See the Start time selection section under MyVCC ...

Страница 66: ...lect Boil cooking mode 1b or select Deep fry cooking mode 2 Press the Cooking with baskets button 3 Press the button and select the desired cooking temperature 4a Press the button and select the desired cooking time 4b Alternatively press the button and select the desired core temperature 5 The Load prompt appears when you set a cooking time or core temperature Confirm once you have placed the foo...

Страница 67: ...oes not restart until you have lowered the baskets once more 7b The baskets are automatically raised after the time has elapsed or the set core temperature is reached In Boil with baskets mode you can select the additional functions PowerBoost Preheat and Delta T cooking In Deep fry with baskets mode you can select the Preheat additional function Always wear heatproof clothing when you touch the b...

Страница 68: ...efore use and insert it into the thickest part of the food You will find a detailed description of the optimum positioning of the core temperature probe in the application manual which can be called up by pressing the button Caution The core temperature sensor may be hot Danger of burns Only pick it up wearing heatproof clothing Caution When you set the core temperature probe protect your arms and...

Страница 69: ...ed on the cover as shown Danger of damage Do not allow the core temperature sensor to hang out of the pan Danger of damage Remove the core temperature sensor from the food before you remove the food from the pan Danger of damage If the core temperature probe is warmer than the core temperature set at the beginning of a cooking process e g because it was in the frying oil during preheating cool it ...

Страница 70: ...ing Control mode to suit your individual needs modify them and save them under a new name or create your own manual programs with up to 12 steps Buttons in Programming Save mode Press the arrow buttons or turn the central dial to select a program Program selection window New program Copy program Change program Image view List view MyDisplay see MyVCC MyDisplay section Delete program ...

Страница 71: ...ton other information is called up or discarded in addition to the program name Image of the food for the program Image of the accessory for the program Group allocation e g Breakfast Notes about the program Additional attributes can be selected The pictogram beside the program name shows whether the stored cooking program is a manual program shown on the left or a VarioCooking Control cooking wor...

Страница 72: ...d to a title image If there is no image available the title of the program appears as text in the image view Press the button to switch to the image view Press the button to change the view from 20 to 16 images per page for example Press the arrow buttons or turn the central dial to page through the view Press the button to switch to the list view The last selected image always appears the next ti...

Страница 73: ...order no filter function standard setting Change The saved programmes are displayed according to the latest changes Programme type The programmes are sorted by cooking mode no filter function Ranking The programmes are sorted by the favourite setting automatic filter function The favourite status must be updated in the programme attributes beforehand The following filter criteria are available Pro...

Страница 74: ...ll done step info button instructions 1 Press the Program button 2 Press the button to create a new program 3 Beef pot roast Use the keyboard on the display to enter a program name 4 Press the button to save the name 5 Select the Meat product category 6 Braise Select a preparation method e g Braise 7 The Searing level and Core temperature cooking parameters may be changed individually 8 Press the ...

Страница 75: ... instructions 9 Select an image for the food for example or exit the program detailed view by pressing the Save button You can store additional information about the program in the program detailed view e g an image of the accessory notes about the program or the allocation to a group ...

Страница 76: ...s 1 Press the Program button 2 Press the button to create a new program 3 Gnocchi Use the keyboard on the display to enter a program name 4 Press the button to save the name 5 Select a manual cooking mode e g Boil 6 Set the required cooking parameters such as cooking temperature and cooking time 7 Press the Save button to store the step The button for the selected manual cooking mode e g Boil star...

Страница 77: ...ress the Save End button to exit the programming process You can set an audible signal to sound at the end of each individual program step To do this simply activate the buzzer button in the steps concerned A preheating step can only be programmed in the first program step You cannot combine the different cooking modes with one another in a manual program It is only possible to switch from pan fry...

Страница 78: ...ogram button 2 Press the arrow buttons or turn the central dial to select a program 3 Press the program name in the selection window or on the central dial to start or call up the program 4 Press the Step symbol to test the individual steps of the program The active step is highlighted in red 5 Press the button to exit the program ...

Страница 79: ...al dial to select a program 3 Press the button to activate the change function The view changes to the program detailed view 4 Beef pot roast Press the program name if you want to change the name 5 Press the button to save the changed name 6 Press the pictogram to open the program 7 Press the Step symbol to select the program step to be changed The active step is highlighted in red ...

Страница 80: ...ep 10 Press the Save End button to exit the programming process Press the button to delete the displayed program step Press the button to add a program step The new program step is inserted after the displayed step Press the button to change notes in the program attribute view Press the button to select additional attributes such as Favourites status Press the button to exit change mode ...

Страница 81: ...L 81 153 Save while in operation step info button instructions 1 Press the Program button shown in the display footer while the unit is in operation 2 Wiener schnitzel Use the keyboard on the display to enter a program name 3 Press the button to save the name ...

Страница 82: ...Press the Program button 2 Press the arrow buttons or turn the central dial to select a program 3 Press the button twice to delete the program Press the Back button or another button to cancel deletion Delete all programs It is only possible to delete all the programs under MyVCC see the MyVCC communication section ...

Страница 83: ...he arrow buttons or turn the central dial to select a program 3 Press the button to copy the program 4 Boned and rolled joints Use the keyboard on the display to enter a program name 5 Press the button to save the copied cooking workflow under the new name If you don t change the program name it will automatically be assigned a consecutive index ...

Страница 84: ...an activate the key lock in order to clean the display The key lock for the display is activated by pressing the MyVCC key for 3 seconds and the button display will change into a key symbol The key lock is deactivated by pressing the key for a further 3 seconds ...

Страница 85: ...etc can be changed under MyVCC Press the MyVCC button to open the overview display for your appliance s default settings You can customise your appliance s settings to suit your requirements Explanation of pictograms Favourites active when MyVCC is selected Settings Acoustics System management MyEnergy Expert setting MyDisplay Service ...

Страница 86: ...s the MyVCC button 2 The Favourites menu item opens automatically 3 Select for example the Language menu sub item using the central dial 4 Press the Star button on the right next to the Language menu sub item 5 The Language menu sub item is now created as a favourite and can be selected in the Favourites menu item Press the Star button to remove a favourite from the list at any time ...

Страница 87: ...ustics etc Language step info button instructions 1 Press the MyVCC button 2 Press the Settings button 3 Press the Language button Change the language by turning the central dial to the appropriate language and then press the dial Date and time step info button instructions 1 Press the MyVCC button 2 Press the Settings button 3 Press the Date and time button ...

Страница 88: ... RATIONAL step info button instructions 4 To set the date and time click the date and time format fields mm dd yyyy HH MM and adjust using the central dial Press the central dial to confirm the new setting 5 Press the arrow button to open the main menu ...

Страница 89: ...inutes ms Minutes secondsPressure cooking optional not 112T 112L Time is always displayed in hm hours minutes Deep frying Time is always displayed in ms minutes seconds Meat Overnight Cooking and Braise Time is always displayed in hm hours minutes Realtime format Press the Realtime format button The set realtime format is highlighted at the bottom right of the button in 24h or am pm Click the butt...

Страница 90: ... do so follow the following steps step info button instructions 1 Press the MyVCC button 2 Press the Settings button Temperature unit Press the Temperature unit button to select between Celsius or Fahrenheit Press the central dial to confirm your selection Display brightness Press the Display brightness button and adjust the brightness in several levels using the central dial ...

Страница 91: ...CC button 2 Press the Acoustics button The following settings can be changed Master volume Press the Master volume button and adjust the master volume 0 100 using the central dial Keypad sound Press the Keypad sound button and adjust the keypad sound to on or off using the central dial Keypad sound volume Press the Keypad sound volume button and adjust the volume of the keypad sound 0 100 using th...

Страница 92: ...for the end of a program step End of cooking time Press the End of cooking time button and customise the melody volume sound length and interval for the end of cooking time Process interruption error found Press the Process interruption error found button and customise the melody volume sound length and interval for process interruption error found Acoustics factory setting Press the Acoustics fac...

Страница 93: ...sert the USB stick into the port beneath the control panel 1b Model 112T 112L Insert the USB stick into the port on the front side of the control console 2 Press the MyVCC button 3 Press the System management button 4 Press the HACCP data download button 5 Click the first date time field and set the start date you require for data using the central dial Press the second date time field and use the...

Страница 94: ... to the USB stick once the download has finished 7 The confirmation tick indicates that a function has been completed successfully Only remove the USB stick once Confirm lights up The following data is logged Batch no Time Cooking program name Pan temperature Core temperature Cover open cover closed Change of cooking mode Energy optimisation system active inactive ...

Страница 95: ...front side of the control console 2 Press the MyVCC button 3 Press the System Management button 4 Press the Download information data button 5 Click the first date time field and set the start date you require for data using the central dial Click the second date time field and set the end date you require for data using the central dial 6 Press the button to start the download A check mark appear...

Страница 96: ...glish RATIONAL The USB icon lights up when a USB stick is detected Data can now be imported downloaded or permanently saved The Confirm check mark signalises that the function has been completed successfully Only remove the USB stick once Confirm lights up ...

Страница 97: ...USB stick into the interface under the control panel 1b Model 112T 112L Insert the USB stick into the port on the front side of the control console 2 Press the MyVCC button 3 Press the System management button 4 Press the Download service data button The service data is saved on the USB stick 5 The confirmation tick indicates that a function has been completed successfully Do not remove the USB st...

Страница 98: ...on instructions 1 Insert the USB stick into the interface under the control panel 1b Model 112T 112L Insert the USB stick into the port on the front side of the control console 2 Press the MyVCC button 3 Press the System management button Download program Press the Download program button The cooking programs are saved on the USB stick ...

Страница 99: ...program Press the Upload program button The cooking programs are saved from the USB stick onto the appliance Delete all programs Press the Delete all programs button twice to delete all the programs processes and groups you have created from the programming mode The Confirm check mark signalises that the function has been completed successfully Only remove the USB stick once Confirm lights up ...

Страница 100: ... instructions 1 Insert the USB stick into the interface under the control panel 1b Model 112T 112L Insert the USB stick into the port on the front side of the control console 2 Press the MyVCC button 3 Press the System management button 3 Press the Download profile button to load profiles from the appliance onto the USB stick 5 The confirmation tick indicates that a function has been completed succ...

Страница 101: ...b Model 112T 112L Insert the USB stick into the port on the front side of the control console 2 Press the MyVCC button 3 Press the System management button 3 Press the Upload profile button to upload the profiles from the USB stick onto the appliance The Confirm check mark signalises that the function has been completed successfully Only remove the USB stick once Confirm lights up ...

Страница 102: ... comfortable solution for editing your images on the www club rational com website You can log in to ClubRATIONAL and use this function free of charge Follow the ClubRATIONAL instructions on the manufacturer s homepage www rational online com Then connect the USB stick with the saved images on your appliance and use the images function to save and delete your images as follows step info button ins...

Страница 103: ... and the user s own food images are saved from the appliance onto the USB stick Upload images Press the Upload images button and save the images from the USB stick as food images in the programming mode Delete all own images Press the Delete all own images button and delete all your food images in the programming mode ...

Страница 104: ...here step info button instructions 1 Press the MyVCC button 2 Press the network settings button Set and modify the IP address Set and modify the IP gateway address Set and modify the IP netmask Activate or deactivate DHCP Activation recommended for ConnectedCooking Display the MAC address of your appliance ...

Страница 105: ...nstructions Server information DNS server information must be entered in conjunction with static IP addresses Ask your network administrator for the information Set and modify the information for a proxy server Ask your network administrator for the information Once the settings have been applied you must restart the appliance ...

Страница 106: ...ing the appliance step info button instructions 1 Press the MyVCC button 2 Press the ConnectedCooking button 3 Activate ConnectedCooking by pressing the ConnectedCooking button 4 After a few seconds the registration code will be shown Scan the QR code with the smart phone on which the ConnectedCooking app is installed or enter the 9 digit PIN in the web portal or the app The appliance has been reg...

Страница 107: ...in Connected Cooking at regular intervals The appliance will automatically inform you if a newer software version is available and will allow the unit to run the software update directly The system time of the appliance is applied automatically The time zone of the unit location must be set correctly in ConnectedCooking Authorised users can operate the unit remotely Authorisations can be updated i...

Страница 108: ... instructions 1 Insert the USB stick into the interface under the control panel 1b Model 112T 112L Insert the USB stick into the port on the front side of the control console 2 Press the MyVCC button 3 Press the System management button 3 Press the Download profile button to load profiles from the appliance onto the USB stick 5 The confirmation tick indicates that a function has been completed succ...

Страница 109: ...1b Model 112T 112L Insert the USB stick into the port on the front side of the control console 2 Press the MyVCC button 3 Press the System management button 3 Press the Upload profile button to upload the profiles from the USB stick onto the appliance 5 The confirmation tick indicates that a function has been completed successfully Only remove the USB stick once Confirm lights up ...

Страница 110: ...SB stick into the port on the front side of the control console 2 Press the MyVCC button 3 On the top left of the display a USB stick with the software on the USB stick will be displayed 4 Press the System management button and scroll down to the Software Update button 5 Press the Software update button to start the software update Follow the instructions that appear on screen and do not disconnec...

Страница 111: ...connected to a network optional Ethernet interface you will automatically be notified that an update is available with a note on the MyVCC button When this note appears follow the above described process from step 2 Model 211 311 If your unit is connected to a network optional Ethernet interface you will automatically be notified that an update is available with a note on the MyVCC button When thi...

Страница 112: ...the automatic dimming setting the screen brightness is automatically reduced when not in use step info button instructions 1 Press the MyVCC button 2 Press the button for the MyEnergy menu item 3 Press the Automatic dim button and adjust the screen dimming time in minutes 1 min 30 min ...

Страница 113: ...a maximum of 15 minutes after a loading request The factory default duration is 10 minutes The cooking process is cancelled automatically after the programmed time has expired if the racks have not been loaded step info button instructions 1 Press the MyVCC button 2 Press the button for the MyEnergy menu item 3 Press the Loading retention time button and set the retention time 2 15 min ...

Страница 114: ...ooking cabinet over a longer period step info button instructions 1 Press the MyVCC button 2 Press the Expert settings button 3 Press the Start time preselection button and set the day and time you want the appliance to start 4 Select a manual cooking mode e g Boil and select your settings 5 The start time is now active The display is dimmed Only the start time and interrupt start time button are ...

Страница 115: ...AL 115 153 The start time is not deleted by switching the appliance ON OFF The appliance help function only is enabled when the start time mode is activated Deactivate start time To deactivate the start time press and hold down the Cancel button for 2 seconds ...

Страница 116: ...nables the cover handle to be lowered for the cover to be subsequently closed manually step info button instructions 1 Press the MyVCC button 2 Press the Expert settings button 3 Press the Activate VarioClose button if the cover is to be lowered after pressing the VarioClose button 4 Press the Back button 5 Press the Function buttons 6 Press the VarioClose button to lower the cover ...

Страница 117: ... You can also limit the access to these profiles so that for example users can only access cooking processes that they have saved themselves Activate change profile step info button instructions 1 Press the MyVCC button 2 Press the button to open the MyDisplay menu item 3 Press the Activate profile button to change to the relevant profile view using the central dial If you have already assigned a pa...

Страница 118: ...tect your profile from unauthorised access using a password The protected profile can only be disabled by entering the password Please ensure that you do not lose the password Without the password MyDisplay cannot be deactivated In this case please contact the Customer Service Upload profile Press the Profile upload button to upload the profiles from the USB stick onto the appliance Insert the USB s...

Страница 119: ... 5 has the highest priority and 1 the lowest priority This means that profiles ranked from 1 to 4 are all subordinate to the profile ranked with 5 As a result you will not be prompted to enter the password despite a password protection if you want to change from a higher ranking profile e g rank 5 to a lower ranked profile e g rank 3 However if you want to change from a lower ranked profile into a...

Страница 120: ...whether the side dishes mode should appear on the start screen for this profile Egg dishes mode Press the button to define whether the egg dishes mode should appear on the start screen for this profile Dairy foods and desserts mode Press the button to define whether the dairy foods and desserts mode should appear on the start screen for this profile Soups and sauces mode Press the button to define...

Страница 121: ... favourites for this profile Press the button to define which favourites should be saved in this profile with MyVCC Assignment of access rights Image list view Select here whether the programs are displayed as images or in a list in programming mode Toggle image list view Here you can select whether you want to toggle between the image or list view for this profile in programming mode List view filt...

Страница 122: ...an select the favourite for the zoom factor of the image view for this profile Filter Set the filter for the programming mode for this profile Sort With this option you select the criteria with which the program list is sorted for this profile Cooking parameter With this option you can select whether you want authorisation to edit the cooking parameters or if they should be read only or if you wan...

Страница 123: ...e information button and the help button are hidden Program group directory structure Press this button to display the directory structure of a program group Header text Save a name to display during an ideal cooking procedure e g lunch Choose whether the function button is to be displayed at the Start level ...

Страница 124: ...play 124 153 V 12 02 2018 PM Stme English RATIONAL Add new profile Press the Add new profile button to create a new profile In addition to the MyDisplayProfile administrator profile you can add a further 10 profiles ...

Страница 125: ... customise the design of your profiles with the help of MyDisplay Open the programming mode from the start screen Press the button to open the programming mode In the programming mode you can access the groups from the filters Programs can be assigned to a group You can then open a group to access all the assigned programs ...

Страница 126: ...3 V 12 02 2018 PM Stme English RATIONAL Press the button to create a new group Enter a name for your group For example Lunch time Confirm by enabling the green check mark Using the filter return from the groups back to the programs ...

Страница 127: ...CC MyDisplay Example V 12 02 2018 PM Stme English RATIONAL 127 153 Use the central dial to scroll down to the program you want to edit Press the button to edit the program You can now customise the program ...

Страница 128: ...MyVCC MyDisplay Example 128 153 V 12 02 2018 PM Stme English RATIONAL Press the button to save an image to the program Add the image you want Press the button to assign the program to a group ...

Страница 129: ...TIONAL 129 153 Select your group For example the Lunch time group Press the Save button twice Repeat this procedure for other programs Once you have created all your programs you can then proceed to editing your profile Press the button to edit your profile ...

Страница 130: ...MyVCC MyDisplay Example 130 153 V 12 02 2018 PM Stme English RATIONAL Here you have an overview of your profiles Press the button to add a new profile The new added profile can now be edited ...

Страница 131: ...espite a password protection if you want to change from a higher ranking profile to a lower ranked profile However if you want to change from a lower ranked profile to a high ranked profile you must always enter the password if the password protection is enabled Tailor your start screen to suit your requirements For example deselect all menu items except the programming mode The green check mark s...

Страница 132: ...Toggle between images lists Disable filter Editing the programs Automatic zoom factor Pre setting of filter on groups Automatic sorting Read only but not write only cooking parameters Read only cockpit dialogue Read only Lunch crew group Then select the expert settings For example that only the information and help buttons are enabled with which you can access the online manual ...

Страница 133: ...ay Example V 12 02 2018 PM Stme English RATIONAL 133 153 Press the button to open the start screen You can toggle between profiles by clicking the upper bar Now change to the new Lunch crew profile you have created ...

Страница 134: ...ear on the screen This was defined in the previous steps The user can select between the applications displayed Press the button when you want to change the profile again You can return to the MyDisplayProfile again Enter the password to return to the start screen This is the end of the example ...

Страница 135: ...CC button 2 Press the button for the Service menu item Information on appliance type software Press the Information on appliance model software button for information about the appliance model and the software version ChefLine Press the Hotline button Displays the telephone numbers of the technical customer service department and the culinary hotline Service hotline Press the Service hotline butto...

Страница 136: ...ponents cannot be moved Status colour orange DUMMY Simulates normal operation of the unit processes run without heating the unit the unit components cannot be moved Status colour blue REDUCED Simulates normal operation of the unit processes run without heating the unit but the unit components can be moved Status colour red The unit must be switched off and on again after a change in status before ...

Страница 137: ...rs due to lack of air exposure If necessary use a fat dissolving cleaning agent or diluted vinegar do not use acids Do not use sharp or pointed tools to clean the pan Only use abrasive cleaning aids on the inside of the pan All other surfaces are sensitive to scratches Do not use steel wool to clean risk of corrosion Do not use high pressure cleaners for cleaning Do not use hydrochloric acid sulph...

Страница 138: ... oil or grease the service life may be greatly reduced If the seal is damaged it should be replaced immediately part no 20 00 992 Core temperature probe Clean the core temperature probe after every use with a soft sponge do not use steel wool If necessary use a fat dissolving cleaning agent do not use acids Cover seal Clean the cover seal regularly Check in particular the bottom sealing area chann...

Страница 139: ...sive cleaning agents Steam nozzles 112 model The steam nozzles protective attachment over the opening to divert the steam to the inside of the cover can be removed without using tools You can then clean the opening beneath using the hand shower Clean the steam nozzles using the hand shower or in the dishwasher Remember to reattach the steam nozzles after cleaning so that you do not lose them You c...

Страница 140: ...ssed by pressing the Back button Service report Error Effects and action Service 100 Core temperature probe error Cooking without a core temperature probe is possible Pressure cooking optional not 112T 112L not possible Model 112 112T 112L No restrictions in the right hand pan Call customer service Service 101 Core temperature probe error R Cooking without a core temperature probe is possible Pres...

Страница 141: ...ns in the left hand pan Call customer service Service 121 128 Error in temperature measuring system B4 B11 Call customer service Service 200 Flow sensor Please check the water inlet Cooking without automatic water inlet possible Service 201 Hot water flow sensor Please check the hot water inlet Cooking without automatic hot water inlet possible Service 220 222 Error in the locking system Model 112...

Страница 142: ... service Service 231 Error in the pan valve drive R Automatic pan valve defect No restrictions in the left hand pan Call customer service Service 240 242 Error in AutoLift system Open left hand cover and select AutoLift again Do not close the cover manually during AutoLift operation Service 241 243 Error in AutoLift system R Open right hand cover and select AutoLift again Do not close the cover ma...

Страница 143: ...2T 112L not possible No restrictions in the left hand pan Call customer service Service 262 Error in the pressure system Error in pressure cooking Please check Bound food product Too little water Overfilling Steam nozzle contaminated Otherwise Call customer service Service 263 Error in the pressure system R Error in pressure cooking Please check Bound food product Too little water Overfilling Stea...

Страница 144: ...filter at the water intake and clean Insert the filter once more Connect the water supply line and check for leaks Water leaking out of the bottom of the unit The unit is not level Align the unit with a spirit level see installation instructions Drain is blocked blockages can occur if a lot of products containing a high proportion of fat are cooked or if the drain pipe was fitted with an insuffici...

Страница 145: ...g on External main switch was switched off Switch on at the main switch Fuse has blown on the main distribution board Check the fuses on the main distribution board The ambient temperature remained below 5 C 41 F for too long after the unit was switched off Heat the unit to a temperature above 5 C The room temperature must be greater than 5 C when operating the unit ...

Страница 146: ...ver edge Pull the old seal out of the sealing groove no tools are required for this Clean the sealing groove Moisten the seal base with soapy water Insert the new seal into the sealing groove starting at each corner of the cover The seal base must be inserted fully into the seating frame The annular pan valve seal is attached to the valve cover Open the pan valve and unscrew the valve cover Clean ...

Страница 147: ...973 Model 112L Part no 60 73 795 Model 211 Part no 24 01 008 Model 311 Part no 24 00 948 Deep frying basket 112 112T For deep frying in baskets with AutoLift Model 112 112T Part no 24 00 972 Deep frying basket 112L For deep frying in baskets with AutoLift Model 112L Part no 60 73 684 Deep frying basket 211 311 For deep frying in baskets with AutoLift Model 211 311 Part no 60 70 716 ...

Страница 148: ...ing in baskets with AutoLift Model 211 311 Part no 60 70 733 Boiling basket 112 112T For boiling in baskets with AutoLift Model 112 112T Part no 60 70 752 Boiling basket 112L For boiling in baskets with AutoLift Model 112L Part no 60 73 680 Boiling basket 211 311 For boiling in baskets with AutoLift Model 211 311 Part no 60 70 725 ...

Страница 149: ...2 x Part no 60 72 066 Bain marie for VitroCeran optional not 112T 112L Attachment with 4 portion containers with handle and cover as well as one 2 3 GN container Part no 60 71 918 Sieve Holds back loose boiled products when you drain off the water Model 112 112T Part no 60 71 327 Model 112L Part no 60 73 706 Model 211 Part no 60 71 761 Model 311 Part no 60 72 034 Pan base grid To avoid contact bet...

Страница 150: ...Part no 60 71 643 Stirring spatula 211 311 For mixing and stirring food in the VarioCookingCenter Model 211 311 Part no 60 72 131 Scoop perforated scoop To simplify emptying of the pan for large quantities of food Scoop Part no 60 73 348 Perforated scoop Part no 60 73 586 ...

Страница 151: ... 307 VarioMobil For the effortless and safe removal of food and for transporting in GN containers GN containers are not supplied as standard Model 112 112T 112L Part no 60 70 771 Model 211 311 Part no 60 70 107 Basket cart 211 311 For storing transporting and drip drying cooking baskets Model 211 311 Part no 60 70 108 UltraVent condensation hood Model 112 Part no 60 70 804 Model 211 Part no 60 70 ...

Страница 152: ...r the GPL v2 and or LGPL v2 1 For the software categorized as 3 4 and 5 please refer to the terms and conditions of GPL v2 and LGPL v2 1 as the case may be at http www gnu org licenses old licenses gpl 2 0 html and http www gnu org licenses old licenses lgpl 2 1 html At least three 3 years from delivery of products Topinox SARL will give to any third party who contact us at the contact information...

Страница 153: ...80 05 xxx_RATIONAL V 12 PM Stme 02 18 ...

Отзывы: