


2
https://www.rasor-cutters.com
Meaning of warning and
danger symbols
Safety instructions, which must be followed to prevent physical
harm, are identified by the following symbols:
a
CAUTION HAZARD
Indicates operations that can cause generic injuries or
trigger malfunctions or damage to the equipment and/or
materials if not carried out correctly; particular attention
and adequate preparation are therefore required.
f
CAUTION ELECTRICAL HAZARD
Indicates operations that can cause electrical injuries or
trigger malfunctions or damage to the equipment and/or
materials if not carried out correctly; particular attention
and adequate preparation are therefore required.
d
DO NOT
Indicates PROHIBITED operations.
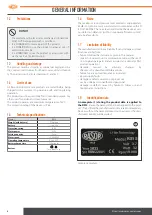
EC - DECLARATION OF
CONFORMITY
PRODUCT MANUFACTURED BY:
RASOR ELETTROMECCANICA S.r.l.
Via Giannetto Mattei, 41/43 - 20044 Arese- (MI) - ITALY
Model:
RS1S
Rasor Elettromeccanica s.r.l.
declares, under its own respon-
sibility, that the aforementioned products, to which this decla-
ration refers, comply with the Directives on the approximation
of the laws of EEC member states relating to:
–
Machinery 2006/42/EC;
–
Electromagnetic Compatibility 2014/30/EU
–
RoHS Directive 2011/65/EU
Milan, 01/06/2022.
Index
SYMBOLS
Mr Lorenzo Spinelli
CEO
1
GENERALITÀ 3
1.1
Informazioni importanti per la sicurezza
3
1.1.1
Avvertenze generali
3
1.2 Divieti
4
1.3
Movimentazione e stoccaggio
4
1.4
Limiti di impiego
4
1.5
Caratteristiche tecniche
4
1.6 Rumorosità
4
1.7
Limitazione di responsabilità
4
1.8
Dati di identificazione
4
1.9
Contenuto della confezione
5
1.9.1
Informazioni sulle batterie
5
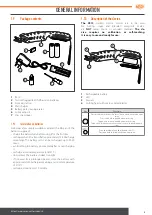
1.10 Descrizione dell’apparecchio
5
2 UTILIZZO 6
2.1
Modalità manuale
6
2.2
Modalità automatica
6
2.3
Caricamento delle batterie
6
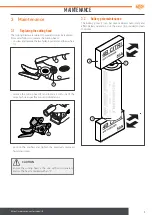
3 Manutenzione 7
3.1
Sostituzione della testina di taglio
7
3.2
Manutenzione poli batteria
7
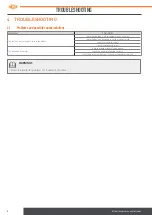
4 TABELLA ANOMALIE 8
4.1
Eventuali anomalie e possibili cause/soluzioni
8
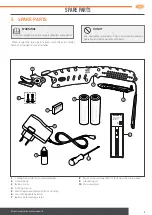
5 RICAMBI 9
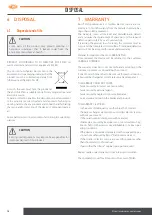
6 SMALTIMENTO 10
6.1
Smaltimento a fine vita del prodotto
10
7 GARANZIA 10
Содержание RS1S
Страница 11: ...11 https www rasor cutters com it DISPOSAL...


