


PX3TS Transfer Switch Quick Setup Guide
6
QSG-PX3TS-0A-v2.6-E
255-80-0032-00 RoHS
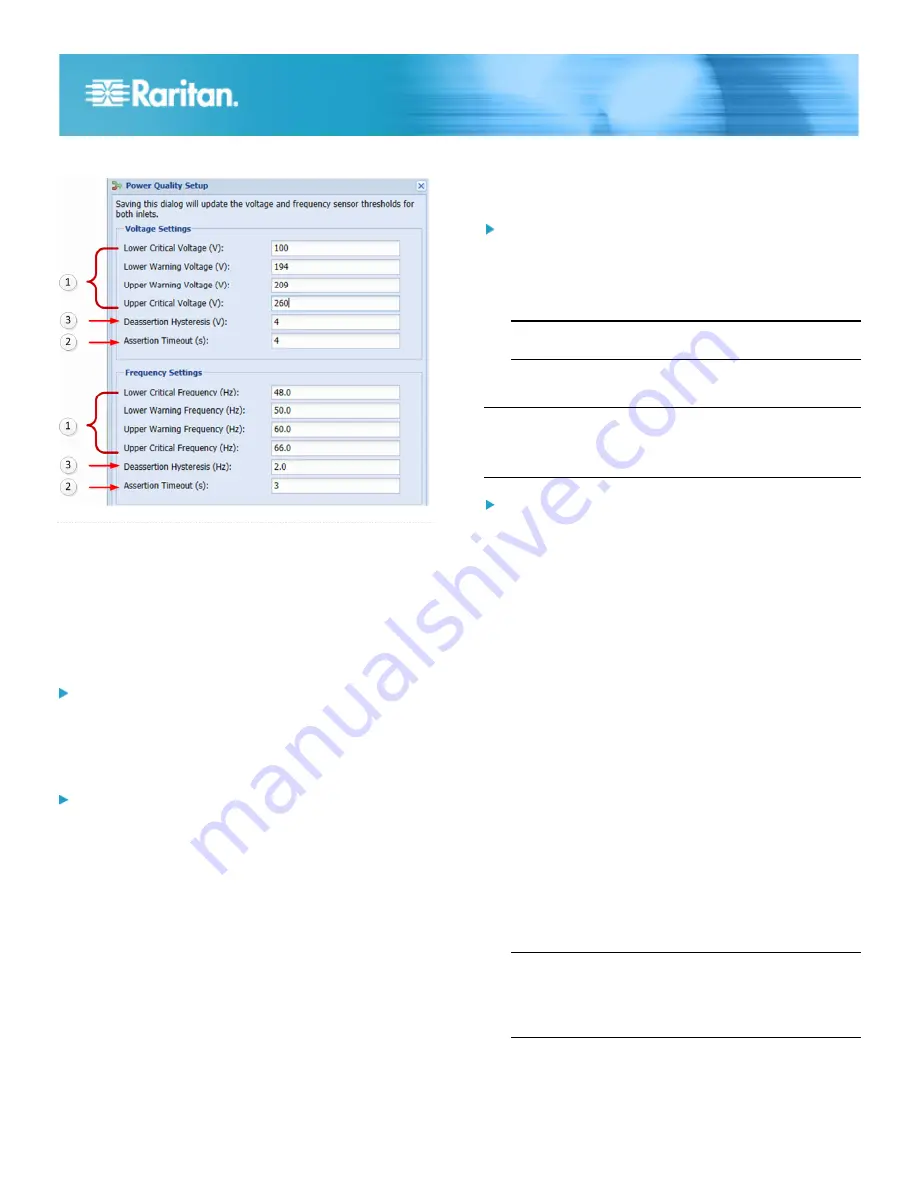
3. Enter deassertion hysteresis values.
QS Rule
Addendum
Network Configuration via an RS-232 or USB Port
Step 1: Connect the PX3TS to a Computer
Connect the PX3TS to a computer via an RS-232 or USB
cable.
RS-232 connection:
1. Connect one end of the null-modem cable to the RS-232
port labeled CONSOLE/MODEM on the PX3TS.
2. Connect the other end to your computer's RS-232 port
(COM).
USB connection:
1. A USB-to-serial driver is required in Windows
®
. Install this
driver before connecting the USB cable. See
Installing the
USB-to-Serial Driver (Optional)
(on page 6).
2. Connect one end of a USB cable to the USB-B port on the
PX3TS.
3. Connect the other end to your computer's USB-A port.
Installing the USB-to-Serial Driver (Optional)
The PX3TS can emulate a USB-to-serial converter over a USB
connection. A USB-to-serial driver named "Dominion PX2
Serial Console" is required for Microsoft
®
Windows
®
operating
systems. Download the
USB Serial Setup 2.0
driver file, which
contains
dominion-serial.inf
,
dominion-serial.cat
and
dominion-serial-setup.exe
files, from the PX2 section on the
Raritan website
(
http://www.raritan.com
).
There are two ways to install this driver: automatic and manual
installation. Automatic driver installation is highly
recommended.
Automatic driver installation in Windows
®
:
1. Make sure the PX3TS is NOT connected to the computer
via a USB cable.
2. Run dominion-serial-setup-2.0.exe and follow online
instructions to install the driver.
Note: If any Windows security warning appears, accept it
to continue the installation.
3. Connect the PX3TS to the computer via a USB cable. The
driver is automatically installed.
Note: Manually install the driver only if the automatic
installation fails. See the section titled "Installing the
USB-to-Serial Driver (Optional)" in the online User Guide for
manual installation procedure.
In Linux:
No additional drivers are required, but you must provide the
name of the tty device, which can be found in the output of the
"dmesg" after connecting the PX3TS to the computer. Usually
the tty device is "/dev/ttyACM#" or "/dev/ttyUSB#," where # is
an integer number.
For example, if you are using the kermit terminal program, and
the tty device is "/dev/ttyACM0," perform the following
commands:
> set line /dev/ttyACM0
> connect
STEP 2: Configure the PX3TS
1. On the computer connected to the PX3TS, open a
communications program such as HyperTerminal or
PuTTY.
2. Select the appropriate COM port, and set the following port
settings:
Bits per second = 115200 (115.2Kbps)
Data bits = 8
Stop bits = 1
Parity = None
Flow control = None
Tip: For a USB connection, you can determine the COM
port by choosing Control Panel > System > Hardware >
Device Manager, and locating the "XXX Serial Console"
under the Ports group, where XXX represents this
product's name.
3. In the communications program, press Enter to send a
carriage return to the PX3TS.