Range Road rr series Скачать руководство пользователя страница 23


23 


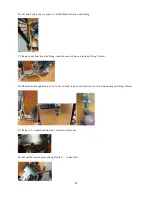
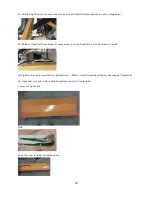
85) Grease conveyor bearings, 2 at top of conveyor, 1 at bottom 


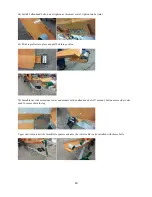
86) Make sure that manual ram engagement bar is in up position, Start engine and let idle until engine and hydraulic 
oil are at operating temperature 

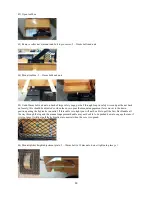
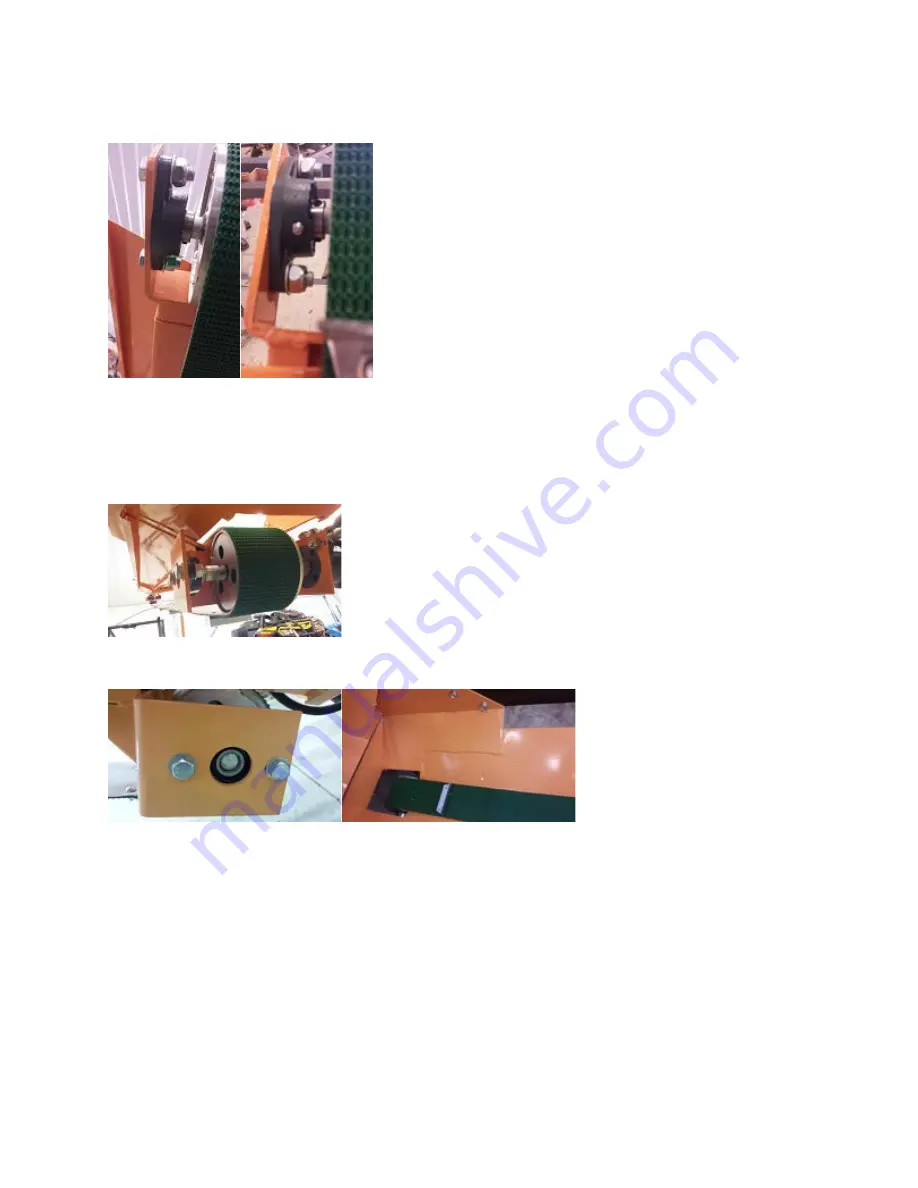
87) While engine is warming up, adjust conveyor belt to run in center of upper and lower pulleys, upper puller has 
bolts on either side for adjustment 


Lower puller only has adjustment bolts on side opposite of drive motor 


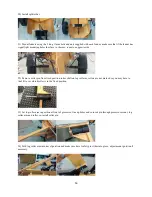
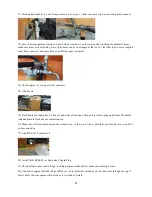
88) When unit is up to operating temperature operate saw and ram multiple times to make sure they are adjusted and 
working properly 

89) Shut unit off 

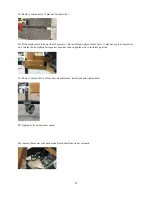
90) Check all nuts, bolts, hose and fittings one more time, check for leaks 
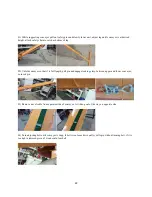
91) 

Tighten and Loctite the 4 Engine to Frame mount Bolts 


Содержание rr series

Страница 1: ...1 Range Road RR Series Semi Automatic Firewood Processor Crated Unit Assembly Manual...

Страница 2: ...2 1 Undo 8 18mm x 19mm Nuts and bolts 2 on each leg of top frame 2 Lift top of Metal crate off and move out of work area 3 Remove Shrinkwrap...

Страница 3: ...aring washer nut cotter key and cap place on workbench set unwrapped wheels out of the way 5 Unwrap the following place on workbench a sawdust chute b sawbar engagement arm c toolbox d fenders 2 e bar...

Страница 4: ...ck 6 Cut tiewrap holding safety covers together 7 Unwrap the following place on workbench a small safety cover b large safety cover c splitter bar height adjusters and lever 3 pieces d chain engagemen...

Страница 5: ...b axle c tripod leg d towbar 10 Lift processor off crate with forklift or crane make sure that straps will not catch anything on unit when tightened and that unit will be balanced Lift high enough to...

Страница 6: ...xle through tube make sure the bolt holes face upwards the inner bolt hole on the battery side should be approx 3 from tube tighten bolt to 75 ft lb tighten lock nut repeat on opposite side 15 Grease...

Страница 7: ...nug and wheel is hard to turn then back the nut off turn until cotter pin hole lines up 18 Insert cotter pin and bend 19 Install hub cap use a rubber mallet to press into place 20 Grease wheel hub gen...

Страница 8: ...ends of spring outwards if you want more tension on sawbar this makes the sawbar harder to pull but returns it to the up position quicker Hook sawbar return spring into slot 24 Connect hydraulic hose...

Страница 9: ...ve trough keep plastic tube as well 26 Remove and keep cotter pin from large safety cage round bar 27 Put large safety cage cover into place slide through hole in processor drop the other end into the...

Страница 10: ...g and nut snug up nut do not tighten 30 Remove 3 13mm Bolts and nuts for chain safety cover make sure rear mount is slotted for cover to move upwards for clearance as chain stretches 31 Remove 2 10mm...

Страница 11: ...n 13mm nut 34 Set chain safety cover on processor tail of cover sits inside sawdust collector 35 Tighten 13mm bolts pull cover towards safety cage as you tighten so that the next cover will have clear...

Страница 12: ...from bar lube fitting insert hose over barb and snug up fitting 14mm 38 Route hose through hole in cover to bar oil tank remove nut insert hose over barb and snug up fitting 14mm 39 Remove 3 16mm bol...

Страница 13: ...n and also the speed that it spins When the 2 bolts are loosened the paddle moves freely up down and side to side Fig 1 shows the paddle adjusted to engage the plunger as soon the handle is moved down...

Страница 14: ...o when the cover opens the manual engagement lever moves to the down position putting the hydraulic in neutral If this cable is to tight you will not be able to pull the Saw Bar Handle all the way thr...

Страница 15: ...hread handle through adjustment plate and slide the bottom shaft into tube at base of unit force through and put safety put through hole 49 Pull lever to highest position make sure that the pin the sp...

Страница 16: ...from fixed position roller shaft on log roll arm rollers are not marked so you may have to trial fit to see which roller is in the fixed position 53 Set log roller arm in position at front of processo...

Страница 17: ...ten 16mm bolt x 17mm nut loosen 18mm nuts on 2 retainer bolts tighten bolts against drawbar then re tighten nuts to lock into position 57 Remove 16mm bolts x 17mm nuts from drawbar install jack and ti...

Страница 18: ...mm bolt from hydraulic pump mount put ring from black wire on bolt and re install 63 Tighten wires onto correct battery terminal red Black install terminals on battery and snug up 10mm bolts 64 Open c...

Страница 19: ...of holders and re intall in top tube only place lower conveyor in place and install 2 mount bolts do not over tighten conveyor must be able to swing up and down freely 66 Unscrew top roller tensioner...

Страница 20: ...e top roller into place and pull belt into position 70 Install lower side extensions lower end mounts with an allan head bolt x17mm nut bolt on motor side is also used to secure chain for leg Upper en...

Страница 21: ...ar oil 75 Flush hydraulic tank pour 2 3 litres of hydraulic oil into tank then unscrew drain plug on bottom of hydraulic tank and drain to flush out any contamination 76 Make sure all return hoses are...

Страница 22: ...nveyor so that it is full length pull pin and engage locking clasp between upper and lower conveyor re insert pin 83 Remove travel cable from operator side of conveyor let it hang out of the way on op...

Страница 23: ...yor belt to run in center of upper and lower pulleys upper puller has bolts on either side for adjustment Lower puller only has adjustment bolts on side opposite of drive motor 88 When unit is up to o...

Страница 24: ...out 10 long bend so at 90 so that it is 8 on one piece and 2 on the other paint semi gloss black 94 Place this bar on ram cover so that it is 90 to the existing bar position it so that when bolts are...

Страница 25: ...25 95 Mark position for bolts 96 Drill holes making sure drill bit does not hit ram or hoses 97 put bolts in and tighten...

Страница 26: ...26 98 Run processor to make sure bolts do not hit and that everything runs smooth...

Отзывы: