background image

MP 4 - OPERATOR’S MANUAL 

1.8.2

3

Important Safety InStructIonS

1. Read these instructions.

2. Keep these instructions.

3. Heed all warnings.

4. Follow all instructions.

5. Do not use this apparatus near water.

6. Clean only with a dry cloth.

7. Do not block any ventilation openings. Install in accordance 
with manufacturer’s instructions.

8.  Do  not  install  near  any  heat  sources  such  as  radiators, 
registers,  stoves,  or  other  apparatus  (including  amplifiers)  that 
produce heat.

9. Do not defeat the safety purpose of the polarized or grounding 
type plug. A polarized plug has two blades with one wider than 
the  other.  A  grounding-type  plug  has  two  blades  and  a  third 
grounding prong. The wide blade or third prong is provided for 
your  safety.  If  the  provided  plug  does  not  fit  into  your  outlet, 
consult an electrician for replacement of the obsolete outlet.

10.  Protect  the  power  cord  and  plug  from  being  walked  on  or 
pinched particularly at plugs, convenience receptacles, and the 
point where it exits from the apparatus.

11. Only use attachments & accessories specified by Rane.

12.  Use  only  with  the  cart,  stand,  tripod,  bracket,  or  table 
specified by the manufacturer, or sold with the apparatus. When 
a  cart  is  used,  use  caution  when  moving  the  cart/apparatus 
combination to avoid injury from tip-over.

13.  Unplug  this  apparatus  during  lightning  storms  or  when 
unused for long periods of time.

14.  Refer  all  servicing  to  qualified  service  personnel.  Servicing 
is required when the apparatus has been damaged in any way, 
such as power supply cord or plug is damaged, liquid has been 
spilled or objects have fallen into the apparatus, the apparatus 
has been exposed to rain or moisture, does not operate normally, 
or has been dropped.

15.  The  plug  on  the  power  cord  is  the  AC  mains  disconnect 
device and must remain readily operable.

16. This apparatus shall be connected to a mains socket outlet 
with a protective earthing connection.

17.  When  permanently  connected,  an  all-pole  mains  switch 
with a contact separation of at least 3 mm in each pole shall be 
incorporated in the electrical installation of the building.

18.  If  rack-mounting,  provide  adequate  ventilation.  Equipment 
may  be  located  above  or  below  this  apparatus,  but  some 
equipment  (like  large  power  amplifiers)  may  cause  an 
unacceptable  amount  of  hum  or  may  generate  too  much  heat 
and degrade the performance of this apparatus.

19.  This  apparatus  may  be  installed  in  an  industry  standard 
equipment  rack.  Use  screws  through  all  mounting  holes  to 
provide the best support.

WarnInG:  To  reduce  the  risk  of  fire  or  electric  shock,  do  not 
expose  this  apparatus  to  rain  or  moisture.  Apparatus  shall  not 
be exposed to dripping or splashing and no objects filled with 
liquids, such as vases, shall be placed on the apparatus.

IntroductIon

Beyond the Quick Start guide, please read through this manual 
to get the most from your MP 4 and the included Scratch LIVE 
software. Keep this manual in a safe place. If you lose yours, a 
new copy may be downloaded at www.rane.com/mp4.html. 

To keep up with the latest tips, and to check for software updates 
for your MP 4, visit the official Scratch LIVE Forum at scratchlive.
net.

copyrIGht notIceS

© 2008 Rane Corporation. All rights reserved. Scratch LIVE and 
the Scratch LIVE logo are trademarks of Serato Audio Research.  
Trademarked  in  the  U.S.  and  other  countries.  Licensed 
exclusively to Rane Corporation. This software is based in part 
on the work of the Independent JPEG Group, and uses libpng 
code,  copyright  ©  2000-2002  Glenn  Randers-Pehrson.  The 
Scratch LIVE Control Tone, the audio pressed on Scratch LIVE 
Control Vinyl and Control CDs, is copyright ©2004-2008 Serato 
Audio Research. The Control Vinyl and Control CDs are licensed 
for personal use only.  The creation of personal backups of the 
Control  CD  is  allowed,  however  duplicating  Control  CDs  for 
commercial benefit is strictly prohibited.  For avoidance of doubt 
the duplication or creation of Control Vinyl for any use is strictly 
prohibited.  Please respect our copyright.  ©2004-2008 Serato 
Audio  Research.  Windows  XP  and  Vista  is  either  a  registered 
trademark or a trademark of Microsoft Corporation in the United 
States and/or other countries. Apple, Mac, Macintosh and iTunes 
are  trademarks  of  Apple  Computer,  Inc.,  registered  in  the  US 
and/or other countries.

WarnInG

To reduce the risk of electrical shock, do not open the unit. No 
user serviceable parts inside. Refer servicing to qualified service 
personnel.

The symbols shown below are internationally accepted symbols 
that warn of potential hazards with electrical products.

this  symbol  indicates  that  a  dangerous 
voltage  constituting  a  risk  of  electric 
shock  is  present  within  this  unit. 

this  symbol  indicates  that  there  are 
important  operating  and  maintenance 
instructions 

in 

the 

literature  

accompanying this unit.

mInImum SyStem requIrementS

•  Computer  with  USB  1  port  supporting  Full  Speed 
Mode (USB 1.1).
• Screen resolution 1024 x 768 or higher.
• Hard drive space for storing music.

pc


• Windows XP with Service Pack 2 or 
  Vista with Service Pack 1
• Pentium 4 / 1.5 GHz
• 1 GB RAM.

mac


• OSX 10.3
• G4 / 1 GHz
• 1 GB RAM.

Scratch  LIVE  is  compatible  with  Intel-based  Mac 
computers.

check LISt

These items are included with the MP4 in the box:

• Scratch LIVE software install disc.
• 1 USB cable.
• IEC C5 line cord.
• Package of 4 rubber feet.
• Quick Start Guide.
• This manual.

RISK OF ELECTRIC SHOCK

DO NOT OPEN

CAUTION

Содержание MP 4

Страница 1: ...TTM 57SL OPERATOR S MANUAL 1 8 1 1 MP 4 OPERATOR S MANUAL 1 8 2...

Страница 2: ...MP 4 OPERATOR S MANUAL 1 8 2 2...

Страница 3: ...aratus to rain or moisture Apparatus shall not be exposed to dripping or splashing and no objects filled with liquids such as vases shall be placed on the apparatus Introduction Beyond the Quick Start...

Страница 4: ...ARING YOUR FILES 12 BuIlding Overviews 12 How to Build Overviews 12 About Corrupt Files 12 Set Auto BPM 12 The Offline Player 12 main screen overview 12 Virtual Deck 12 Visual Aids 13 Tempo Matching D...

Страница 5: ...Shift 23 Lock Playing Deck 23 Sort Cues Chronologically 23 Auto Gain 23 Modifying the Auto Gain Level 23 Hi Fi Resampler 23 Play From Start 23 Instant Doubles 23 Play From First Cue Point 23 Audio Out...

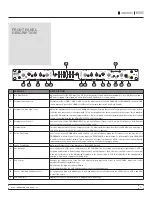
Страница 6: ...h a 48 kHz sample rate Inputs PROGRAM A and B INPUT switches select between the two LINE and two USB Inputs LINE 1 and LINE 2 are set for PHONO level or LINE level using the associated push switch on...

Страница 7: ...nd on the Crossfader setting see 6 5 Program Meter This four segment meter shows signal presence at 24 dBu optimum signal level at around 0 dBu and a warning to turn down the associated LEVEL control...

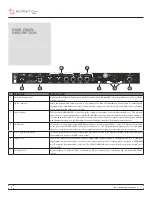
Страница 8: ...not affected by the front panel HOUSE LEVEL control These balanced TRS tip ring sleeve Outputs connect to a balanced equalizer or amplifier for a possible second listening zone and follow the same int...

Страница 9: ...bbles appear MP 4 USB Composite Device MP 4 USB1 Out USB Audio Device MP 4 USB2 Out USB Audio Device MP 4 Line In USB Audio Device MP 4 USB Human Interface Device Your new hardware is installed and re...

Страница 10: ...the MP 4 The ASIO Bit Depth and Ask host to process during callback settings should not be adjusted unless you are having problems Uncheck Ask host to process during callback if you have audio dropou...

Страница 11: ...can also import by dragging files and folders directly from Windows Explorer PC version or Finder Mac version into the Scratch LIVE library SuppOrted File Types Scratch LIVE supports fixed and variabl...

Страница 12: ...cular progress bar around the edge is a visual representation of the position within the song and can be set to flash to warn you that the track is nearing its end The time and remaining time are disp...

Страница 13: ...ck including color coding to show the frequency of the sound red representing low frequency bass sounds green representing mid frequency sounds and blue representing high frequency treble sounds You c...

Страница 14: ...half time start of each bar etc The range is set by the first two taps after that you can switch to any steady rhythm you feel comfortable with quarter notes half note whole notes Esc resets the BPM E...

Страница 15: ...mporary cue point that can be used like the Cue button on many DJ CD players Press ctrl I to set this temporary cue point on the left deck and ctrl K to set it on the right deck This temp cue point is...

Страница 16: ...Each cue point can have a different color To change the color of a cue point click on the colored square and choose a new color from the drop down menu To remove a cue point use the x button on the ri...

Страница 17: ...ou unlock it by clicking on the number again Auto Looping Auto looping allows you to create loops instantly If the track has a BPM value simply click the number of bars you wish to loop and Scratch LI...

Страница 18: ...nger respond directly to the mouse If you need to change a control using the mouse disable MIDI assign mode While in MIDI assign mode controls which have MIDI inputs assigned show a green box indicato...

Страница 19: ...area can be customized to display the columns listed below Added Album Artist Bitrate BPM Comment Composer Filename Genre Grouping Label Length Location Remixer Sampling Size Track Video Track Year T...

Страница 20: ...h LIVE has detected some corruption in the MP3 file Solution If possible re encode the MP3 The track cannot be found Most likely the file has been renamed or moved Scratch LIVE is trying to import a t...

Страница 21: ...out saving simply click the record button again Recordings can be loaded onto the decks renamed and managed like other files Recordings are saved in MyDocuments My Music ScratchLIVE Recording on a PC...

Страница 22: ...move track from library remove track from crate delete crate does not delete the file Remove track from crate and from library Delete the file from your library and send to the recycle bin Note to iTu...

Страница 23: ...dicated by the LED meter red lining If the track is too quiet unload the track then go to the setup screen and boost that auto gain db value more Once you ve made that adjustment load that same track...

Страница 24: ...file tags Use this function if you have edited or modified file tags outside of Scratch LIVE TIP Rescanning the tags is a handy way to identify all the files that Scratch LIVE can t find for example i...

Страница 25: ...Music ScratchLIVE on a PC Crates have the file extension crate and are located in your subcrates folder If your library contains tracks that are stored on a drive other than your boot drive a folder c...

Страница 26: ...s an audio file Unsupported file This MP3 contains multiple layers While scanning this file Scratch LIVE found frames belonging to multiple MPEG layers Scratch LIVE does not support MP3s that contain...

Страница 27: ...064 Phone 858 486 8388 Fax 858 486 8398 Web www caig com Cleaning Instructions A Fader assembly replacement part 11646 1 Unplug the MP 4 2 Remove the bottom cover 3 Remove the fader screws from the fr...

Отзывы: