


WWW.RAISE3D.COM
AMERICA · ASIA · EUROPE
Pro2 Hotend Installation Instruction
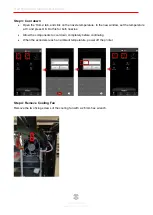
Step 6: Inspect Replacement HotEnd
•
To completely replace the hotend, verify that the new hotend is properly adjusted.
•
The bottom of the heat sink should lie flush with the bottom of the larger cylinder.
•
If the heat sink is improperly positioned refer to the Nozzle Replacement document for
additional instructions.
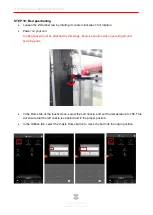
Step 7: Wiring
•
Insert the heater rod (Red Wire) into the bottom hole of the heater block. Insert it completely
so that it reaches the other end of the hotend, and secure into place with the two set screws.
•
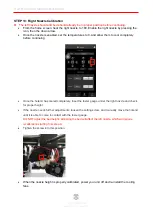
Insert the silver thermocouple into the upper hole on the heater block.
•
Secure it in place with the two set screws.


