52
Cleaning
It is advisable to clean the stove of dust and foreign bodies each new heating season
and especially if the stove has not been used for a long time. This can be done with a
soft brush and a vacuum cleaner. Or with a damp cloth with a non-abrasive cleaning
agent. Do not use corrosive or abrasive substances to clean this stove. The stove should
be cold when cleaning and taking care of it.
If the glass is sooty:
• Only clean the glass when the stove is cold.
• Cleaning should be done with glass cleaner, which can be purchased from your
RAIS dealer.
External cleaning is done using a soft dry cloth or brush only.
Before each new heating season, the chimney and flue gas connection piece should
always be checked for blockages. Check the stove externally and internally for damage.
Check gaskets in particular. Only original spare parts may be used.
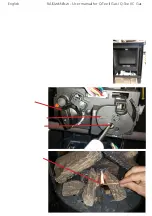
Cleaning of ceramic logs.
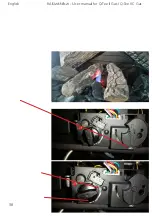
Remove the ceramic logs as described in points 1 - 4 under
Service.
Clean the ceramic parts carefully with a soft brush and a vacuum cleaner.
Only replace damaged parts with original Rais specified parts.
Pack scrap ceramics in plastic bags and deliver to the correct waste locations.
It is recommended using a vacuum cleaner with a HEPA filter system.
Replace embers and close the door. Ensure the stove works correctly and is safe to use.
Servicing of the Burners.
(See section Conversion to bottled gas if necessary)
Remove the ceramic logs as described in points 1 - 4 under
Service.
The pilot plate guard is removed by loosening the two M5 screws with a 4 mm hex key.
By removing the two screws on the pilot unit with a 7 mm open-ended spanner, the pi-
lot unit can be raised a little. Fittings on the underside of the pilot unit can be loosened
by means of a 10 mm open-ended spanner. The thermosensor and pilot burner can be
replaced.
To gain access to the nozzles on the main burner, the main burner unit must be re-
moved from the stove. This is done by removing the 4 bolts holding the burner in place.
Now the burner can be lifted out of the combustion chamber. Now there is free access
to the nozzles.
When parts are replaced, only replace these with original Rais specified parts.
English
RAIS/
attika
- User manual for Q-Tee II Gas / Q-Tee II C Gas
Содержание Q-Tee II GAS
Страница 2: ......
Страница 35: ...35 Log 3 Log 4 Log 5 English RAIS attika User manual for Q Tee II Gas Q Tee II C Gas ...
Страница 36: ...36 Sample photos Log 6 Log A Log B English RAIS attika User manual for Q Tee II Gas Q Tee II C Gas ...
Страница 49: ...49 English RAIS attika User manual for Q Tee II Gas Q Tee II C Gas ...
Страница 50: ...50 English RAIS attika User manual for Q Tee II Gas Q Tee II C Gas ...
Страница 76: ...76 Français ...
Страница 77: ...A A A 598 590 I E 250 D 50 149 M 76 460 410 582 291 291 149 Q Tee II Gas ...
Страница 82: ...82 ...
Страница 83: ...83 A A A E 250 D 50 330 179 660 479 598 590 76 460 179 M 330 Q Tee II C Gas ...
Страница 91: ......

