


00.09-013 Rev. E – Radlink GPS Tablet User Manual (07/31/2017)
Page 8 of 16
2.
Once the GPS Tablet is on and Windows has booted, prior to opening the Radlink Pro
Imaging Software, click on the “Internet Access” icon in the bottom right corner of the
desktop
3.
Scroll through the list of available wireless networks and select the network titled
“RadlinkDRXXXX”, where the XXXX represents the last 4 digits of the Flat Panel Detector’s
serial number.
4.
The password for the network will be “PerkinElmer”
5.
Confirm the network shows “No Internet, Secured” under the wireless network name and is
at the top of the list of networks available
6.
Open the Radlink Pro Imaging software and ensure the system-mode is properly set by
clicking “Manage” in the upper right, and then selecting “Perkin Elmer” for the System
Mode inside the software. Click “Save Settings” in the bottom right corner.
U
SING THE
R
ADLINK
GPS
T
ABLET IN AN
A
NTERIOR
A
PPROACH
THA
P
ROCEDURE
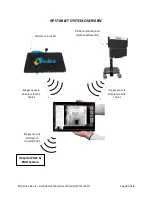
1.
Make sure that your Radlink Wireless C-Arm Kit is on and connected to the wireless internet
network “RadlinkWCAXXXX” where XXXX is the last 4 digits of the Wireless C-Arm Kit serial
number
2.
If images need to be pulled from PACS and WiFi access is not available, use the USB
Ethernet LAN adapter with an Ethernet cable to plug into an Ethernet port.
3.
Double-click the Radlink Pre-op icon on to access the PACS. Select the pre-operative image
to be used as a reference during the case (if one is available)
4.
Double-click the Radlink Pro Imaging to open the acquisition software
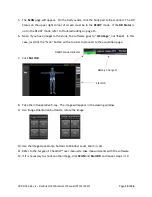
5.
Click on the row with the patient ID for the study if the order is displayed in the modality
worklist. Otherwise, click New Patient and enter the study information.
6.
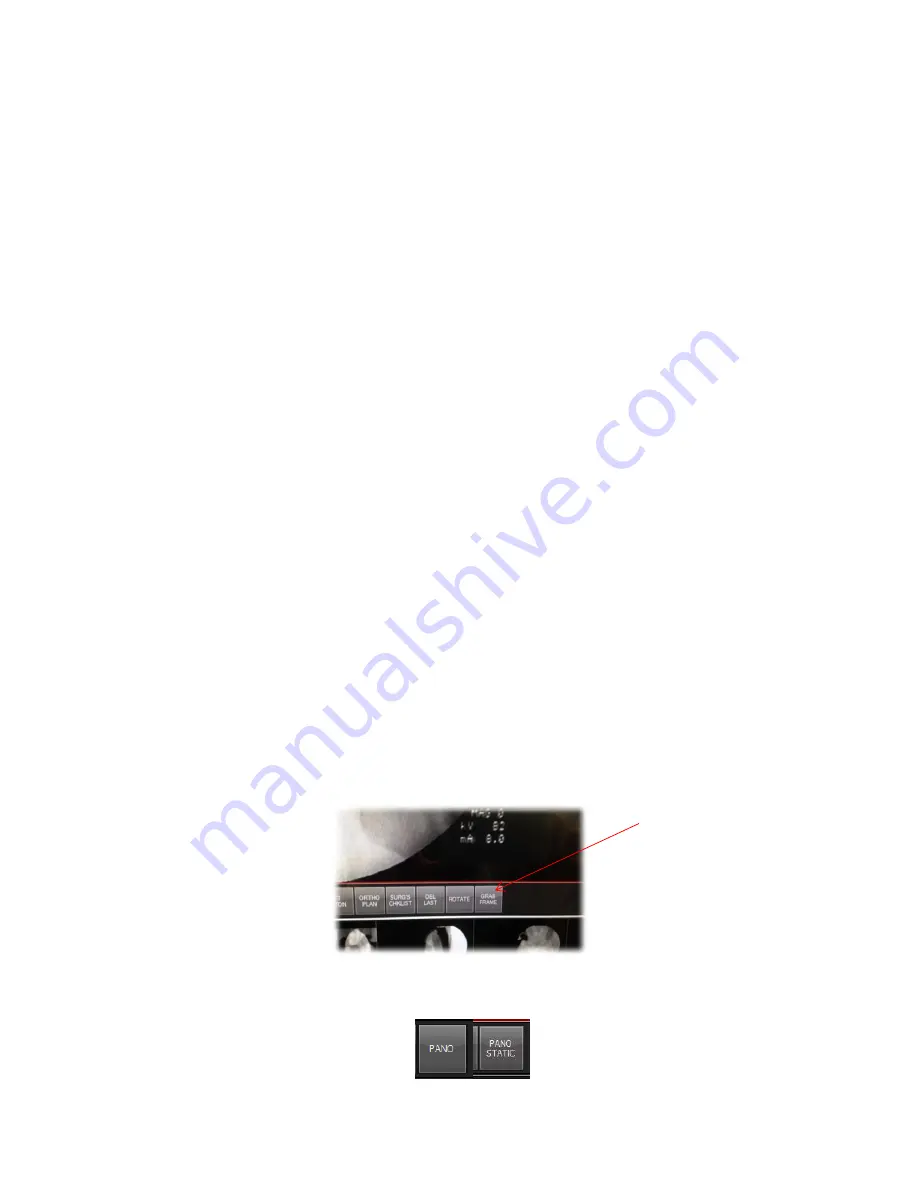
Once you are in QC Image page, click the Grab Frame tab.
7.
C-Arm images will appear in the viewing window for review and measurement
8.
If needed, click Pano/Pano Static tab for panoramic function.