Installation Instructions
1997 Radionics All rights reserved
The Radionics logo is a registered trademark of Radionics,
1800 Abbott Street, Salinas, CA 93901, USA
74-07649-000-B 01/97
D9024/D10024 Installation
Page 4 of 17
A. D9109A Enclosure Installation
Depending on the configuration and the battery selection, the Fire Alarm Control Panel (FACP) can
weigh more than 75 pounds. When attaching the enclosure to a surface, use mounting hardware
capable of supporting this weight, and reinforce the wall as necessary.
The enclosure can be ordered separately to conform with construction schedules. The enclosure door,
with its integral Front Panel Display, and the system components are packaged separately and can be
ordered and shipped at a later date.
Caution: Route 120
V
AC wiring into the enclosure at the upper left corner only. Keep AC wiring
away from the circuit boards.
Caution: For Power Limited Circuits use types FPL, FPL
R, or FPLP cable as applicable per NEC,
Article 760.
A.1 Semi-flush Mounting
1. Prepare an opening in the wall 20” x 20” x 5-1/2”.
2. Remove the knockouts as necessary for wiring conduit fittings.
3. Mount the enclosure in the wall.
4. Run the necessary wiring throughout the premises and pull the wires into the enclosure.
Knockouts are provided at the top of the enclosure. If other holes are necessary, avoid
interfering with the component mounting locations.
5. M
ount the D9080 Flush Mount Trim Ring to the enclosure.
A.2. Surface Mounting
1. Remove the necessary knockouts and install conduit fittings.
2. Mount the enclosure in the desired location. Use all four mounting holes.
3. Run the necessary wiring throughout the premises and pull the wires into the enclosure.
Knockouts are provided at the top of the enclosure. If you punch other holes, be sure not to let
them interfere with the component mounting locations. See the Caution above.
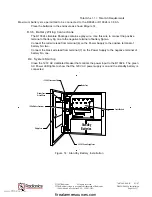
Enclosure Door
Front Panel Display
Knockouts for
System Wiring
Figure 1: D9109A Enclosure and Removable Door
www.PDF-Zoo.com
firealarmresources.com


