background image

3

Preparation

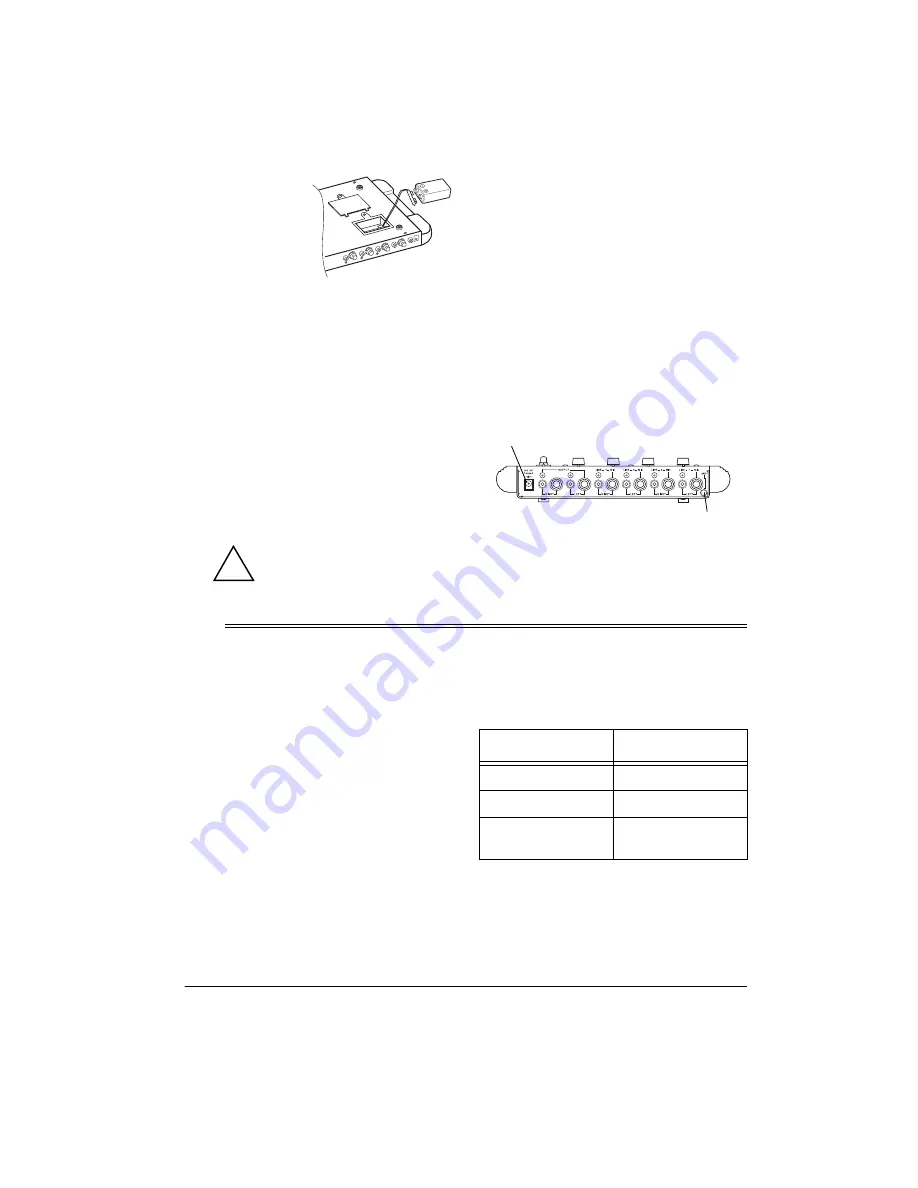
2. Attach the bat-

tery snap in
the battery
compartment
to the 9-volt
battery's termi-
nals. Then
place the battery in the compartment. 

3. Replace the cover and tighten the bat-

tery compartment cover's screw. 

Replace the battery when the BATTERY
LOW indicator on the mixer's upper right cor-
ner lights. 

USING AC POWER 

You can power the mixer using an optional
9V AC adapter (not supplied).

Cautions:

You must use a Class 2 power
source that supplies 9V DC
and delivers at least 300 mA.

Its center tip must be set to negative and
its plug must fit the mixer’s 

DC 9V

 jack.

Using an adapter that does not meet
these specifications could damage the
mixer or the adapter.

• Always connect the AC adapter to the

mixer before you connect it to AC power.
When you finish, disconnect the adapter
from AC power before you disconnect it
from the mixer.

Follow these steps to connect the adapter.

1. Insert the AC adapter's barrel plug into

the 

DC 9V

 jack on the back of the mixer.


2. Plug the AC adapter's power module

into a standard AC outlet. 

ˆ

Preparation 

PRESETTING THE 
CONTROLS 

Presetting the Mixer 

Warning: A sudden high output from the
mixer could damage the audio devices con-
nected to the mixer and your hearing, espe-
cially if you use headphones. 

To avoid accidentally overdriving a channel
or prematurely mixing in an audio input, ad-

just the mixer's controls to these settings be-
fore you turn on power. 

!

DC 9V

 Jack

GND

 Terminal

Control

Setting

POWER

OFF

CHANNEL 1, 2, 3, 4

0 (Minimum)

MODE STEREO/
MONO

MONO

Содержание 4-Channel Stereo Microphone Mixer

Страница 1: ...Owner s Manual Please read before using this equipment 4 Channel Stereo Microphone Mixer ...

Страница 2: ...AC adapter Battery Low Indicator lets you know when the battery needs to be replaced ˆ Powering the Mixer USING BATTERY POWER Your can power the mixer with a 9 volt bat tery not supplied For the best results and longest battery life we recommend an alka line battery available at your local Ra dioShack store 1 Use a flat blade screwdriver to loosen the battery compartment cover s screw and remove t...

Страница 3: ...e mixer or the adapter Always connect the AC adapter to the mixer before you connect it to AC power When you finish disconnect the adapter from AC power before you disconnect it from the mixer Follow these steps to connect the adapter 1 Insert the AC adapter s barrel plug into the DC 9V jack on the back of the mixer 2 Plug the AC adapter s power module into a standard AC outlet ˆ Preparation PRESE...

Страница 4: ... nections available at your local RadioShack store Connecting Two Stereo Inputs To connect two stereo sources use the two pairs of LEFT and RIGHT phono input jacks for example use LINE jacks 1 left and 2 right for a CD player and jacks 3 left and 4 right for a cassette player The signals for each of these sources are routed to the corresponding output channel Connecting up to Four Stereo Sources a...

Страница 5: ...NE and MIC sig nal sources to the same channel both sig nals are mixed and their levels are controlled by the corresponding channel s fader control Connecting the Outputs To play the mixer s output signal through your speaker system for events such as par ties dances conferences etc connect one end of an audio patch cord not supplied to the mixer s OUTPUT LEFT and RIGHT jacks and the other end of ...

Страница 6: ...plifier and all the audio input sources MIXING MONO OR STEREO When you set the mixer s MODE STEREO MONO switch to MONO The mixer routes the input signal of any monaural source connected to only one of the mixer s line inputs LEFT or RIGHT to both output channels The mixer changes the stereo input sig nals connected to the mixer s line inputs LEFT and RIGHT to monaural To mix mono signals with ster...

Страница 7: ...ix er is not performing as it should take it to your local RadioShack store for assistance ˆ Specifications Input Sensitivity Mic 1 mV Line 100 mV Output Level at 1 Kohm Load 1 mV Input Overload Mic More than 250 mV Line More than 6V Distortion Less than 0 5 Signal to Noise Ratio Better than 55 dB Frequency Response 20 20 000 Hz 2 dB Power Requirements DC One 9V Battery AC Using AC Adapter 120V AC...

Страница 8: ... of a product defect during the warranty period take the product and the RadioShack sales receipt as proof of purchase date to any RadioShack store RadioShack will at its option un less otherwise provided by law a correct the defect by product repair without charge for parts and labor b replace the product with one of the same or similar design or c refund the purchase price All replaced parts and...

Отзывы: