background image

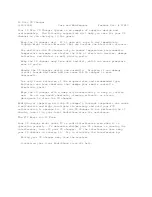
If you cannot eliminate the interference, the FCC requires that you stop  
using your CD changer.  
 
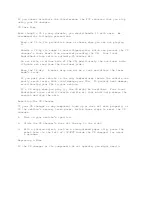
CD Care Tips 
 
Even though a CD is very durable, you should handle it with care.  We  
recommend the following precautions.  
 
  Keep the CD in its protective case or sleeve when you are not playing  
  it.  
 
  Handle a CD by its edges to avoid fingerprints, which can prevent the CD  
  changer's laser beams from accurately reading the CD.  Your local  
  RadioShack store sells a suitable CD cleaner kit. 
 
  Do not write on either side of the CD, particularly the non-label side.   
  (Signals are read from the non-label side.) 
 
  Keep the CD dry.  A water drop can act as a lens and affect the laser  
  beam's focus.  
 
  If you park your vehicle in the sun, temperatures inside the vehicle can  
  easily reach levels that could damage your CDs.  To prevent heat damage,  
  avoid leaving your CDs in your vehicle.  
 
  If a CD skips when you play it, the CD might be scratched.  Your local  
  RadioShack store sells a Scratch and Fix kit that might help remove the  
  scratch and stop the skip. 
 
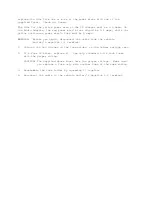
Resetting The CD Changer 
 
If your CD changer or any component locks up or does not work properly, or  
if the vehicle's battery loses power, follow these steps to reset the CD  
changer.  
 
1.  Turn on your vehicle's ignition. 
 
2.  Slide the CD changer's door all the way to the right.  
 
3.  With a pointed object, such as a straightened paper clip, press the 
    reset hole (to the left of /\EJECT inside the CD changer) for about  
    2 seconds. 
 
Replacing A Fuse 
 
If the CD changer or its components do not operate, you might need to  

Содержание 120-2182

Страница 1: ...nnection to the CD changer with the Audio Adapter FM modulator or an RCA Input jack to work with the Audio Adapter ground isolator To be safe we recommend you do not change your CD changer s or sound...

Страница 2: ...steady when you Suspension System drive over rough roads Track Search lets you quickly locate the beginning of any track while playing a CD Track Skip lets you rapidly play a CD in either direction to...

Страница 3: ...u install your LCD changer s components read all the instructions in this owner s manual You should be able to answer all of these questions about your vehicle s electrical and sound systems Does my v...

Страница 4: ...l not interfere with the vehicle s pedals or other moving parts No component is directly in front of heating vents All wires and cables will reach their connection points Before attempting to mount th...

Страница 5: ...ter s mounting area must be at least 5 inches 127 mm wide and 1 1 16 inches 26 3 mm high by 3 3 5 inches 91 mm deep When you choose a mounting area for the Audio Adapter make sure it is close enough t...

Страница 6: ...sh batteries of the required size and recommended type Do not mix old and new batteries different types of batteries standard alkaline or rechargeable or rechargeable batteries of different capacities...

Страница 7: ...o adapter to the CD changer and the vehicle s sound system Using RCA Jacks If your vehicle s sound system has a pair of RCA input jacks either on the stereo head unit or the power amplifier you can co...

Страница 8: ...y back up wire with in line fuse holder to your vehicle battery s positive terminal or to a fuse that provides a continuous source of 12 volts This connection provides power for the CD changer and its...

Страница 9: ...udio Adapter and CD changer squeeze each plug then gently pull it out Never pull on the CD changer cable Connecting The CD Changer Controller To connect the CD changer controller to the Audio Adapter...

Страница 10: ...e screws on both sides of the CD changer from H and turn SPRING ATTACHMENT H V to V on both sides then replace the screws into V CAUTION If you do not set SPRING ATTACHMENT H V on both sides of the CD...

Страница 11: ...ure the controller 1 Clean both mounting surfaces with isopropyl alcohol and allow them to completely dry 2 Peel the backing from one side of the hook and loop fastener and attach it to the mounting l...

Страница 12: ...than one CD into the same slot in the CD magazine This will damage the CD magazine the CD changer and the CDs Do not insert anything other than 5 inch CDs into the CD magazine To unload CDs from the...

Страница 13: ...or each CD loaded in the magazine 1 10 Then the changer selects the CD you loaded into the lowest slot number If you connected the Audio Adapter s antenna plug to your sound system s antenna jack you...

Страница 14: ...current CD hold down or during play The CD changer rapidly plays the CD backward or forward Release or to resume normal play The display shows the rotating disk moving faster and or flashes Selecting...

Страница 15: ...uffle play stops Press SHUFFLE again to end shuffle play Switching Between The CD Player And The Radio If you connected the Audio Adapter s antenna plug to your sound system s antenna jack and you wan...

Страница 16: ...on system vehicle correctly replace them if necessary see Replacing a Fuse in Faxback Doc 57813 Check all connections No sound Vehicle radio s volume Adjust the vehicle set to minimum radio s volume V...

Страница 17: ...k Doc 57813 Sound from CD skips CD is dirty or defective Clean the CD and try it again or try another CD see CD Care Tips in Faxback Doc 57813 H V set incorrectly Check H V on both Sides of CD Changer...

Страница 18: ...t CD changer requires Turn on your eject from CD changer power to eject CD Vehicle s ignition when it is pressed Magazine And try again Check the CD changer s and sound system s fuses and replace them...

Страница 19: ...rly Use only fresh batteries of the required size and recommended type Batteries can leak chemicals that damage your remote control s electronic parts Wipe the CD changer with a damp cloth occasionall...

Страница 20: ...s focus If you park your vehicle in the sun temperatures inside the vehicle can easily reach levels that could damage your CDs To prevent heat damage avoid leaving your CDs in your vehicle If a CD sk...

Страница 21: ...ARNING Before you begin disconnect the cable from the vehicle battery s negative terminal 1 Unlatch the two latches on the fuse holder so the holder springs open 2 If a fuse is blown replace it Use on...

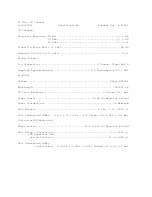
Страница 22: ...44 1 kHz Pick Up System Sanyo M90281 Wavelength 785 815 nm CD Used Diameter 5 Inches 127 mm Power Source 14 4V DC Negative Ground Power Consumption 3A Maximum Unit Weight 6 lbs 7 oz 2920 g Unit Dimens...

Страница 23: ...or and Ground Isolator 1 x 4 1 8 x 3 9 16 Inches 26 x 105 x 90 mm Specifications are typical individual units might vary Specifications are subject to change and improvement without notice BR EB 12 1...

Отзывы: