


12
Operation
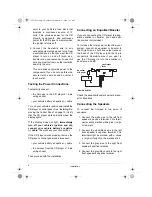
appears. If you get a steady FM signal,
appears to the right side of
ST
.
Adjust the CD player’s controls to your listen-
ing preference (see “Adjusting the Sound” on
Page 11).
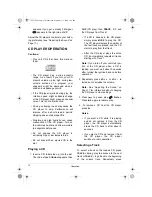
CD PLAYER OPERATION
Cautions:
• Play only CDs that have this mark on
them:
• The CD player has a wide dynamic
range. As a result, if you turn your CD
player’s volume up too high during low-
volume sections of a program, your
speakers might be damaged when a
sudden loud passage occurs.
• If the CD player is jolted during play, the
rotation speed might suddenly change
or the CD player might make an unusual
noise. This is not a malfunction.
• Driving on bumpy roads may cause the
CD player to skip. Performance will
improve after a short break-in period.
Skipping does not damage CDs.
• Moisture and high humidity can cause
malfunction of the CD player. Turn on
the vehicle’s heater and allow moisture
to evaporate before use.
• Do not expose the CD player to
extremely high or low temperatures.
• Do not drive with an ejected CD in the
slot.
Playing a CD
1. Insert a CD, label side up, into the slot.
The radio stops.
LOAdcd
appears, then
CdP
(CD play), then
TRACK 01
, and
the CD plays from Track 1.
• If a CD is already in the CD player,
simply press
MODE
to play the CD.
The CD player displays the number of
the last track you played, and the CD
starts to play from that track.
• After the CD player plays the entire
CD, it automatically repeats all tracks,
starting with Track 1.
Note: If you turn off your vehicle’s igni-
tion or the CD player when a CD is
loaded, you must wait about 5 seconds
after turning the ignition back on before
operation.
2. Repeatedly press
VOL +
or
VOL –
to
increase or decrease the volume.
Note: See “Adjusting the Sound” on
Page 11 for information about changing
the CD player’s other settings.
3. Press
.
to pause play.
.
flashes.
Press
.
again to resume play.
4. To remove a CD from the CD player,
press
EJ
.
Notes:
• If you eject a CD while it is playing
and do not remove it from the CD
player, the CD player automatically
draws the CD back in after about 5
seconds.
• If you eject a CD and remove it from
the CD player, the CD player
switches to radio operation.
Selecting a Track
To select a track on the loaded CD, press
TRACK +
during play to advance to the next
track or
TRACK –
to go back to the beginning
of the current track. Repeatedly press
12-2158.fm Page 12 Wednesday, September 13, 2000 1:50 PM


