


8
3. To select an option, push the “Set” button and the “SET” icon is displayed.
4. Use the “+” or “-” buttons to toggle between choices and press the “Set” button to enter the new value. The
instrument will continue to operate in the Utility Menu mode, and the display will show "0" and "MENU". To adjust
another Utility Menu option, repeat the above steps.
5. To exit the Utility Menu at any time, press the SET button again. The
In continues with the
normal start-up routine.
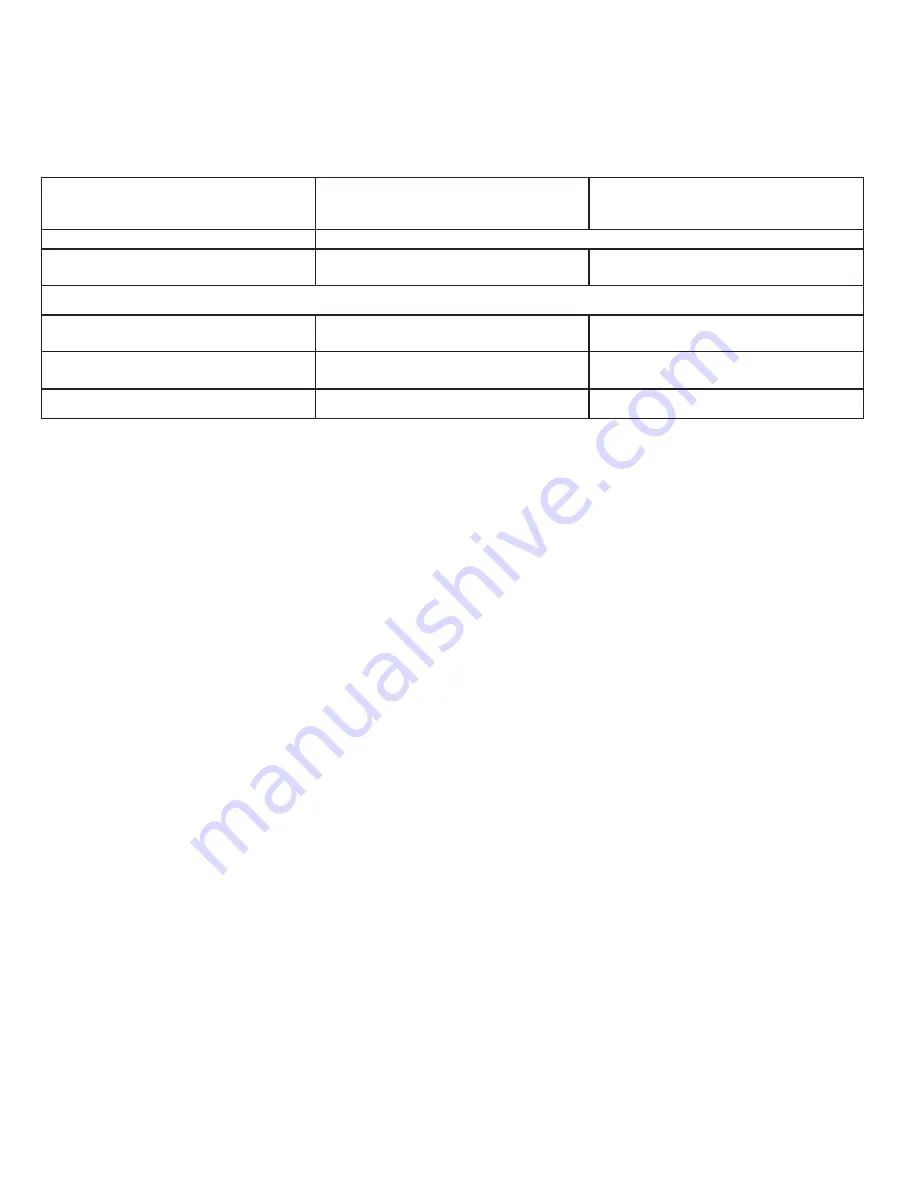
See options in the table below:
Options
Function
Comments
Interfacing to an External Device
The lower output jack (Figure 1(10)) on the left side of the Inspector
+
is a dual miniature jack that provides a data output
that can be used to drive a CMOS or TTL device. You can use it to record the counts on a computer, data logger, or
accumulating counter. The output at the tip of the plug provides a positive (
10
volt) pulse each time the Geiger tube detects
a count. Visit seintl.com for more information on Observer Software.
Options
WipeTest
Plate
(patent # 5,936,246)
The stainless steel WipeTest Plate has a circular depression for placement of a wipe parallel to the detector window at a
fixed distance of 1 cm. The WipeTest Plate is designed to slide easily onto the back of the Inspector
+
.
4 Common Procedures
The following sections give instructions for several commonly-used procedures. With any procedure, the user must
determine the suitability of the instrument or procedure for that application.
Establishing the Background Count
Normal background radiation levels vary at different locations, time, even in different areas of the same room. To
accurately interpret the readings you get on the Inspector
+
, it is good to establish the normal background radiation count
rate for each area you plan to monitor. You can do this by taking a timed count. For more information on using the timer,
see “Taking a Timed Count” in Chapter 3.
A ten-minute average is moderately accurate. You can repeat it several times and see how close the averages are. To
establish a more accurate average, take a one-hour timed count. If you need to determine whether there is prior
contamination, take averages in several locations and compare the averages.
Environmental Area Monitoring
You can keep the Inspector
+
in CPM or mR/hr mode whenever you want to monitor the ambient radiation, and look at it
from time to time to check for elevated readings.
If you suspect an increase in ambient radiation, use the timer and take a five or ten minute count, and compare the
average to your average background count. If you suspect an increase that is too small to detect with a short timed
reading, you can take a longer count (for example 6, 12, or 24 hours).
Checking for Surface Contamination
CAUTION:
Never touch the Inspector
+
to a surface that may be contaminated. You may contaminate the instrument. The
rubber strips on the back can be replaced if they become contaminated. Replacement strips are supplied in this manual.
To check a surface, hold the detector window close to the surface and read the count rate (wait 30 seconds or until the
reading has stabilized). If you want to find out if a surface is slightly radioactive, take a timed count or a longer
accumulated count.
1.
Auto Averaging or 3 sec. Averaging “on” selects Auto Averaging “oFF”
selects 3 second (fast response)
averaging
Refer to “Response Time
(Autoaveraging)” in Chapter 3
2.
Units Of Measurements
Selects between mR/hr and CPM or
µ
Sv and CPS
3.
Cal 100 Reset
Automatically resets Cal factor to 100
Press the set Button No toggling
required
4, 5, 6
Reserved for future options
7.
Cal Factor Adjust
Manually adjusts cal factor
Use “+” or “-” Buttons to increase or
decrease the value
8.
Factory Default Reset
Automatically resets to Auto Averaging,
mR/hr, CPM, and CAL 100
Press the set Button No toggling
required
9.
Revision #
Displays software version number
Содержание Inspector EXP+
Страница 1: ...User Manual...


