background image

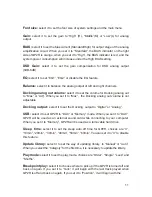
Font size: 

select it to set the font size of system settings and the main menu.

Gain:

 select it to set the gain to “High” (H), “Middle”(M) or “Low”(L) for analog 

output.  

BIAS:

 select it to set the bias current (Standard/High) for output stage of the analog 

amplification circuit. When you set it to “Standard”, the BIAS indicator on the right 
side of QP2R is orange, when you set it to “High”, the BIAS indicator is red, and the 
system power consumption will increase under the High BIAS setting.

DSD Gain:

 select it to set the gain compensation for DSD analog output 

(0dB-6dB).

EQ:

 select it to set “EQ1”, “EQ2” or disable the EQ feature.

Balance:

 select it to balance the analog output of left and right channels.

Docking analog out volume: 

select it to set the volume for Docking analog out 

to “Max” or “Adj”. When you set it to “Max”,  the Docking analog out volume is not 
adjustable.

Docking  output: 

select it to set the Docking  output to “Digital” or “Analog”.

USB:

 select it to set QP2R to “DAC” or “Memory” mode. When you set it to “DAC”, 

QP2R will be used as an external sound card while connecting to your computer. 
When you set it to “Memory”, QP2R will be used as a removable hard drive.

Sleep  time:

 select it to set the sleep auto off time for QP2R, choices are “0”, 

“10min”, “20min”,  “30min”, “40min”, “50min”, “60min”. You can set it to “0” to disable 
this feature.

Update library:

 select it to set the way of updating library  to “Manual” or “Auto”.  

When you select the “Category” for the first time, it is necessary to update the library.

Play mode:

 select it to set the play mode, choices are “Order”, “Single”, “Loop” and 

“Shuffle”.

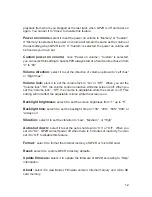
Breakpoint play:

 select it to choose where to pick up if the QP2R is turned off and 

back on again. If you set it to “Tack”, it will begin with the last track played when 
QP2R is off and back on again. If you set it to “Position”,  it will begin with the 

11

Содержание QP2R

Страница 1: ...www questyleaudio com...

Страница 2: ...Firmware Connect QP2R to Computer Transfer Music Files Play Music Files How to Use QP2R Native Playback of Music Files Main Menu Description Icons in Status Bar Operation Instructions Settings QP2R U...

Страница 3: ...rted In the Box QP2R Cloth bag QP2R Quick Start Guide USB type C cable Optical cable connector Silicone disc for the steering wheel Silicone patch for the OK button 1pc 1pc 1pc 1pc 1pc 1pc 1pc Optical...

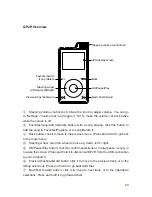
Страница 4: ...song to Favorites Playlists or to Loop Delete it Back button click it to move to the previous menu Press and hold it to go back to the main menu Steering wheel scroll the wheel to move up down left o...

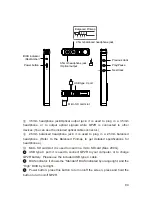
Страница 5: ...ot it is used to insert in a micro SD card Max 200G USB type C port it is used to connect QP2R to your computer or to charge QP2R battery Please use the included USB type C cable BIAS indicator it sho...

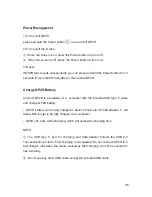
Страница 6: ...the included USB type C cable and charge QP2R battery QP2R battery will be fully charged in about 4 hours via a 5V 2A adapter It will take a little longer to be fully charged via a computer QP2R can w...

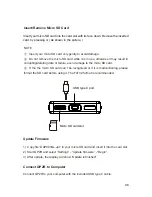
Страница 7: ...ter NOTE Insert your micro SD card very gently to avoid damage Do not remove the micro SD card while it is in use otherwise it may result in corrupting deleting data or failure even damage to the micr...

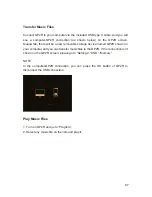
Страница 8: ...ce named QP2R shown on your computer and you can transfer music files to the QP2R If the connection isn t shown on the QP2R screen please go to Settings USB Memory NOTE In the computer QP2R connection...

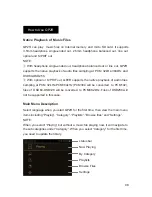
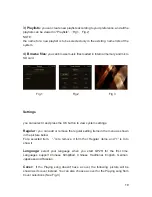
Страница 9: ...tive Playback of Music Files Select language when you start QP2R for the first time then view the main menu items including Playing Category Playlists Browse files and Settings NOTE When you select Pl...

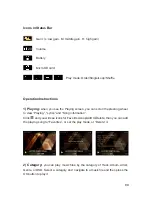
Страница 10: ...wheel to view Playing Lyrics and Song information Click and you will see icons for Favorites Loop Add to Delete then you can add the playing song to Favorites or set the play mode or Delete it 2 Cate...

Страница 11: ...oesn t have a cover the following picture will be shown as its cover instead You can also choose a cover for the Playing song from Cover selections See Fig 3 3 Playlists you can create new playlists a...

Страница 12: ...the Docking analog out volume is not adjustable Docking output select it to set the Docking output to Digital or Analog USB select it to set QP2R to DAC or Memory mode When you set it to DAC QP2R wil...

Страница 13: ...he volume control is inactive while the screen is off When you set the Volume lock Off the volume is adjustable while the screen is off This setting will not affect the adjustable volume while the scr...

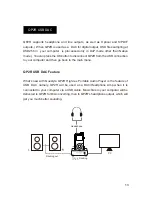
Страница 14: ...ct QP2R from the USB connection to your computer and then go back to the main menu QP2R USB DAC Feature What s new with Questyle QP2R High res Portable Audio Player is the feature of USB DAC namely QP...

Страница 15: ...on later than the Mac OS 10 5 7 there is no need to install the USB DAC driver 4 Play music files in your computer It s better to play DSD files with a professional audio player 1 Operating System QP2...

Страница 16: ...e will be directly output to USB without SRC on PC Files sampling at PCM384 or higher will be converted over SRC to that of lower sample rate PCM192kHz before they are played QP2R USB DAC supports DSD...

Страница 17: ...dows OS We take Win7 64bit operating system for an example to show the Driver installation 1 Visit Questyle Audio website www questyleaudio com click Download Driver and select 2 Double click Setup ex...

Страница 18: ...puter and the QP2R Driver installation is done 5 Installation on Win XP Vista is similar to the above Installation will take 3 or 5 minutes Click Finish to exit the installation Installation is comple...

Страница 19: ...lect Questyle ASIO Driver ASIO under Audio Device 3 Select Settings under Audio Device and click Open Driver Control Panel under the ASIO then select Format 2Channels 24Bits select Buffer Settings Saf...

Страница 20: ...4 Click DSP output format under Settings Make sure nothing on the left row is ticked To wit without any processing to DSD data ensuring original sound 19...

Страница 21: ...5 Select Custom under Bitstreaming Yes DSD 6 Tick DSD and then click OK Save and exit The setup is completed 20...

Страница 22: ...1 Install Foobar2000 2 Install Plugins 1 Install plugins according to the following steps highlighted from 1 to 8 Foobar Setup 21...

Страница 23: ...22...

Страница 24: ...install location to confirm that the three plugins highlighted in the following figure are installed successfully If so you will see two more options ASIO and SACD on the left of the interface as show...

Страница 25: ...3 Install ASIO driver double click in the unzipped folder and then finish the installation according to the following steps highlighted from 1 to 3 24...

Страница 26: ...Software Settings 1 Connect QP2R to your computer with the included USB cable and power it on Finish software settings according to the following steps highlighted from 1 to 8 Close and restart the s...

Страница 27: ...and it is ready for playing music files For Mac OS X no special drivers are needed for later versions of Mac OS 10 5 7 Connect QP2R to your Mac via the included USB cable go to Preferences Sound on y...

Страница 28: ...utput Power Unbalanced RL 32 Pout 38mW RL 300 Pout 9mW Balanced RL 32 Pout 70mW RL 300 Pout 38mW Frequency Response 0 1dB 20Hz 20kHz S N 100dB 1kHz Unbalanced 102dB 1kHz Balanced THD N 0 0006 1kHz Unb...

Страница 29: ...ure to sunlight fire or overheated environment 2 If you need to replace the QP2R battery please contact your dealer Do not disassemble QP2R or replace the battery by yourself 3 If your QP2R fails to w...

Страница 30: ......

Страница 31: ......

Отзывы: