


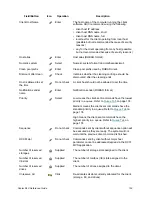


160
Configuration Tab
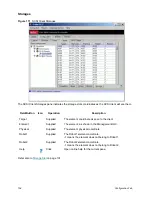
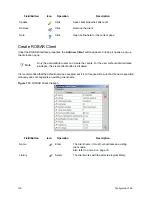
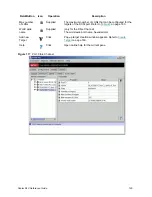
Create ROBAR Client
Under the ROBAR Interface properties, the
Add new Client
button appears. Clicking it opens a pop-up
client creation pane.
It is recommended that the default name be accepted, but it is not required. Be sure that the name specified
manually does not duplicate an existing client name.
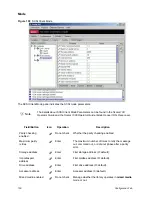
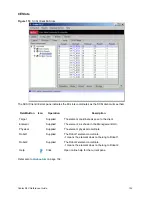
Figure 115
ROBAR Client Creation
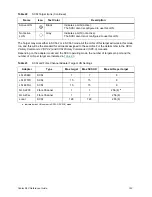
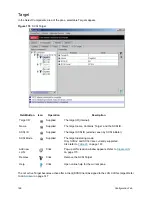
Update
Click
Save client properties after edit.
Remove
Click
Remove the client.
Help
Click
Open online help for the current pane.
Note
Only the administrator users can create the clients. For the user without administrative
privileges, the create client button is disabled.
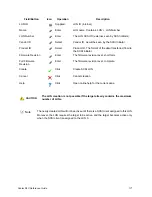
Field/Button
Icon
Operation
Description
Name
Enter
The client name. It must not duplicate an existing
client name.
Also refer to
Table 6
on page 16.
Library
Select
The client works with the selected logical library.
Field/Button
Icon
Operation
Description
Содержание Scalar 1000
Страница 14: ...xiv Figures...
Страница 86: ...70 Management GUI...
Страница 188: ...172 Configuration Tab...
Страница 198: ...182 Events Tab...
Страница 254: ...238 Tools and Utilities...
Страница 282: ...266 DAS Guide...
Страница 292: ...276 SCSI Guide...
Страница 300: ...284 ROBAR Guide...
Страница 304: ...288 Index...